
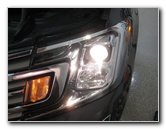
Ford
Expedition Headlight Bulbs Replacement Guide
How to change a burnt out low or high
beam headlight bulb in a 4th generation 2018, 2019 & 2020 Ford Expedition.

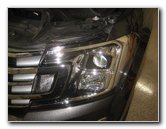 2018 Expedition Headlight |
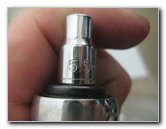 Small 5.5mm Socket |
 Wheel Well Liner |
| This automotive
maintenance tutorial was specifically written to assist owners of the 4th
generation (2018, 2019, 2020 and probably also the 2021, 2022 and 2023 model
years) Ford Expedition SUV in changing a burnt out low beam or high beam
light bulb in the headlight assemblies. Owners of other Ford or Lincoln vehicles such as the Explorer, F-150, Escape, EcoSport, Transit, F-350, F-250, Edge, Flex, Ranger, Fiesta, Focus, Fusion, Mustang, Bronco, Super Duty, Navigator, Continental, MKZ, MKX, MKC, MKT, Aviator, Corsair and Nautilus may also find these DIY instructions to be helpful. The light bulb part numbers in this 2018 Expedition MAX are as follows: Low Beam # 9005, High Beam # H9 and Front Turn Signal # 7444NA. The owner's manual lists the following part numbers: Low Beam # H11 and High Beam HB3. Please check your old light bulbs to verify the compatible replacement part numbers before purchasing new bulbs. (Some trim levels are equipped with LED front turn signal, side marker and parking light bulbs that should last the life time of the vehicle.) The tools needed to access and replace the headlight bulbs include a 5.5mm socket and a 1/4" drive ratchet. The easiest way to access the headlight bulbs is through the black fabric wheel well liner located in front of the tire. Move to the side of the SUV with the burnt out light bulb. |
||
|
|
||
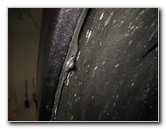
 Loosen Counterclockwise |
 Top Screw Removed |
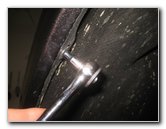
 Loosen Second Screw |
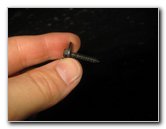
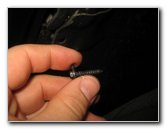
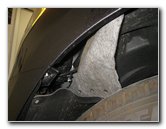
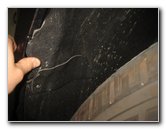
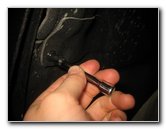
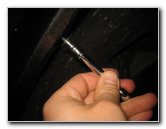
| Remove the two
screws along the outer edge of the wheel well liner located closest to the
back side of the headlight housing by turning them in the counterclockwise
direction with a 5.5mm socket and a 1/4" drive ratchet. (You may also be able to use a 7/32" SAE socket if you don't have a 5.5mm socket.) Set the two screws aside in a safe place. |
||
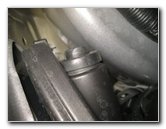
 Bottom Screw Removed |
 Pull Back Access Cover |
 Prop Panel Against Tire |
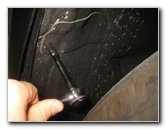
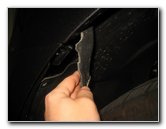
| Pull open the
access flap and wedge it against the front tire to hold it in place. Once the wheel well liner or "splash guard" is out of the way, you'll be able to see the back of the headlight housing. |
||
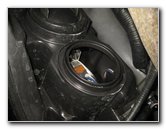
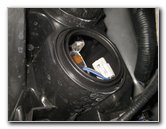
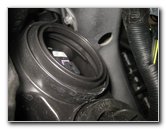
 High Beam - Bottom |
 Low Beam - Top |
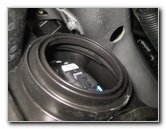
 Pull Off Rubber Cover |
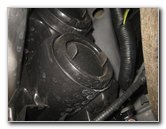
| The low beam
headlight bulb is located closer to the top of the housing. The high beam bulb is situated near the bottom of the headlight assembly. Pull off the rubber dust cap on the back of the high beam bulb housing (closer to the bottom). |
||
 Old High Beam Exposed |
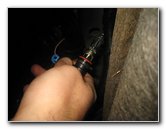
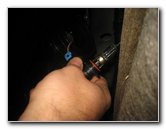
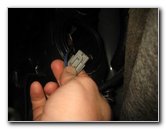 Disconnect Power Plug |
 Old High Beam Removed |
| Push down the
release tab on the electrical connector before sliding it straight off the
base of the old high beam bulb. Rotate the base of the old high beam 1/4 turn in the counterclockwise direction before pulling it straight out of the housing. The OEM (original equipment manufacturer) high beam bulb in this 2018 Expedition MAX was an Osram H9 12V 65W. |
||
 Empty Bulb Housing |
 1/4 Turn Clockwise - Lock |
 Push On Power Plug |
| Avoid touching the
glass part of the new halogen bulb with your fingers or anything greasy in
the wheel well. If you do get the new bulb dirty, wipe it clean with a paper towel and some rubbing alcohol. Dirt or oil on a halogen bulb may cause hot spots and lead to a reduced lifespan or possibly cause the glass to break. Insert a new number H9 bulb into the housing and rotate it 1/4 turn in the clockwise direction to secure it into place. If you would like to have brighter high beam lights that will also last a lot longer before burning out, install some compatible replacement H9 LED bulbs. Push the electrical connector straight on to the base of the new high beam light bulb. You should hear or feel the power plug "click" securely into place. |
||
|
|
||
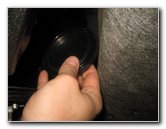
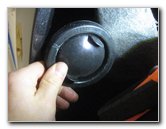 Rubber Dust Cover |
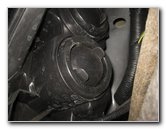 Push On Rubber Cap |
 Top - Low Beam Cover |
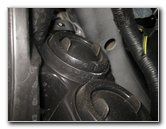
| Push the rubber cap
back into place over the high beam light bulb housing. The low beam light bulb is located closer to the top of the assembly. Pull off the rubber dust boot and set it aside in a safe place. |
||
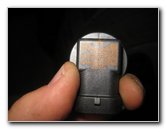
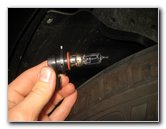
 Old Low Beam Exposed |
 1/4 Turn Counterclockwise |
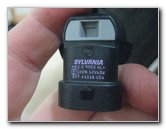 Old Low Beam Bulb |
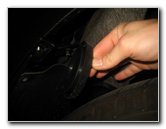
| Gently pry back the
retaining tabs on the electrical connector. Slide the power plug straight off the base of the old light bulb. Rotate the base of the old low beam bulb 1/4 turn in the counterclockwise direction before pulling it straight out of the housing. The OEM low beam bulb in this 2018 Expedition MAX was a Sylvania 9005. If you would like to have brighter low beam lights, install some compatible replacement 9005 LED bulbs. |
||
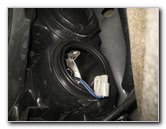
 New Low Beam Bulb |
 Push On Power Plug |
 1/4 Turn Clockwise - Lock |
| Avoid touching the
glass part of the new halogen bulb with your fingers or anything greasy in
the engine bay. If the bulb does get dirty, wipe it clean with a paper towel and some rubbing alcohol. Insert the new low beam bulb into the housing and rotate it 1/4 turn in the clockwise direction to secure it into place. Push the electrical connector straight on to the base of the new light bulb. The power plug should "click" securely into place. |
||
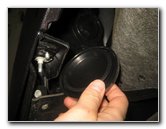
 Rubber Dust Cover |
 Push On Rubber Cover |
 Replace Wheel Well Liner |
| Push the rubber
dust cap back into place. Replace the access flap on the wheel well liner. |
||
 Spin In Two Screws |
 Tighten Screws Clockwise |
 Test New Light Bulbs |
| Replace the two
screws by tightening them in the clockwise direction with the 5.5mm socket
and a 1/4" drive ratchet until they are snug. If your SUV is equipped with a traditional incandescent front turn signal light bulb, reach in through the engine bay just above the headlight housing. Rotate the black plastic base of the front turn signal bulb socket 1/4 turn in the counterclockwise direction. Gently pull the old wedge base light bulb straight out of the socket. Push a new amber colored number 7444NA light bulb straight into the socket. Re-insert the socket into the housing and rotate it 1/4 turn in the clockwise direction to secure it into place. If you would like to have brighter front turn signal lights, install some 7444NA LED bulbs. To test the new light bulbs, turn on the headlights, activate the hazard signals and flash the high beams. If you need to adjust the vertical aim of the headlights, use a Phillips head screwdriver to turn the adjustment screw in the clockwise or counterclockwise direction. The adjustment screw can be seen through a small hole in the top of the headlight assembly near the low beam headlight. Be sure to write down the bulb change in your vehicle's service records. Please
check out all of my
2018-2020 Ford Expedition DIY Repair & Maintenance Guides. |
||
| If you found this guide to be helpful,
please consider making a small donation by clicking on the PayPal.com
"Donate" button located to the right of this paragraph. Thank you!
(Note: I am not a registered charity. Donations are not tax deductible.) |