
Kia Optima
PCV Valve Replacement Guide
How to check or change the positive
crankcase ventilation valve in a 4th generation 2016 to 2020 Kia Optima.

By Paul B. Michaels Author & Photographer Auto Mechanic Since 1989 |
||
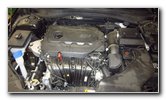
 2019 Optima 2.4L I4 |
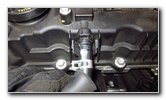
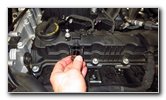
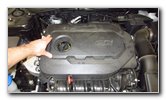
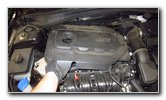 Pull Off Engine Cover |
 Lift Rear of Cover |
| This automotive
maintenance tutorial was specifically written to assist owners of the 4th
generation (2016, 2017, 2018, 2019 and 2020 model years) Kia Optima sedan in
checking and cleaning or changing the PCV (positive crankcase ventilation)
valve for the Theta II 2.4 liter GDI inline four cylinder engine. Owners of other Kia, Hyundai or Genesis vehicles such as the Niro, Sportage, Sedona, Telluride, Sorento, Rio, Forte, Soul, K900, Cadenza, K5, Stinger, Tucson, Santa Fe, Kona, Palisade, Elantra, Sonata, Accent, Veloster, Ioniq, Nexo, Venue, G70, G80 and G90 may also find these DIY instructions to be helpful. Some of the symptoms of a clogged, failing or faulty PCV valve include a rough idle, hard starting, increased oil consumption, reduced fuel economy, misfires, oil leaks, black / blue or white exhaust smoke, stalling, reduced performance and possibly also a CEL (check engine light) / SES (service engine soon) warning indicator on the gauge cluster. To check the DTC (diagnostic trouble code) use an OBDII Scanner (also known as an OBD2 scan tool). The OEM (original equipment manufacturer) part number is Kia 26740-2G000 or Hyundai 26740-2G000. A compatible replacement aftermarket PCV valve is the Standard Motor Products V509. The tools needed to remove and replace the valve include a pair of pliers, a plastic pry bar tool or a flat head screwdriver and a 21mm socket (or a 13/16" socket would also work) with a 1/2" drive ratchet. The first two steps are to open the hood and then carefully pull off the plastic engine cover. The cover is held in place by four rubber friction fasteners on the underside of the cover attached to metal pegs on the top of the engine's black plastic valve cover. |
||
|
|
||
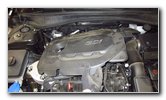
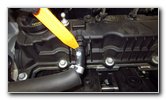
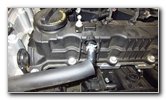
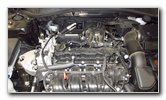 Engine Cover Removed |
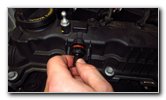
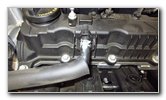 PCV Valve & Hose |
 Release Hose Clamp |
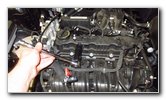
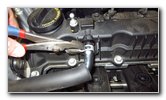
| Set the engine
cover aside in a safe place. The PCV valve and black rubber hose are situated on the top front area of the engine near the oil fill cap and the red / orange dipstick handle. Use a pair of pliers to pinch together the two tabs on the hose clamp and slide it forward off the old PCV valve. |
||
 Slide Clamp Forward |
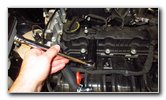
 Pry Tube Off Valve |
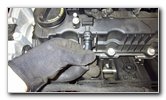 Pull Hose Off PCV |
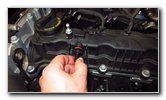
| Then use a plastic
pry bar tool or a flat head screwdriver to pop the rubber hose off the
nipple on the old PCV valve.
If you use a screwdriver, try to avoid damaging the hose. |
||
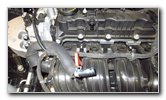 Rubber Hose Removed |
 Loosen Counterclockwise |
 Spin Out Old Valve |
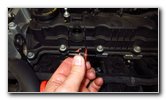
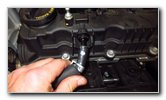
| Attach the 21mm
socket to the 1/2" drive ratchet. Loosen the old PCV valve by turning it in the counterclockwise direction. You could instead use a 13/16" socket, a pair of pliers or an adjustable crescent wrench. Spin out the old valve the rest of the way by hand. |
||
 Old Valve Removed |
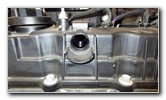 Port In Valve Cover |
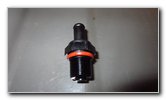 Inspect Old Valve |
| To check the
condition of the old valve, shake it vigorously. If you hear a distinct rattling sound like a spray paint can, the old valve is probably still in good condition. Since new valves are relatively inexpensive, I recommend just replacing it with a new one if your car has been driven over 60,000 miles. The original OEM part number is Kia 26740-2G000. If you would like to try cleaning the old valve, use some carburetor cleaner or throttle body cleaner to rinse out any sludge that might be preventing the old PCV valve from working properly. |
||
 Spin In New Valve |
 Tighten By Hand |
 Tighten Clockwise |
| Make sure that the
old rubber o-ring gasket from the old valve is not still attached to the
engine. Apply a small amount of new motor oil to the o-ring on the new PCV valve to lubricate it. Spin in the new valve a few turns by hand in the clockwise direction to help prevent it from becoming cross threaded. Then tighten the new valve with the 21mm socket and a 1/2" drive ratchet until it is snug. Avoid over tightening the new valve to prevent from breaking the PCV valve itself or possibly cracking the plastic valve cover on the engine. |
||
 Push On Rubber Hose |
 Replace Hose Clamp |
 Hose Clamp Secured |
| Push the rubber
hose over the nipple on the new valve until it is fully seated. Pinch together the two tabs on the metal hose clamp and slide it forward over the PCV valve to secure the hose in place. |
||
 New Valve Installed |
 Push On Engine Cover |
 Engine Cover Secured |
| Double check that
the hose and clamp are securely in place. Lower the plastic engine cover down into place. Firmly push on the cover to secure the four rubber friction fasteners to the metal pegs on the top of the engine. Take the car for a short test drive to see if the new valve has cured any of the symptoms you were experiencing before. Be sure to record the valve change in your vehicle's service records. Please check out all of my
2016-2020 Kia Optima DIY Repair & Maintenance Guides. |
||
| If you found this guide to be helpful,
please consider making a small donation by clicking on the PayPal.com
"Donate" button located to the right of this paragraph. Thank you!
(Note: I am not a registered charity. Donations are not tax deductible.) |