
Nissan Murano
Fog Light Bulbs Replacement Guide
How to change a burnt out fog light bulb
in the front bumper cover of a 3rd generation 2015-2018 Nissan Murano.

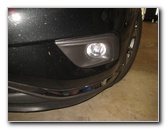 2017 Murano Fog Light |
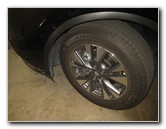 Turn Front Wheels |
 Wheel Well Liner |
| This
automotive maintenance tutorial was specifically written to assist
owners of the third generation (2015, 2016, 2017, 2018 and probably
also the refreshed 2019 & 2020 model years) Nissan Murano SUV in
changing a burnt out fog light bulb in the front bumper cover. Owners of other Nissan and Infiniti vehicles such as the Rogue, Pathfinder, Armada, Versa, Sentra, Altima, Maxima, Leaf, 370Z, GT-R, Frontier, Titan, NV200, Q50, Q70, Q60, QX30, QX50, QX60, QX70 and QX80 may also find these DIY instructions to be helpful. The compatible replacement halogen fog light bulb part number is H11. If you would like to have brighter fog lights, install some compatible H11 LED bulbs. The tools needed to access and replace the bulbs include a small flathead screwdriver and a plastic pry bar tool. |
||
|
|
||
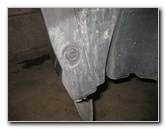
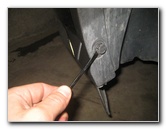 Pry Out Center of Fastener |
 Pull Out Base of Fastener |
 Pop Rivet Under Bumper |
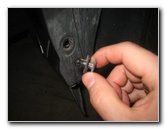
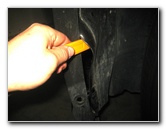
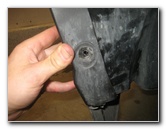
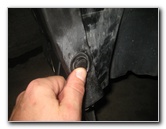
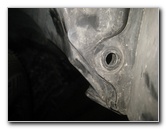
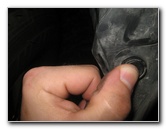
| The first step is
to turn the steering wheel all the way in the opposite direction of the
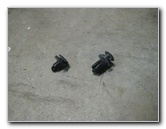
burnt out fog light bulb. This will give you more room to access the wheel well liner by the front tire. There is a black plastic pop rivet friction fastener at the bottom of the wheel well liner or "splash guard" and also another one on the underside of the front bumper cover. Pry out the smaller center piece of the pop rivet to unlock it. Then pry out the base of the fastener from the wheel well liner. Set it aside in a safe place. Look under the front bumper cover and locate the larger pop rivet fastener that secures the bottom of the wheel well liner in place. Pry out the center of the fastener with the plastic pry bar tool and then remove the base of the fastener. |
||
 Two Pop Rivets Removed |
 Pry Open Wheel Well Liner |
 Access To Fog Light Bulb |
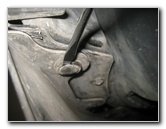
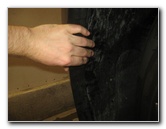
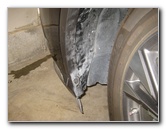
| Set the two pop
rivets aside in a safe place. Carefully pry out the front outer edge of the wheel well liner. |
||
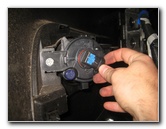
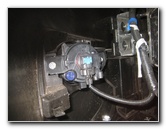 Rear of Fog Light Housing |
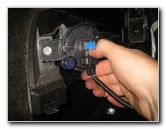 Pull Back Release Tab |
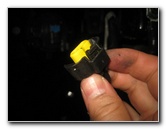 Power Plug Removed |
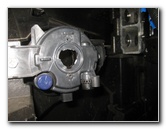
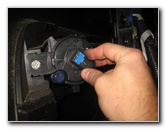
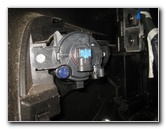
| Hold back the wheel
well liner or "splash guard" to access the rear of the fog light housing. Gently pull back the tab on the electrical connector to release it from the base of the old light bulb. Pull the power plug straight off the base of the old bulb. |
||
 Electrical Connector Removed |
 1/4 Turn Counterclockwise |
 Old Light Bulb Removed |
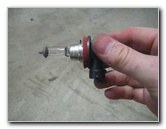
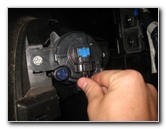
| Rotate the base of
the old light bulb 1/4 turn in the counterclockwise direction. Pull the old light bulb straight out of the housing. |
||
|
|
||
 Osram H11 12V 55W |
 Empty Bulb Housing |
 Install New Fog Bulb |
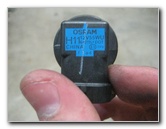
| The OEM light bulb
was an Osram H11 12V 55W which is the same as the
Sylvania H11. Avoid touching the glass part of the new halogen bulb with your fingers or anything greasy in the engine bay. Insert the new H11 bulb into the housing and rotate it 1/4 turn clockwise to secure it into place. If you would like to have brighter fog lights, install some compatible replacement H11 LED bulbs. |
||
 1/4 Turn Clockwise - Lock |
 Push On Power Plug |
 Replace Splash Guard |
| Push the power plug
straight on to the base of the new power plug until it clicks securely into
place. Push the wheel well liner back into place. |
||
 Line Up Holes |
 Push In Pop Rivet |
 Bottom of Front Bumper |
| Line up the holes
in the wheel well liner and the edge of the front bumper cover. Push the pop rivet back into the wheel well liner. Push in the center of the fastener to secure it into place. |
||
 Push In Pop Rivet |
 Wheel Well Liner Secured |
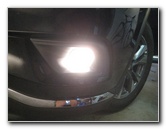 Test New Fog Light Bulb |
| Then replace the
other pop rivet into the underside of the front bumper cover. Double check that the wheel well liner and front bumper cover are securely attached together. To test the new light bulbs, turn on the headlights and turn on the fog lights switch. Be sure to record the bulb change in your vehicle's service records. For more,
please check out all of my
2015-2018 Nissan Murano DIY Repair & Maintenance Guides. |
||
| If you found this guide to be helpful,
please consider making a small donation by clicking on the PayPal.com
"Donate" button located to the right of this paragraph. Thank you!
(Note: I am not a registered charity. Donations are not tax deductible.) |