
Honda Pilot
Load Adjusting Shock Absorber Installation Guide
How to install the Monroe load
adjusting shock absorbers on a 1st generation 2003 to 2008 Honda Pilot SUV.

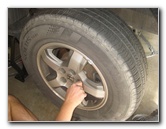
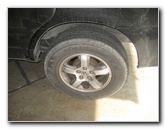
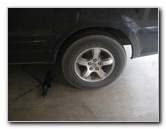 2006 Pilot Rear Wheel |
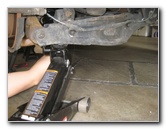
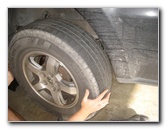
 Loosen Five Lug Nuts |
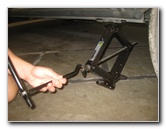 Raise Rear of SUV |
| This
automotive maintenance tutorial was specifically written to assist
owners of the first generation (2003, 2004, 2005, 2006, 2007 and
2008) Honda Pilot SUV in fixing a sagging rear suspension that
bottoms out when loaded with cargo or with passengers in the third
row of seats by removing the OEM shock absorbers and installing load
adjusting coil over shock absorbers. Owners of other Honda or Acura SUV or minivan vehicles such as the Odyssey, MDX, RDX, CR-V and Ridgeline may also find these DIY instructions to be helpful. The compatible replacement load adjust shock absorber part number is Monroe 58645. The tools needed to complete this procedure include a lug nut wrench, a floor jack, two jack stands, a 17mm wrench or a 17mm socket with a ratchet, a breaker bar, a rubber mallet, a torque wrench, a 19mm wrench or a 19mm socket with a ratchet. |
||
|
|
||
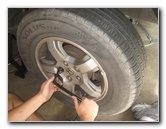
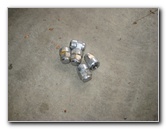 5 Lug Nuts Removed |
 Remove Rear Wheel |
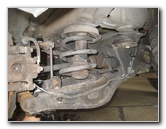
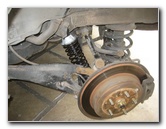
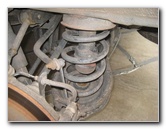 Rear Suspension Spring |
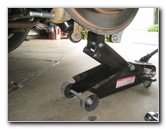
| The first few steps
are to park the SUV on a level surface and turn off the ignition. Engage the emergency / parking brake and place wheel chocks on both sides of the front tires to prevent the vehicle from moving. (You may want to use a measuring tape to check the "before" ride height of your SUV with the OEM shocks.) Slightly loosen the five lug nuts on the rear wheel by turning 1/4 to 1/2 turn in the counterclockwise direction with the lug nut wrench. I prefer to work on one side of the car at a time to keep three tires on the ground for extra safety. Raise the rear of the SUV with the floor jack and securely support it with at least two jack stands. Release the floor jack and roll it towards the rear of the vehicle. You will need it later to compress the suspension. Spin off the five lug nuts and set them aside in a safe place. Pull off the rear wheel and place it face up beneath the frame rail of the SUV as another safety measure just in case both of the jack stands fail. Locate the OEM shock absorber. |
||
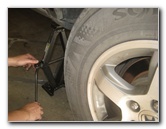
 OEM Shock Absorber |
 Top of Shock Absorber |
 Raise Suspension With Jack |
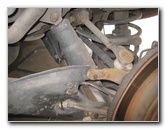
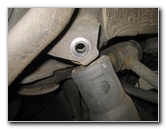
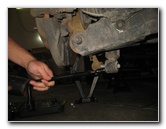
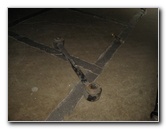
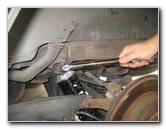
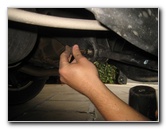
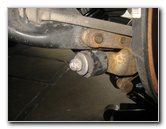
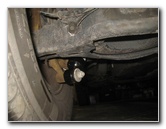
| The OEM shock
absorber is held in place by a 17mm bolt at the top and a 17mm nut at the
bottom. Slide the floor jack to below the suspension spring. Place a small amount of tension on the suspension with the floor jack to release the tension from the old shock absorber's fasteners. |
||
 Loosen Top 17mm Bolt |
 17mm Bolt - Tapered End |
 Upper Bolt Removed |
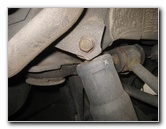
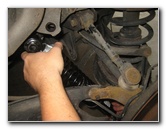
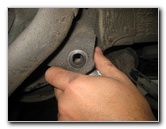
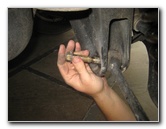
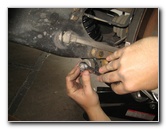
| Loosen the top bolt
by turning it counterclockwise with a 17mm wrench or a 17mm socket with a
3/8" or 1/2" drive ratchet. If you have trouble loosening the bolt, use a breaker bar or link together two wrenches for extra leverage. Slide out the 17mm bolt and set it aside in a safe place. |
||
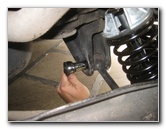
 Loosen Lower 17mm Nut |
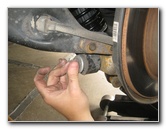
 17mm Nut & Washer |
 Bottom Nut Removed |
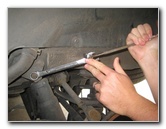
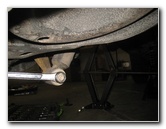
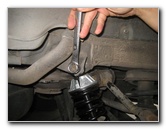
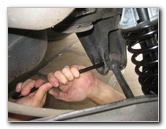
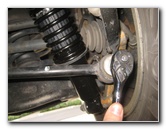
| Loosen the lower
nut on the old shock absorber by turning it counterclockwise with the 17mm
wrench. Set the nut and the washer aside in a safe place. |
||
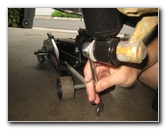
 Tap Out Top End |
 Tap Lower End Off Mount |
 Top of Old Shock Removed |
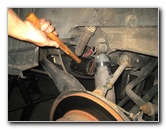
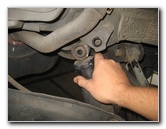
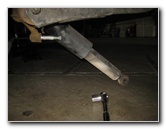
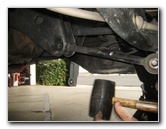
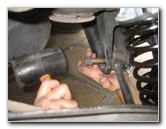
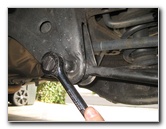
| Use the
rubber mallet to tap out the top
end of the old shock from its mounting cup. Use the end of the tire iron and the mallet to gently tap the lower part of the shock off its mounting bar. |
||
 Old Shock Released |
 OEM Shock Absorber |
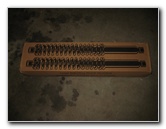 Monroe Load Adjusting |
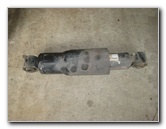
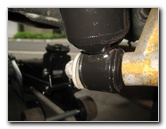
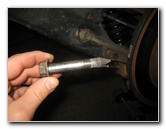
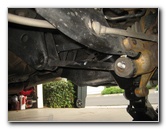
| Remove the old
shock from the vehicle. The new Monroe Sensa-Trac # 58645 load adjusting "coilover" shock absorber will be mounted with the spring at the top. |
||
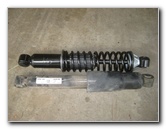 Comparison of Shocks |
 Slide In Top of New Shock |
 Difficult To Attach Bottom |
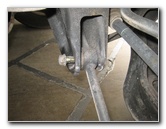
| Some Pilot, MDX and
Odyssey owners have reported being able to install the new shock absorber
with out removing the lower lateral arm. We had difficulty getting the new shock in to place with out removing the lower lateral arm (also known as the "lateral link", "tie rod" or "control arm"). (If you need to replace a bent or damaged "rear lower forward lateral link" the part number is as follows: Dorman 522-798.) |
||
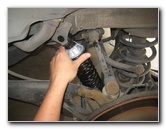
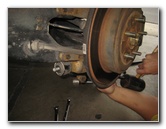
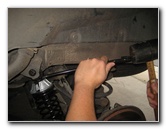
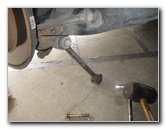
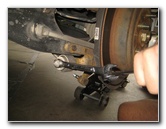 Removing Lower Lateral Arm |
 17mm Nut Removed |
 Lower Outer End of Arm |
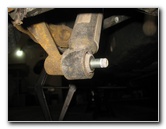
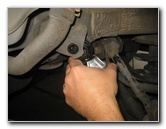
|
If you decide that you need to remove the lower lateral arm to get the new shock absorber in to place, start by removing the 17mm nut located on the lower outer end of the arm near the brake rotor. Loosen the 17mm nut in the counterclockwise direction. Set the nut and washer aside in a safe place. |
||
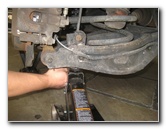
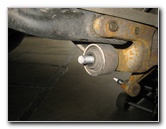
 Tap Arm Off Bolt End |
 |
 19mm Bolt Top Inner End Arm |
| Loosen the top inner bolt on the lateral arm by turning it counterclockwise with a 19mm socket and a 1/2" drive ratchet or a 19mm wrench. | ||
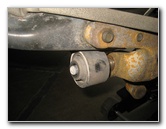
 Removing Top 19mm Bolt |
 19mm Bolt Removed |
 Tap Off Bottom End |
| Remove the 19mm
bolt and set it aside in a safe place. Tap the bottom outer end of the lateral arm off its mounting bolt with the rubber mallet. |
||
|
|
||
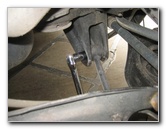
 Tap Out Top Part |
 Lateral Link Removed |
 Raise Top of New Shock |
| Tap the top inner
end of the lateral arm out of its mount. Set the lateral link aside in a safe place. Once the lateral link is out of the way, we were able to easily install the new Monroe shock absorber. |
||
 Slide In To Mount |
 Spin On 17mm Nut |
 Tighten 17mm Clockwise |
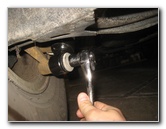
| Spin the 17mm nut
on to the bottom of the new shock absorber. Tighten the 17mm nut in the clockwise direction until it is snug. We will tighten it to the proper torque setting later on. |
||
 Tap To Align Bolt Holes |
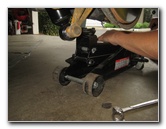 Re-Position Floor Jack |
 Compress Suspension Spring |
| If necessary, tap
the top of the shock absorber with the rubber mallet to line up the bolt
holes.
You may need to apply some pressure to the bottom of the suspension with the floor jack to compress the spring and align the bolt holes. |
||
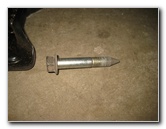
 Tapered 17mm Bolt |
 Line Up Bolt Holes |
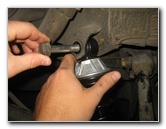 Slide In 17mm Bolt |
| Slide the tapered 17mm bolt in to the top of the new shock. | ||
 Tighten 17mm Clockwise |
 |
 Torque 17mm To 47 lb-ft |
| Tighten the 17mm bolt in the clockwise direction to about 47 lb-ft of torque. | ||
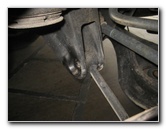
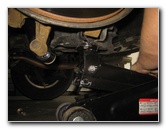
 Re-Install Lower Lateral Arm |
 Tap To Align Bolt Holes |
 Re-Insert 19mm Bolt |
| Re-attach the lower
lateral arm. Use the rubber mallet to tap the outer edge on to the mounting bolt and the inner end in to its mount. Re-insert the 19mm bolt in to the inner edge of the lateral arm. |
||
 |
 Bar - Lining Up Holes |
 Tap In Tapered Bolt |
| We had some
difficulty re-inserting the 19mm bolt for the inner edge of the lateral arm. We used the end of a metal bar and the rubber mallet to carefully line up the bolt holes. |
||
 Raise Suspension With Jack |
 Finally Inserted Bolt |
 |
| You may need to raise or lower the suspension with the floor jack to get the 19mm bolt re-inserted. | ||
 Tighten 19mm Bolt |
 Spin On Outer 17mm Nut |
 17mm Nut Replaced |
| Tighten the 19mm
bolt in the clockwise direction to about 69 lb-ft of torque. Replace the washer and spin on the 17mm nut at the bottom outer edge of the lateral link. Tighten the 17mm nut in the clockwise direction to about 47 lb-ft of torque. |
||
 Tighten 17mm Nut |
 Shock Absorber Replaced |
 Replace Rear Wheel |
|
Double check that the bolt and nut on the lateral link are tight before moving on to the next steps. Push the rear wheel back in to place. |
||
 Spin On 5 Lug Nuts |
 Slightly Tighten Lug Nuts |
 Lower Car From Stands |
| Spin on the five
lug nuts a few turns by hand in the clockwise direction to prevent them from
becoming cross threaded.
Slightly tighten the lug nuts with the tire iron in a "criss cross" or "star" pattern. Carefully lower the SUV from the jack stands by using the floor jack. Tighten the lug nuts to 80 lb-ft of torque in a "criss cross" or "star" pattern. |
||
 Suspension Loaded |
 |
 Tighten Lateral Link 17mm |
| Now the suspension
is loaded down with the weight of the vehicle, you can double check the
fasteners. The lateral link 17mm nut should be tightened to 47 lb-ft. |
||
 Inner Lateral Link 19mm |
 Tighten Shock Lower 17mm |
 Shock Install Complete |
| The inner lateral
link 19mm bolt should be tightened to 69 lb-ft. The lower 17mm nut on the new shock absorber should be tightened to 47 lb-ft. The top 17mm bolt on the new shock absorber should be at 47 lb-ft. |
||
 Passenger Side - Remove Link |
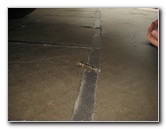
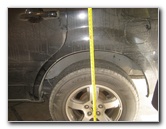 Measure Ride Height |
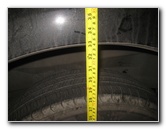 Raised Rear By About 1.5" |
| When we moved to
the passenger side of the SUV, we decided to remove the lateral link as our
first step to make the shock absorber install much easier. We used the measuring tape to measure the ride height after the new shock absorbers were installed. The
Monroe 58645 shocks seemed to raise the saggy rear end of the SUV
about 1 1/4" to 1 1/2" (1.25 to 1.5 inches).
They have also improved the ride quality a bit with the rear end remaining more planted and level during cornering. For more, check out all of my
2003-2008 Honda Pilot DIY Repair & Maintenance Guides. |
||
| If you found this guide to be helpful,
please consider making a small donation by clicking on the PayPal.com
"Donate" button located to the right of this paragraph. Thank you!
(Note: I am not a registered charity. Donations are not tax deductible.) |