
Smart Fortwo Tail Light
Bulbs Replacement Guide
How to change a burnt out brake, rear
turn signal or reverse light bulb in a 2nd generation 2008 to 2014 Smart Fortwo.

By Paul B. Michaels Author & Photographer Auto Mechanic Since 1989 |
||
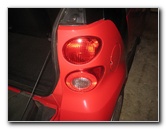 2013 Smart Fortwo Tail Lighs |
 Cargo Area Plastic Panel |
 Push In Release Tab |
| This
automotive maintenance tutorial was specifically written to assist
owners of the second generation (2008, 2009, 2010, 2011, 2012, 2013
and 2014) Smart Fortwo compact city car in changing a burnt out
brake, rear turn signal or reverse bulb in the tail light
assemblies. Owners of any Smart Fortwo models or trim levels such as the coupe hatchback, cabriolet or "cabrio", electric, pure, passion, forfour, prime and proxy may also find these DIY instructions to be helpful. The compatible replacement light bulb part numbers are as follows: Brake / Rear Turn Signal # 7528 (or P21/5W) and Reverse Light # 7506 (or P21W). No tools are needed to access and replace any of the bulbs in either the driver or passenger side tail light housings. |
||
|
|
||
 Release 2nd Retaining Clip |
 Remove Access Cover |
 Pull Back Fabric Cover |
| The first two steps
are to open the tailgate and move to the side of the car with the burnt out
tail light bulb. Locate the plastic access panel near the tailgate housing at the back of the cargo area. On the right (passenger) side of the car, there are two release tabs on the rear of the access cover. On the left (driver) side of the car, there is one release tab on the front of the cover and another on the rear of the cover. Gently push in the two tabs to release the retaining clips and pull the access cover off the cargo area panel. Pull back the fabric cover to access the rear of the tail light housing. |
||
 Push Up To Release Clip |
 Pull Off Bulb Bracket |
 Push In & 1/4 Turn CC |
| Locate the tab in
the center of the light bulb bracket. Gently push the tab up to release the retaining clip. Carefully pull the bulb bracket straight off the rear of the tail light housing. Turn over the bracket to access the bulb sockets. The brake light bulb socket is located at the top of the bracket. Push the old bulb down in to the socket and rotate it 1/4 turn counterclockwise before pulling it straight out. |
||
 Install New Light Bulb |
 Push Down & 1/4 Turn CC |
 Remove Reverse Bulb |
| Push a new #
7528 (also known as part
number
P21/5W) light bulb down in
to the socket and rotate it 1/4 turn clockwise to secure it in place. The reverse or "back up" light bulb is located at the bottom of the bracket. Push the old bulb down in to the socket and rotate it 1/4 turn counterclockwise before pulling it straight out. |
||
|
|
||
 Install New Reverse Bulb |
 Re-Insert Bulb Bracket |
 Mount For Bulb Bracket |
| Push a new #
7506 (also known as part
number
P21W) light bulb straight
in to the socket and rotate it 1/4 turn clockwise to secure it in place. Line up the bulb bracket with the rear of the tail light housing. The two bulbs should align with their corresponding holes in the housing. |
||
 Bottom - Reverse Bulb Housing |
 Top - Brake Bulb Housing |
 Push On Bulb Bracket |
| Pass the mounting
tab at the middle of the housing through the opening in the center of the
bulb bracket. Push the bulb bracket on to the housing until the retaining clip clicks securely in to place. |
||
 Bulb Bracket Secured |
 |
 Re-Insert Plastic Tabs |
| Make sure that the
bulb bracket is securely attached. Close the fabric cover. Line up the plastic access cover. |
||
 Close Cover - Secure Clips |
 Access Cover - Driver Side |
 Test New Tail Light Bulbs |
| Gently push the
access cover back in to place to secure the two retaining clips. To test the new tail light bulbs, have an assistant push down the brake pedal, activate the hazard signals and place the transmission in reverse. Be sure to record the light bulb change in your car's service records. For more, check out all of my
2008-2014 Smart Fortwo DIY Repair & Maintenance Guides. |
||
| If you found this guide to be helpful,
please consider making a small donation by clicking on the PayPal.com
"Donate" button located to the right of this paragraph. Thank you!
(Note: I am not a registered charity. Donations are not tax deductible.) |