
Volvo XC60
Rear Turn Signal Light Bulb Replacement Guide
How to change a burnt out rear turn
signal light bulb in a 1st generation 2010 to 2017 Volvo XC60 SUV with the part
number.

By Paul B. Michaels Author & Photographer Auto Mechanic Since 1989 |
||
 2017 Volvo XC60 Tail Light |
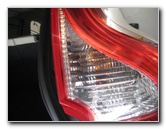 Rear Turn Signal Light |
 Interior Access Cover |
| This
automotive maintenance tutorial was specifically written to assist
owners of the first generation (2010, 2011, 2012, 2013, 2014, 2015,
2016 and 2017) Volvo XC60 SUV in changing a burnt out rear turn
signal bulb in the tail light housing. Owners of other Volvo vehicles such as the XC90, XC70, S90, S80, S60, S40, C30, C70, V90, V70, V60 and V40 may also find these DIY instructions to be helpful. The compatible replacement rear turn signal light bulb part number is genuine OEM Volvo 30763165. It also marked as Valeo # 89072906 13628 13. The tools needed to access and replace the bulb include a 10mm socket with a 1/4" drive ratchet or a 10mm wrench, a Torx T25 star bit screwdriver and a plastic pry bar tool. |
||
|
|
||
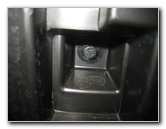
 Front Lower 10mm Nut |
 Rear Lower 10mm Nut |
 Loosen Counterclockwise |
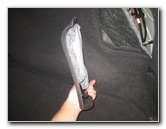
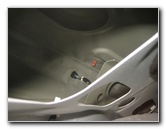
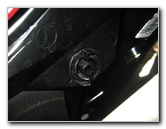
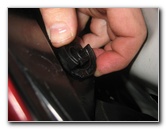
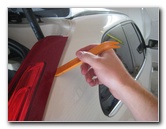
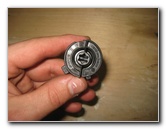
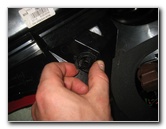
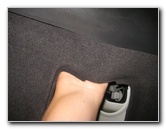
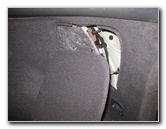
| The first two steps
are to open the tailgate and move to the side of the SUV with the burnt out
rear turn signal light bulb. Locate the access cover on the rear corner of the cargo area carpet liner. Gently pull off the access cover and set it aside in a safe place. The brake and reverse light bulbs are very easy to access once the cover has been removed. If you need to replace those bulbs, check out my Volvo XC60 Brake & Reverse Light Bulbs Replacement Guide. To access the rear turn signal light bulb, you'll need to at least partially remove the tail light housing and part of the rear bumper cover. Locate the two lower threaded stud ends and black metal nuts. |
||
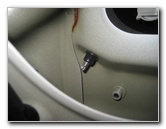
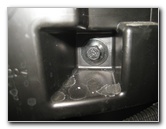
 10mm Nut Removed |
 |
 Rear Lower Nut |
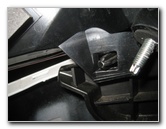
| Remove the two lower nuts by turning them counterclockwise with a 10mm socket and a 1/4" drive ratchet or a 10mm wrench. | ||
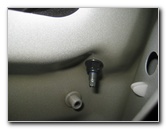
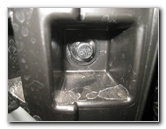
 Loosen Counterclockwise |
 Two 10mm Nuts Removed |
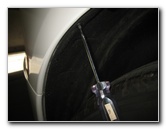
 Pointing To Top 3rd Nut |
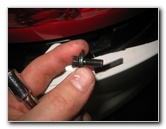
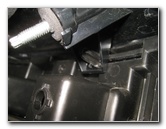
| Set the two nuts
aside in a safe place. The third 10mm nut is much more difficult to remove. I recommend attaching a rope or wire to your ratchet or wrench so that you don't lose it inside the body. |
||
 Hard To Reach Top Nut |
 |
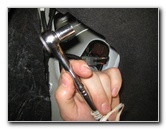 10mm Socket & Ratchet |
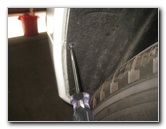
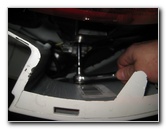
| Use a flashlight to
peer up in to the opening and locate the third nut close to the top of the
tail light housing. Be prepared to
scrape, scratch, chafe and rub your forearm raw removing the third nut.
|
||
 Loosen Counterclockwise |
 Third Nut Finally Removed |
 Rubber Tailgate Bumper |
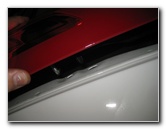
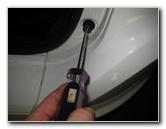
| Loosen the top
third nut by turning it counterclockwise with the 10mm socket and 1/4" drive
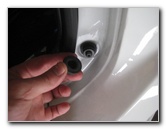
ratchet. Set the third nut aside with the other two. Move to the bottom outer edge of the cargo opening. Pull off the rubber stopper / bumper for the tailgate door. |
||
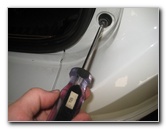 Loosen Counterclockwise |
 Torx T25 Screw Removed |
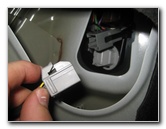 Disconnect Power Plug |
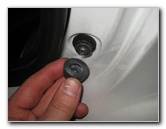
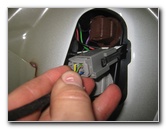
| Loosen the screw
that was hidden by the rubber bumper by turning it counterclockwise with a
Torx T-25 screwdriver. Set the screw and rubber bumper aside with the other fasteners. Push in the release tab on the grey plastic electrical connector before pulling it straight out of its socket. |
||
 Rear Bumper Cover |
 Wheel Well Liner Screws |
 Loosen Counterclockwise |
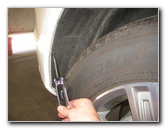
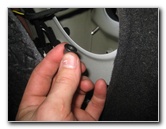
| In order to at
least partially remove the tail light housing enough to reach the rear turn
signal bulb socket, you'll have to also partially remove the rear bumper
cover. Move to the rear part of the wheel well liner. Remove the four screws along the rear edge of the black plastic wheel well liner by turning them counterclockwise with the Torx T-25 screwdriver. Set the four screws aside in a safe place. |
||
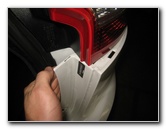
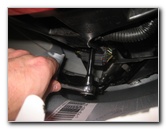
 Pull Back Bumper Cover |
 Bumper Cover Released |
 Turn Signal Bulb Socket |
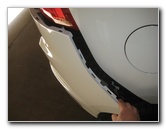
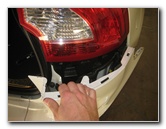
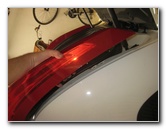
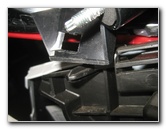
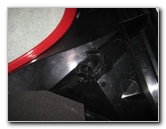
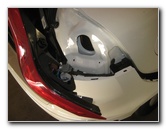
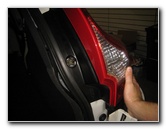
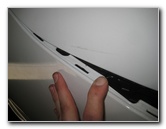
| Gently pull back
the rear bumper cover. Pull away from the rear bumper cover from the bottom edge of the tail light housing. Use a plastic pry bar tool to gently loosen the outer edge of the tail light housing from the rear edge of the SUV. There is a plastic peg or "spike" near the top of the housing that helps hold it in place to the vehicle. Try to avoid using excessive force to prevent from cracking the housing. Don't pull too hard, the tail light housing is still attached at the bottom edge to a black plastic bracket. With the tail light housing partially removed, you'll be able to reach the turn signal bulb socket. |
||
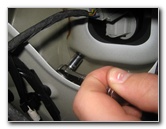
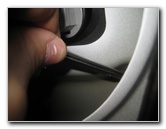
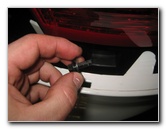
 1/4 Turn Counterclockwise |
 To Entirely Remove Housing |
 Top Inner 8mm Bolt |
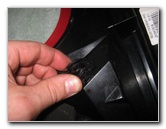
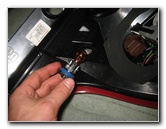
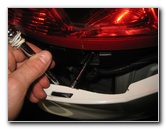
| Rotate the bulb
socket 1/4 turn counterclockwise and pull it straight out of the housing. Insert a new Volvo 30763165 or Valeo # 89072906 13628 13 light bulb assembly in to the housing and rotate it 1/4 turn clockwise to secure it in place. I highly recommend testing the new turn signal light bulb before moving on to the next steps. If you only want to replace the turn signal light bulb, you can reverse the steps to re-install the housing and re-attach the bumper cover. If you would like to entirely remove the light housing to replace a cracked or shattered assembly from a fender bender or other accident, continue on to the following steps. The bottom lip of the tail light housing has two rectangular shaped slots that are secure to two black plastic pegs on the rear of the black plastic bracket. Locate the three bolts on the black plastic bracket. Two are near the top of the bracket and the third is a bit further down. |
||
 Top Outer 8mm Bolt |
 Remove Counterclockwise |
 2nd 8mm Bolt Removed |
| Remove the three bolts by turning them counterclockwise with an 8mm socket and a 1/4" drive ratchet. | ||
 Lower 8mm Bolt |
 Loosen Counterclockwise |
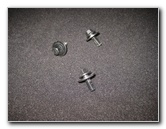 Three 8mm Bolts Removed |
| Set the three 8mm bolts aside in a safe place. | ||
|
|
||
 Gently Pry Off Top Edge |
 Pry At Middle of Housing |
 Lift Housing Off SUV |
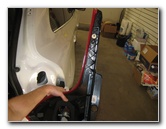
| If you haven't already, use the plastic pry bar tool to gently separate the outer edge of the housing from the rear of the SUV. | ||
 Bottom - Two Fasteners |
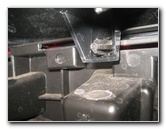 Slot Over Plastic Peg |
 Pull Housing Off Pegs |
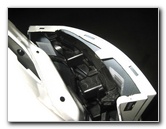
| Pull off the tail
light housing and locate the two fasteners on the bottom edge. Gently pull the rectangular shaped slots on the bottom edge of the tail light housing off their mounting pegs on the black plastic bracket below it. |
||
 Black Plastic Bracket |
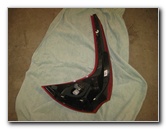
 Tail Light Housing Removed |
 Easy Access To Bulb Sockets |
| Now you can fully separate the light housing from the rear of the car. | ||
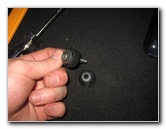
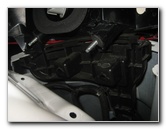
 Turn Signal Bulb Socket |
 1/4 Turn Counterclockwise |
 Old Bulb Removed |
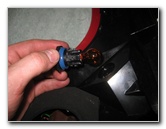
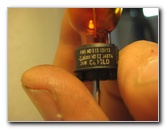
| The OEM turn signal
light bulb was marked with a variety of part numbers on the socket and the
base of the actual bulb. They included AMS MD E13 12613, Valeo MD E2 06074, 24W C610LD and Valeo 89072906 13628 13. The OEM part number from Volvo, which wasn't found anywhere on the bulb or the owner's manual, was Volvo 30763165. To remove the bulb socket, rotate it 1/4 turn counterclockwise and pull it straight out of the housing. |
||
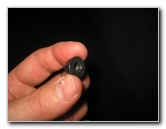
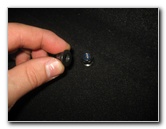
 |
 Valeo MD E2 06074 |
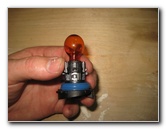 |
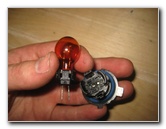
| I tried pulling the
old bulb out of the socket or "base" of the assembly.
But it seems that the replacement unit is the entire assembly with the bulb and base. |
||
 Valeo 89072906 13628 13 |
 Install New Turn Signal |
 1/4 Turn Clockwise - Lock |
| Insert the new bulb assembly in to the housing and rotate it 1/4 turn clockwise to secure it in place. | ||
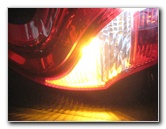 Test New Turn Signal Bulb |
 Line Up Tail Light Housing |
 Push Slots Over Pegs |
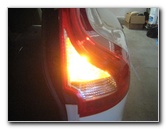
| Test the new turn
signal light bulb before you replace the tail light housing by
turning on the hazard signals. Lower the two slots on the bottom edge of the housing over their mounting pegs on the black plastic bracket located behind the bumper cover. |
||
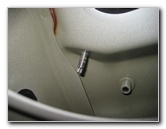
 2nd Peg - Bottom Edge |
 Re-Insert Stud & Plastic Peg |
 Push On Bottom Edge |
| Line up the plastic
spike and threaded bolt stud near the top of the housing back in to their
corresponding holes on the rear edge of the SUV. Push on the bottom edge of the housing to re-insert the two bolt ends. |
||
 Replace 8mm Bolts |
 Tighten Clockwise |
 Re-Insert Bumper Cover |
| If you removed the
black plastic bracket located below the tail light housing, replace the
three bolts by turning them clockwise with the 8mm socket and 1/4" drive
ratchet. Carefully push the rear bumper cover back in to place. |
||
 Bumper Cover Replaced |
 Wheel Well Fasteners |
 Tighten Clockwise |
| Push the wheel well
liner back in to place. Replace the four screws along the rear outer edge of the wheel well liner by turning them clockwise with the Torx T25 screwdriver. |
||
 Replace Tailgate Bumper Screw |
 Push On Rubber Bumper |
 Rubber Stop Replaced |
| Replace the screw
near the opening to the cargo area by tightening it in the clockwise
direction with the Torx T25 screwdriver. Push the rubber tailgate bumper / stopper piece back over the screw. |
||
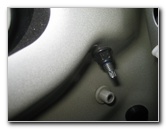
 Push In Power Plug |
 Replace 10mm Nuts |
 Replace Top 3rd Nut |
| Replace the grey
plastic electrical connector by pushing it straight in to its socket. Reach in and spin on the upper 10mm nut a few turns by hand in the clockwise direction to prevent it from becoming cross threaded or from falling down in to the body. Tighten the three 10mm nuts by turning them clockwise with the 10mm socket and a 1/4" drive ratchet until they are snug. Try to avoid over tightening the three 10mm nuts to prevent from cracking the plastic tail light housing. |
||
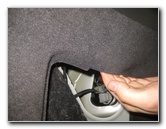
 Re-Insert Top Tab |
 Push In Retaining Clips |
 Testing Rear Turn Signal |
| Re-insert the tab
at the top edge of the access cover in to the opening in the carpet liner. Push on the bottom edge to secure the two plastic retaining clips. Test the new rear turn signal light bulb by activating the hazard signals. For more,
check out all of my
2010-2017
Volvo XC60 DIY Repair & Maintenance Guides. |
||
| If you found this guide to be helpful,
please consider making a small donation by clicking on the PayPal.com
"Donate" button located to the right of this paragraph. Thank you!
(Note: I am not a registered charity. Donations are not tax deductible.) |