
USB Cell
Phone Charger Custom Cable Guide
A pictures illustrated instruction manual
for creating a USB mobile telephone charging cable for a Sony Ericsson T637.

|
|
||
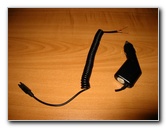
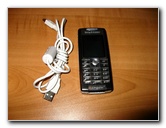 USB Cable & Cell Phone |
 Mini & Regular USB Wires |
 Camera Connector Cut Off |
| This guide was
specifically written to assist owners of the Sony Ericsson T637 (T630,
T610, T616, T618) cell phone in building a custom USB charging cable. Owners of cell phones from other manufacturers such as Nokia, LG, Apple, Pantech, Samsung, Sanyo, Panasonic, Siemens, NEC, Kyocera, Nextel, and Audiovox may also find these instructions useful. As I mentioned above, please be sure to confirm that your device has a 5V DC USB compatible charging system before continuing. For example, my cell phone wall charger's specifications are: Input 100-240 VAC 70 mA 50-60Hz, Output 4.9 VDC 450 mA. So since the OEM charger's output is 4.9 volts, the phone should have no problem charging from a 5 volt USB computer port. |
||
|
|
||
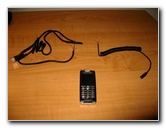
 Red, Green, Black, White |
 Sony Ericsson Car Charger |
 White & Red, 12V Charger |
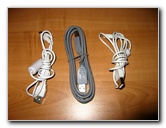
| To start we'll need
a standard A to A, mini to A, or A to B printer USB cable, a spare 12V car
or wall phone charger, scissors, shrink tubing and/or electrical tape.
I chose an old USB data transfer cable from a Canon Powershot digital camera that I no longer have and a generic 12 volt DC car charger to get the unique Sony Ericsson charging tip. |
||
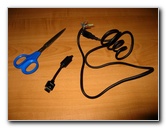
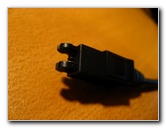 Sony Ericsson Charger Plug |
 Mobile Phone Model T637 |
 Cut USB & Car Charger |
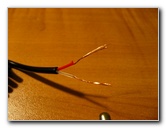
| First snip off the
side of the USB cable that doesn't go into a standard computer female USB
port or choose one side if you have an A male-male cable.
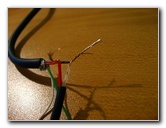
Then strip off about 1/2 to a full inch of the wire's insulation. If the manufacturer of your USB cable followed international standard design, it will have four colored wires - green, black, white, and red. The red wire should be the positive (+) power and the black will be the negative (return) (-) wire. Verify this with a multimeter or proceed and take your chances. My cell phone is old and I wouldn't have been too upset if it had fried while attempting to make this USB charging cable. The green and white wires can be snipped off since they are just used for data transfer to the computer. |
||
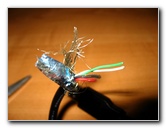
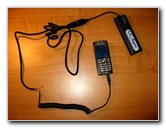
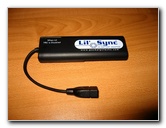 Lil' Sync USB Charger |
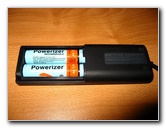 Powerizer AA NiMH Cells |
 Red To Red, Black To White |
| Now cut off the 12V
car charger or wall charger end of your phone charging cable leaving at
least a few inches to work with. Then again strip off about 1/2 to 1 inch of
the insulation to reveal the red (+) and black (or white/clear) negative (-)
wires.
Strip off a small amount of insulation from the positive and negative wires of both the USB and charging cables. Twist together the two red positive wires and the black/white negative wires. Make sure that the wires aren't touching by pulling them apart! Now you can connect your cell phone, hold your breath, and plug the male USB end of the wire into a desktop computer or laptop. |
||
|
|
||
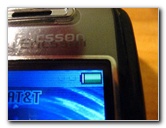
 Mobile Phone Charging |
 |
 Cell Charging Via Lil' Sync |
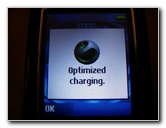
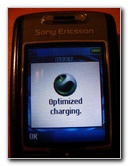
| Hopefully after
plugging everything together you heard the familiar chime that means your
phone has begun charging.
Let it charge with the cable for at least a few minutes in this unfinished condition and then unplug the USB male end first and the phone plug. Does the cable or the back of the phone feel unusually
hot? If not, it should be safe to use.
|
||
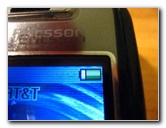 Li-Ion 3.7V 550mAh |
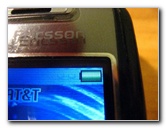 Fully Charged Li-Ion Cell |
 T637 Battery Indicator |
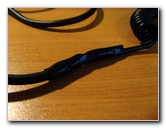
| I didn't have any
heat shrink tubing handy so I just used electrical tape to secure each of
the wire connections and then seal the junction of the two cables.
I plan on eventually cutting my new custom USB cell phone charger cable down to just a few inches and finishing it off with a more professional looking piece of heat shrink tubing. If I ever lose or break this phone, I plan on buying a Motorola model or perhaps a SmartPhone PDA that is already OEM equipped with a mini-USB charger plug. Then I can just plug it into any computer using a standard A-mini USB cable that almost every one has laying around somewhere in their home or office. The Motorola phones however do require a software "modem" driver installed on the computer to enable USB charging but that can be downloaded and set up in just a few seconds. |
||
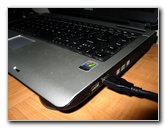 Toshiba A105 Laptop USB |
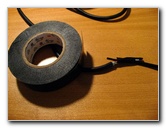 Black Electrical Tape |
 Exposed Wires Taped Up |
| About 4 rows up on
this page you'll see the
Lil' Sync USB AA Battery Power Adapter sold by the Pocket PC Techs. I
originally bought it keep the Li-Ion cell in my
HP iPAQ PDA charged on long airplane flights. But now with this new cable I can
charge my cell phone too.
I also ordered a USB battery charger on eBay for the Canon NB-5L batteries which power my SD700IS camera. This only makes sense for me because I already have five sets, 4 each, of 2500-2700 mAh AA NiMH batteries for the Canon S5 IS and 430EX flash. If I ever have to be away from home and car power sources
for days at a time on a camping trip, all I'll need to keep my small
electronics powered up is a solar panel power source for the Maha MH-C204W
AA battery charger. |
||
| If you found this guide to be helpful,
please consider making a small donation by clicking on the PayPal.com
"Donate" button located to the right of this paragraph. Thank you!
(Note: I am not a registered charity. Donations are not tax deductible.) |