
Toyota Prius
Engine Oil Change Guide
How to change the motor oil and replace
the cartridge filter in a 3rd generation 2010-2015 Toyota Prius 1.8L I4 hybrid.

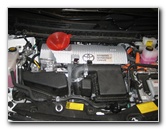
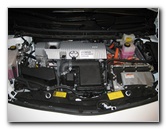 '10-'13 Prius 1.8L Engine |
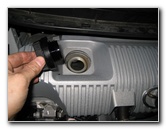
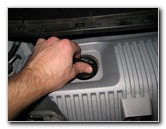 Twist Off Oil Filler Cap |
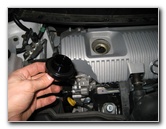 Oil Filler Cap Removed |
| This
automotive "how-to" guide was specifically written to assist owners
of the third generation (2010, 2011, 2012, 2013, 2014 & 2015) Toyota Prius with
the 2ZR-FXE 1.8L inline four cylinder engine in changing the motor
oil and replacing the cartridge oil filter. Owners of other vehicles equipped with the 2ZR-FXE 1.8L L4 Atkinson cycle engine such as the Lexus CT200h, and Toyota Auris Hybrid or the previous 2004-2009 "Gen II" Prius with the similar 1.5L 1NZ-FXE engine may also find these DIY oil change instructions to be helpful. The tools needed to complete this procedure include a floor jack, jack stands, a small flathead screwdriver, a 14mm socket with a 3/8" drive ratchet or a 14mm wrench, a 64mm oil filter wrench with 14 flats such as the AST Tools TOY 640, a 24mm or 15/16" socket with 1/2" drive ratchet, a used oil catch container, an automotive funnel, a new cartridge oil filter, and 5 U.S. quarts of SAE 0W-20 oil. |
||
|
|
||
A few compatible cartridge style oil filters include the following with their part numbers: Mobil 1 M1C-154, Wix 57064, Fram CH10358 or TG10358, Pennzoil HPZ-172, Hastings LF640, Toyota 04152-YZZA6 and Pentius PCB10358. |
||
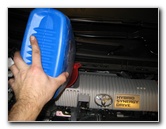
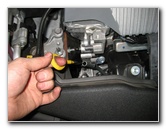 Pull Up Oil Dipstick |
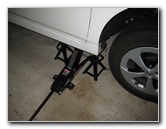 Raise Front of Vehicle |
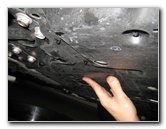
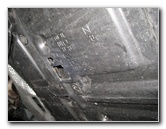 Service Access Panel |
| The first few steps
are to warm up the motor to operating temperature, park the vehicle on a
level surface, and turn off the engine.
Warming up the engine helps suspend any contaminants within the old oil and allow it to drain out more quickly. Then engage the emergency parking brake and chock the rear wheels to prevent the vehicle from moving. Open the hood, twist off the oil filler cap in the counter clockwise direction, and lift up the yellow handled oil dipstick. Removing the oil filler cap and pulling out the dipstick prevent a vacuum from forming and allow the old oil to drain more quickly. Next raise the front passenger side of the vehicle with the floor jack and securely support it with two jack stands. |
||
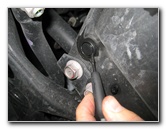
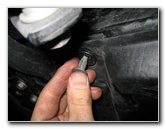
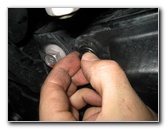
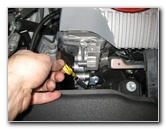
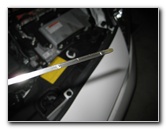
 Pry Out Center of Rivet |
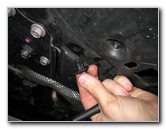 Pull Out Outer Piece |
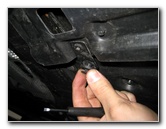 Removing Fastener |
| Slide underneath
the front passenger area and locate the rectangular access panel in the
black plastic engine under cover marked with the words "For Service". There are three black plastic fasteners that hold the service panel in place. Pry out the small circular inner piece first and then pry out the larger outer piece to remove the fastener. |
||
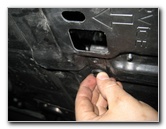
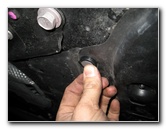
 Remove 3rd Fastener |
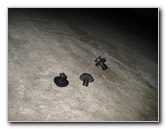 3 Fasteners Removed |
 Open Service Panel |
| Once all three of the black plastic fasteners have been removed, you can flip open the service panel. | ||
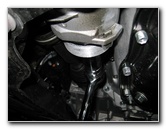
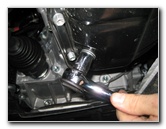 Remove 14mm Drain Bolt |
 Draining Old Oil Out |
 Replace Drain Bolt |
| The silver metal
oil drain bolt is located at the bottom of the black metal oil pan facing
towards the rear of the vehicle. Move the used oil catch container to directly below the oil drain bolt. Remove the oil drain bolt with the 14mm socket and ratcheting wrench by turning it counter clockwise. If the drain bolt is equipped with a crush washer, inspect it and replace it if necessary. It is an "M12" sized washer that can be purchased at your Toyota dealership's parts counter or at most auto parts stores. The washer or "gasket" part number is Toyota 90430-12031.
Allow the old oil to drain out for a few minutes, re-insert the oil drain bolt in the clockwise direction, and tighten it to just past hand tight or about 28 ft lbs of torque. It would be best to replace the old crush washer on the drain bolt with a new one. |
||
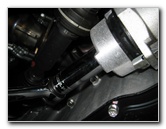
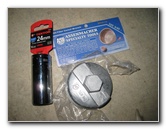 24mm Socket & TOY640 |
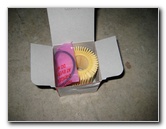 New Cartridge Oil Filter |
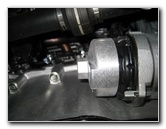
 Oil Filter Cap |
| The round black
plastic oil filter cap is located just behind the oil pan closer to the
passenger (right) side of the vehicle. The oil filter cap faces towards the
driver side of the car. To remove the oil filter cap, you'll need a 64mm oil filter wrench with 14 flats (or "flutes") such as the Assenmacher Tools TOY 640, Toyota SST (Special Service Tool) # 09228-06500-02, or # 09228-06501. |
||
|
|
||
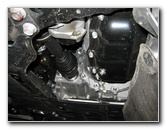
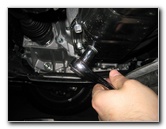
 Attach Oil Filter Wrench |
 Loosen With 24mm Socket |
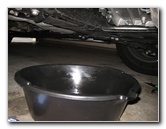 Move Used Oil Basin |
| Slide the used oil
catch container to directly underneath the oil filter cap. Place newspapers
below the basin to keep your garage floor clean. Push the 64mm oil filter wrench on to the filter cap, attach the 24mm or 15/16" socket with ratcheting wrench, and slowly turn it counter clockwise until the filter cap can be removed. (You may need to push the silver metal tab away from the filter cap to allow it to start turning.) The old cartridge oil filter may fall out when you remove the cap. Be sure to remove the old rubber o-ring at the base of the threads on the oil filter cap. |
||
 Cartridge Filter & O-Ring |
 Tighten Oil Filter Cap |
 Replace Service Panel |
| Allow the old oil
to drain from the oil filter receptacle for a few minutes. I recommend buying the genuine OEM Toyota 04152-YZZA6 oil filters since they have excellent reviews on Amazon. Lubricate the new rubber o-ring with some fresh 0W-20 oil and install it on to the base of the threads on the filter cap. Insert the new cartridge oil filter into the oil filter cap and thread it on by hand a few turns in the clockwise direction to prevent it from becoming cross threaded. Re-attach the 64mm oil filter wrench and slowly turn it clockwise with the 24mm socket to tighten the oil filter cap to just past hand tight or about 18 ft lbs of torque.
|
||
 Insert Fastener Outer Piece |
 Push In Center Piece |
 Replace 2nd Fastener |
| Double check that
the oil drain bolt and oil filter cap are tight before continuing on to the
next steps. Replace the black plastic service panel and line up the three holes in the panel with the corresponding holes in the engine under cover. Re-insert the three round black plastic retaining clips by first pushing in the larger outer section and then popping in the smaller inner piece. |
||
 Replace 3rd Fastener |
 Insert Automotive Funnel |
 Pour In New 0W-20 Oil |
| Lower the vehicle
from the jack stands and the floor jack.
Move to the engine bay and insert an automotive funnel into the oil filler hole. Pour in four quarts of new SAE 0W-20 oil into the funnel. The engine's total oil capacity for an oil change with filter replacement is 4.4 US quarts (4.2 L or 3.7 Imperial quarts). It is far easier to add more oil into the engine than to drain some from an over filled engine. You may also not need to pour in the entire 4.4 U.S. quarts depending on how long you allowed the old oil to drain out. |
||
 Pull Out Engine Oil Dipstick |
 Check Oil Level |
 Replace Oil Filler Cap |
| Temporarily replace
the oil filler cap, run the engine for a few minutes, turn it off, and allow
the oil to drain down to the oil pan for a few minutes. Pull out the yellow handled oil level dipstick located near the front left corner of the engine cover. Slowly add in more oil and repeatedly re-check the dipstick until the level is at or near the upper dot indicating that the engine is "Full". If you haven't already, replace the dipstick and twist on the oil filler cap.Be sure to check the oil level on the dipstick several times over the next week and watch your driveway for oil spots that may indicate a leak from the oil drain bolt or filter cap. Record the mileage and oil change details in your service record book. To reset the "Oil Maintenance" reminder message, first turn the car "On". Then set the odometer to "Trip A" and turn the car "Off" by pressing the "Power" button. The last step is to press and hold the "MPH km/h" button before pressing the "Power" button to turn on the car. Keep holding the MPH button until the multi-information display shows that the reset is complete. For more,
check out my other
Toyota Prius DIY Repair & Maintenance Guides. |
||
| If you found this guide to be helpful,
please consider making a small donation by clicking on the PayPal.com
"Donate" button located to the right of this paragraph. Thank you!
(Note: I am not a registered charity. Donations are not tax deductible.) |