
Toyota Prius
Engine Air Filter Replacement Guide
How to clean or replace the engine air
filter element in a 3rd generation 2010-2015 Toyota Prius with the 1.8L I4motor.

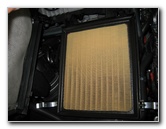
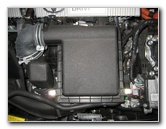
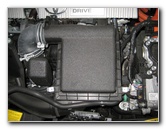 Prius 1.8L Engine Air Box |
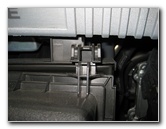
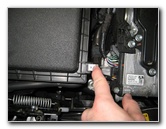 Release Right Metal Latch |
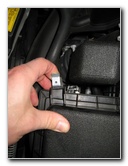
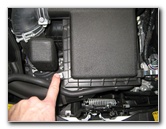 Release Left Side Latch |
| This
automotive "how-to" guide was specifically written to assist owners
of the third generation (2010, 2011, 2012, 2013, 2014 & 2015) Toyota Prius
hybrid hatchback in cleaning or replacing the 1.8L engine's air
filter element. Owners of the previous 2nd generation 2004-2009 Prius and other Toyota, Lexus or Scion vehicles such as the Yaris, Corolla, Matrix, Camry, Sienna, Avalon, Highlander, RAV4, FJ Cruiser, Venza, 4Runner, Sequoia, Tacoma, Tundra, IS250, ES350, tC, FR-S, iQ, xD, and xB may also find these DIY instructions to be helpful. A few compatible aftermarket engine air filters with their part numbers are as follows: Purolator A26114, Fram CA10741, Wix 49320, Pentius PAB10741, MAHLE LX 2870, Ecogard XA6114, K&N 33-2435 and the OEM Toyota 17801-37021. No tools are needed to access the engine air filter. A wet/dry shop vacuum can be useful for cleaning the air box or element. |
||
|
|
||
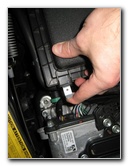
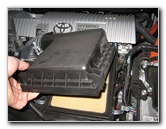 Lift Off Top Half |
 OEM Engine Air Filter |
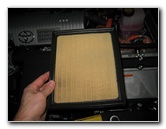 Lift Out Old Air Filter |
| First open the hood
of the vehicle to expose the engine bay. Then move to the center of the
vehicle and locate the square black plastic engine air box. The top half of the air box is held in place by two metal latches with one on the left side and the other on the right side. Release the latches by flipping them outwards away from the air box. Pinch the rubber edge of the air filter and lift it out of the bottom half of the air box. |
||
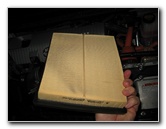 Inspect Underside |
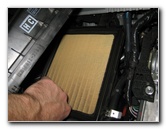 Install New/Cleaned Filter |
 Insert Tabs Into Slots |
|
|
||
| Look at the
underside of the old air filter element. If the old filter is dark grey or
black and clogged with dirt, dust, leaves, insect and other debris, it
should be replaced. I recommend buying the Fram CA10741 since it has excellent reviews on Amazon. If the old filter is relatively clean, just tap out the large debris and vacuum it with the wet/dry shop vac before re-installing it into the bottom half of the air box. Be sure to install the new or cleaned engine air filter with the pleats facing down. |
||
 Close 1st Metal Clasp |
 Secure 2nd Metal Clasp |
 Engine Air Filter Replaced |
| To re-attach the
top half of the air box, first insert the tabs at the rear into the slots on
the bottom half closest to the engine cover. Then swing the top half of the air box closed, raise the metal latches up, and snap them in place to secure the two halves. For more,
check out my other
Toyota Prius DIY Repair & Maintenance Guides. |
||
| If you found this guide to be helpful,
please consider making a small donation by clicking on the PayPal.com
"Donate" button located to the right of this paragraph. Thank you!
(Note: I am not a registered charity. Donations are not tax deductible.) |