
Toyota
Corolla Serpentine Accessory Belt Replacement Guide
How to replace the serpentine (accessory)
belt on a 9th generation 2003-2008 Toyota Corolla with the 1.8L I4 engine.

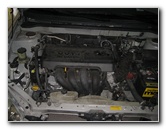 Corolla 1ZZ-FE Engine |
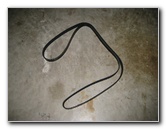
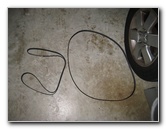
 Gatorback Belt # 4060740 |
 Remove 10mm Nut |
| This
automotive maintenance "how-to" guide was specifically written to
assist owners of the 9th generation 2003 to 2008 Toyota Corolla in
replacing the serpentine or "accessory" belt on the 1.8 liter inline
four cylinder 1ZZ-FE engine. Owners of other vehicles equipped with the 1.8L 1ZZ-FE engine such as the Toyota Celica, Allion, Premio, Vista, WiLL, Caldina, Matrix, Avensis, Opa, Isis, RAV4, Wish, Chevrolet Prizm, Pontiac Vibe, and Lotus Elise may also find these instructions to be helpful. A few compatible new serpentine accessory belts for a 2003-2008 Toyota Corolla equipped with A/C (air conditioning) with their part numbers are as follows: Continental Elite 4060740, Bando 6PK1880, Toyota 90080-91139-83, Drive-Rite V-Ribbed Belt # 740K6, Dayco Poly-Rib Belt # 5060740 and also the Gates K060739. |
||
|
|
||
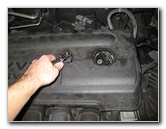 2nd 10mm Nut |
 Remove Plastic Fastener |
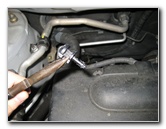 |
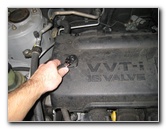
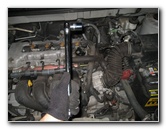
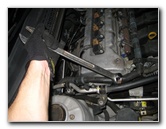
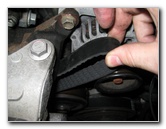
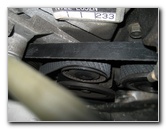
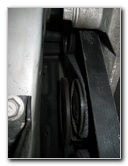
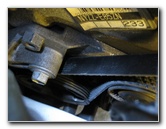
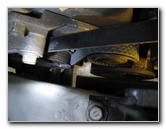
| To complete this
procedure, you'll need the following tools: a 10mm socket with ratcheting
wrench, a pair of needle nose pliers, a 19mm socket with a long handled
socket wrench, and possibly a breaker bar or box wrench. The first step is to allow the engine to cool for a few hours. Do not attempt to replace the accessory belt while the engine is still hot to avoid being burned. Then remove the engine cover by loosening the two 10mm nuts near the front of the engine and pulling out the two black plastic fasteners near the rear. |
||
 2nd Plastic Fastener |
 Lift Off Engine Cover |
 Old Belt On Alternator |
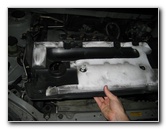
| Once the two plastic clips and the two 10mm nuts are removed, you can lift off the engine cover and put it aside in a safe place. | ||
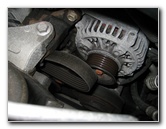
 Fake 19mm Nut On Tensioner |
 Study Belt Routing |
 Belt Tensioner Assembly |
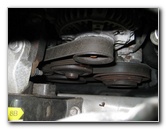
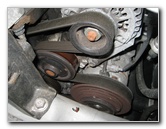
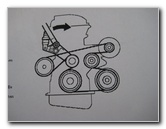
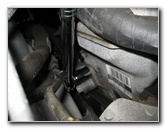
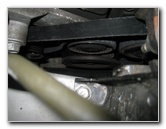
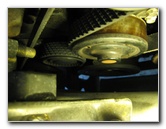
| Study the left side
of the engine for a minute or two to see how the serpentine belt is routed
around the various pulleys.
I'd recommend printing out the accessory belt routing diagram in the picture below to have as a reference. |
||
 Belt Replacement Steps |
 Belt Routing Diagram |
 19mm Socket & 1/2" Handle |
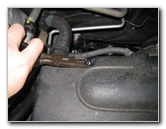
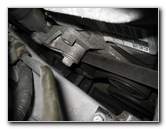
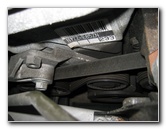
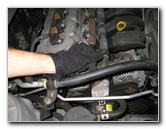
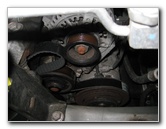
| Attach the 19mm
socket to the long handled socket wrench and locate the belt tensioner
assembly.
Place the socket on to the "fake" nut just above the real nut on the tensioner. For help locating the false tensioner assembly nut, take a look at Picture Number 10 above. |
||
|
|
||
 Socket On Fake Nut |
 Turn Clockwise - Front of Car |
 Slack In Old Belt |
| Carefully turn the long handled wrench clockwise towards the front of the car to relieve the tension on the old belt. | ||
 New Belt Ready |
 Wrench For Extra Leverage |
 Slip Belt Off Alternator |
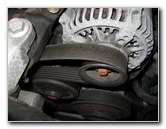
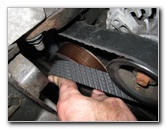
| If you have trouble
getting the tensioner assembly arm to move, place a breaker bar or a box
wrench over the long handled socket wrench.
Once there is enough slack in the old belt, carefully slip it off the alternator pulley at the top front of the engine.
|
||
 Pull Belt Off Pulleys |
 Old Belt Removed |
 |
| After the old belt
is off the alternator pulley, you can easily slip it off the other engine
pulleys and remove it from the engine bay.
I recommend buying the Continental Elite 4060740 belt since it has excellent reviews on Amazon. |
||
 New Belt - Old Belt |
 Wrap New Belt On Pulleys |
 Route Belt Towards Front |
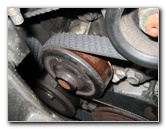
| If the tensioner
pulley doesn't spin freely or makes a noise, replace it with a new one such
as the Gates 38018.
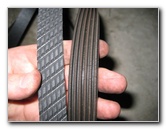
If the old belt seemed loose and the tensioner was very easy to rotate, replace it with the Dorman 419-123 belt tensioner. Place the new belt down on to the left (passenger) side of the engine and wrap the ribbed side around the lowest large pulley near the rear of the engine. Then bring it upwards and wrap the smooth side over the tensioner pulley and continue to the upper pulley at the rear of the engine and wrap the ribbed side over it. |
||
 Belt Over Alternator |
 Pull Tensioner - Belt Over Idler |
 Belt Slipped On Idler Pulley |
| Continue wrapping
the new belt around the other pulleys keeping in mind that the smooth
surface of the belt goes on smooth pulleys and the ribbed side of the belt
goes around ribbed pulleys.
Some people prefer to leave the alternator pulley for last but I found it easier to wrap the belt around the alternator and then leave the smooth idler pulley located just below and behind it for last. The alternator pulley has a raised metal lip that can be difficult to pull the new belt over. |
||
 Checking New Belt Routing |
 Smooth On Smooth |
 Ribbed On Ribbed |
| Once you have the
belt routed properly with just the alternator or idler pulley left
uncovered, rotate the long handled wrench forward to release the tensioner.
Keep a firm grip on the belt to keep it from slipping off the other pulleys. Then carefully slip the belt over the last pulley. Avoid placing your fingers between the new belt and any of the pulleys. |
||
 Double Check Belt Installation |
 Belt Over Tensioner Pulley |
 Belt Replacement Done |
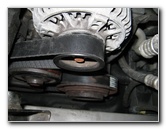
| Check and double
check that the new belt is routed properly over the various pulleys with the
ribbed pulleys against the ribbed side of the belt and the smooth side of
the belt against the smooth pulleys. When you're sure that the new accessory belt is properly installed, you can start the engine and take the car for a test drive to see if everything works well. Be sure to test the air conditioning and listen for any strange sounds. I replaced the belt on this 2005 Toyota Corolla with 93,000 miles on the odometer due to a loud chirping or squeaking sound that had gotten worse over time. The new Gatorback (now known as "Continental Elite") belt, self proclaimed as "The Quiet Belt", lived up to its name and completely silenced the embarrassing chirps and squeaks that the car emitted when started up on a cold morning. For more, check out my other 2003-2008 Toyota Corolla Repair & Maintenance Guides.
If you have a newer model check out my
2009-2013 Toyota Corolla Repair & Maintenance Guides. |
||
| If you found this guide to be helpful,
please consider making a small donation by clicking on the PayPal.com
"Donate" button located to the right of this paragraph. Thank you!
(Note: I am not a registered charity. Donations are not tax deductible.) |