
Toyota
4Runner V6 4.0L 1GR-FE Engine Oil Change Guide
Pictures illustrated guide for how to
change the motor oil in a 2003-2009 Toyota 4Runner with the 4.0L 1GR-FE V6
engine.

| This guide is meant for illustrative purposes only and I assume no responsibility for any damage to your vehicles, persons, pets, or property. If you have any doubts, do not proceed and consult with a professional mechanic. | ||
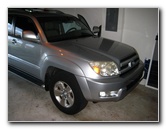 2003 Toyota 4Runner |
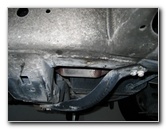 |
 4Runner Jack Point |
| This
automotive "how-to" guide was specifically written to assist owners
of the 4th generation (2003, 2004, 2005, 2006, 2007, 2008 & 2009) Toyota 4Runner SUV equipped with the 1GR-FE V6
4.0 Liter engine in changing the motor oil. Owners of other Toyota vehicles with the 1GR-FE engine may also find this guide to be useful. These vehicles include the 2003-2009 Hilux Surf, 2003-2009 Land Cruiser, 2005 Tacoma, 2005 Tundra, 2005 Fortuner, and 2006-2009 FJ Cruiser. The 1GR-FE 4.0L V6 engine requires 5.2 Liters, 5.5 US quarts or 4.6 Imperial quarts of SAE 5W-30 oil. This vehicle's owner chose Mobil 1 10W-30 to better match the hot South Florida climate. The tools needed to complete this oil change procedure include a 14mm socket with a 3/8" drive ratchet or a 14mm wrench, a car jack, jack stands, an oil filter wrench (Lisle 63600), an oil catch container and an automotive funnel. A few compatible replacement oil filters with their part numbers are as follows: Bosch 3330, Pennzoil HPZ-21, EcoGard S241, Purolator PL10241, Mobil 1 M1-102 and Fram PH3614. |
||
|
|
||
 Two Jack Stands |
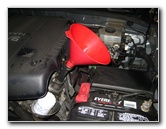
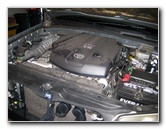 4.0 Liter V6 1GR-FE |
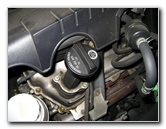
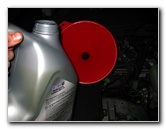
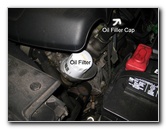 Oil Filter & Oil Filler Cap |
| The old oil will
drain out faster and remove more of the contaminants if you warm up the
engine for a few minutes.
Then the first step is to locate a jack point on the underside of the Toyota 4Runner and raise the SUV a few inches to allow better access to the 14mm oil drain bolt. I secured the vehicle with two jack stands for extra safety. Then remove the oil filler cap, located just behind the oil filter, to allow the old oil to drain out more quickly once you remove the oil drain bolt. |
||
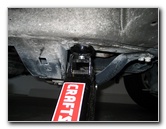
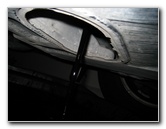
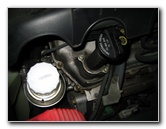
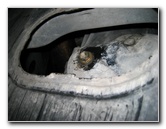 Oil Drain Bolt Access Hole |
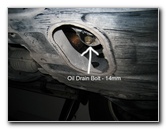 14mm Oil Drain Bolt |
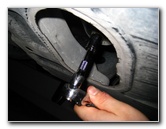 Removing 14mm Bolt |
| The oil drain bolt
is located near the rear of the engine and can be seen through the oval
access hole in the engine's metal skid plate.
Place some newspapers or rags under the oil drain bolt and position the used oil catch container under the oil drain bolt. Remove the bolt with a 14mm socket and 3/8" drive ratcheting wrench by turning it counter clockwise. Inspect the oil drain bolt's washer or "gasket" and replace it if necessary. The part number is Toyota 90430-12031. |
||
 Old Motor Oil Draining |
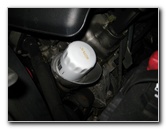 Old Oil Filter |
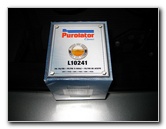 Purolator L10241 |
| If you haven't
already, remove the oil filler cap from inside the engine bay so that the
used oil will drain out more quickly.
Allow the old oil to drain out for at least a few minutes. |
||
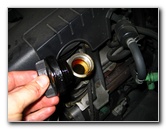
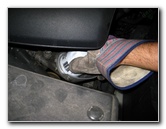 Twist Off Old Filter |
 Open Oil Filler Cap |
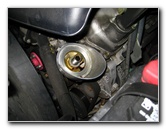 Oil Filter Removed |
| While the old oil
is draining out, move to the engine bay and twist off the old oil filter by
turning it counter clockwise.
If you have trouble turning it, use an oil filter wrench. I recommend the Lisle 63600 oil filter wrench. Be ready with some paper towels or newspaper since a bit of oil will leak out when you remove the old oil filter. There is also a hole in the metal "cup" surrounding the oil filter receptacle, so some oil will leak down into the engine bay and onto the floor. We bought the Purolator L10241 oil filter since it has excellent reviews on Amazon. |
||
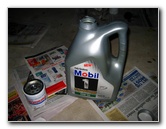 Mobil 1 - 10W30 |
 Lubricate Oil Filter Gasket |
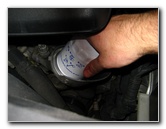 Twist On New Oil Filter |
| Lubricate the
rubber gasket on the new oil filter with a bit of new oil on your fingertip.
This will help it create a better seal and make it easier to remove for the next oil change. Twist on the new oil filter and tighten it down by hand to about 1/4 to 1/3 turn past hand tight. Then re-attach the oil drain bolt with the 14mm socket and tighten it about 1/4 to 1/2 turn past hand tight. Don't over-tighten the oil drain bolt to avoid damaging the threads or oil pan. |
||
 Insert Funnel |
 Fill With Mobil 1 Oil |
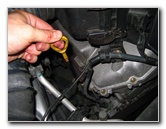 Check Oil Dipstick Level |
| Using an automotive
funnel, pour in about 4 to 4.5 quarts of new oil. Replace the oil filler
cap, run the engine for a minute, let it sit for a few minutes, and check
the level on the dipstick.
Add more oil until the level on the dipstick reaches the upper "Full" mark. The 1GR-FE 4.0L V6 engine officially requires 5.5 US quarts for an oil change with a new filter. We poured in the entire 5 US quart bottle of Mobil 1 SAE 10W-30 and the level reached the full mark. If we had let the engine drain out for longer, we may have needed to add that extra half (.5) quart. It's a good idea to check the oil level again over the next few days and check for leaks on your garage or driveway floor. |
||
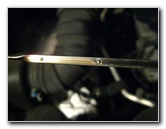 Add Oil To Full Mark |
 Replace Oil Filler Cap |
 Oil Change Complete |
| To reset the
"Maintenance Required" or "Oil Change Reminder" indicator light follow these
steps: 1. Turn the ignition key to "Off" with the odometer reading showing,
2. Turn the ignition key to "ON" while holding down the trip meter reset
button. 3. Keep holding the button until the light goes off. It will flash a
few times before going off. The light turns on every 5,000 miles. |
||
| Check out all of my
2003-2009 Toyota 4Runner DIY Repair & Maintenance Guides.
For more of my
related photo galleries, click on the following links:
Toyota Front Brake Pads Replacement Guide,
Meguiar's Headlight Buffing Kit Review,
Zaino Show Car Polish Review,
WeatherTech FloorLiner Review,
Toyota Cabin Air Filter Guide,
Corroded Car Battery Terminal Replacement Guide,
Garmin Nuvi 260W GPS Review,
Toyota Corolla Oil Change Guide, and the
K&N Air Filter Cleaning Guide. |
||
| If you found this guide to be helpful,
please consider making a small donation by clicking on the PayPal.com
"Donate" button located to the right of this paragraph. Thank you!
(Note: I am not a registered charity. Donations are not tax deductible.) |