
SJCAM SJ4000
Action Camera Lens Replacement Guide
How to take apart the SJCAM SJ4000 action
camera, remove a scratched lens and install a new GoPro Hero2 lens.

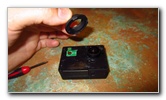
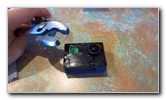
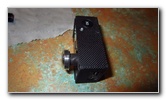
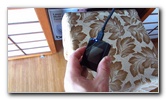
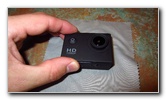
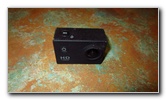 SJCAM SJ4000 Action Cam |
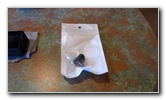
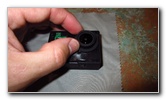
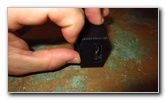 Gently Pull Off Front Plate |
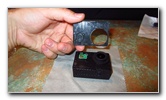
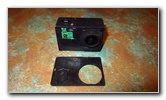 Front Cover Removed |
| I attached
my SJCAM SJ4000 action camera to a Redcat Racing Volcano EPX R/C
(remote control) truck with several large strips of packing tape to
record some fun bashing. After many flips, rolls and crashes, the camera flew off and hit a rock. The plastic lens sustained some minor scratches that were barley noticeable in the videos. But I decided to replace the OEM lens with a new one since they are readily available on Amazon or eBay for anywhere from $10 to $15. The correct lens to purchase is a 170 degree wide angle 2.5mm lens with an M12 thread. They are most commonly marketed as being compatible with the GoPro HERO1 or HERO2 action cameras. I bought the Techno Earth® 2.5mm Lens. The only tools needed to complete this lens change procedure are a small flathead screwdriver and a pair of pliers. |
||
|
|
||
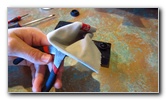
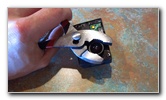
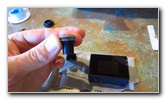
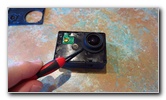 Pry Off Plastic Ring |
 Plastic Ring Around Lens |
 Pair of Pliers |
| The first step is
to gently pry off the plastic face plate on the front of the
SJ4000 camera. You can use your fingernail to lift up a corner or carefully use a small flathead screwdriver. Once you have the cover popped off, set it aside in a safe place. Then gently pry up the plastic ring that surrounds the lens with the small flathead screwdriver. You may have to re-insert the screwdriver in several locations around the plastic ring to remove it. |
||
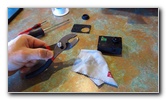
 Optional - Micro Fiber Cloth |
 Rotate Old Lens Clockwise |
 Glue Seal On Threads Broken |
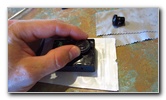
| An optional step is
to wrap your pair of pliers with a thin micro fiber cloth to protect the old
lens if you plan on re-using it in the future. Very carefully grip the old lens with the pliers and slowly rotate it a fraction of a turn in the clockwise direction. By rotating the lens a tiny bit in the clockwise (tighten) direction, you will break the glue seal that was used at the factory to keep the lens from vibrating out of focus. Once you feel or hear the glue seal "crack" or "snap" loose, you can release the pliers. |
||
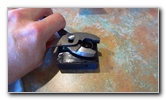
 Loosen Lens Counterclockwise |
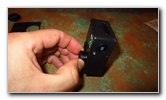 Spin Out Old Lens CC |
 Old Lens Removed |
| The next step is to
begin turning the lens in the counterclockwise (loosen) direction.
You may need to use the pliers at first but then the lens should be loosen enough to turn by hand. Continue turning the lens in the counterclockwise direction until it can be removed from the front of the camera. Be sure to keep the camera faced down on a clean and lint-free micro fiber cloth or other similar surface. Try to avoid getting any dust or other debris in to the lens opening on the camera since it may settle on the CMOS image sensor and affect the image quality. |
||
|
|
||
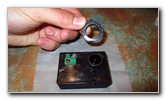
 New "Techno Earth" Lens |
 M12 Threads On New Lens |
 Clean Glue Around Opening |
| If there is any
leftover glue on the front of the camera, carefully remove it with your
fingers or some tweezers. Keep the front of the camera facing down so that the loose glue doesn't fall down on to the sensor. The lens that I bought and recommend is the Techno Earth® 2.5mm Wide Angle 170 Degree Lens for the GoPro Hero 2. |
||
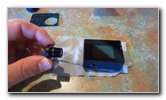
 Screw In New Lens |
 Turn Clockwise - Tighten |
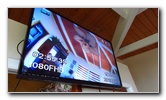
 Attach Micro HDMI Cable |
| An optional step is
to apply a small amount of glue or teflon ("plumber's") tape to the threads
of the new lens. Using glue or Teflon tape may help prevent the lens from vibrating out of focus if you are using the camera on a motorcycle, R/C quadcopter (drone) such as the DJI Phantom, go-kart, or in a race car. Attach a micro HDMI cable to the video out port on the camera and connect it to a big screen TV or a large computer monitor. |
||
 Screw Lens In & Out |
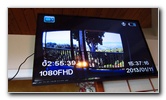 Adjust Lens Focus |
 Line Up Plastic Lens Ring |
| Spend a few minutes
slowly turning the lens clockwise and counterclockwise to find the optimal
focus point. Double check that the lens has been properly focused by pointing it at both near by objects (such as your face) in a well lit room and at objects about 50, 100 or 150 feet away. Once you are satisfied that the focus is as sharp as possible, carefully pop on the plastic ring over the lens. |
||
 Pop Plastic Ring In Place |
 Line Up Front Plastic Cover |
 Snap On Plastic Face Plate |
| Then line up the
plastic front face plate and gently snap the cover in place over the SJ4000
camera. Enjoy your new lens and crystal clear videos from your repaired SJCAM SJ4000 action camera! Be sure to check out my
Home Repair Guides
and Automotive Repair Guides. |
||
| If you found this guide to be helpful,
please consider making a small donation by clicking on the PayPal.com
"Donate" button located to the right of this paragraph. Thank you!
(Note: I am not a registered charity. Donations are not tax deductible.) |