
R/C Brushless
Motor Bearings Replacement Guide
How to change the ball bearings in an
electric brushless motor for a radio control car, truck, plane, helicopter or
boat.

By Paul B. Michaels Author & Photographer Auto Mechanic Since 1989 |
||
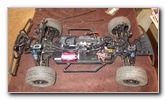
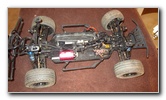 Losi TEN-SCTE RTR |
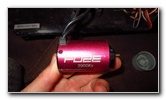
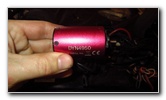
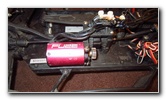 Dynamite Fuze DYN4950 |
 Fast Eddy New Bearings |
| This DIY
repair tutorial was specifically written to assist owners of the
Losi TEN-SCTE Troy Lee Edition RTR (ready-to-run) radio control
short course 4WD truck in replacing broken or worn out ball bearings
in the Dynamite Fuze DYN4950 3900kv 4 pole 540 size brushless electric
motor. After 1000's of laps at an indoor clay track, the front ball bearing in my brushless motor failed and literally exploded. I asked the staff member at the R/C shop for a compatible new bearing, but he wanted to sell me a new $100 motor. I contacted Dynamite R/C (owned by Horizon Hobby) and they told me that the bearing size is 5x13x4mm (5mm by 13mm by 4mm) for the DYN4950 motor. To complete this procedure, you'll need a set of hex drivers. |
||
|
|
||
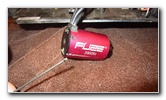
 Loosen Motor Mount Bolt |
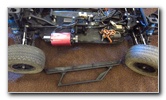 Remove Side Bumper Rail |
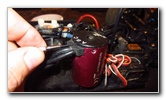
 Pull Out Brushless Motor |
| Some symptoms of an
electric brushless motor that needs new bearings include excessive heat
build up, an abnormally hot ESC (electronic speed control), ESC thermal
shutdown, shortened run times, hot LiPo batteries and/or reduced top speed. The first step is to remove the brushless electric motor from the vehicle. For the Losi TEN-SCTE, you'll also need to remove the side bumper bar or "rail". I recommend using the Bondhus hex screwdrivers since they have a lifetime warranty and excellent reviews on Amazon. Then loosen the hex bolt on the motor mount. Slide the brushless motor out of the mount. |
||
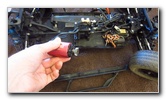
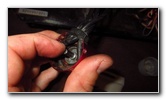
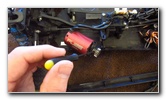 Loosen Pinion Gear |
 Loosen Base Cover Screws |
 Base Cap Screws |
| Loosen the small
screws on the rear cover the brushless motor with a hex driver.
Set the small screws aside in a safe place such as a plastic container. |
||
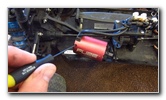
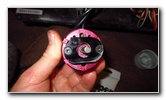
 Pry Off Rear Cover |
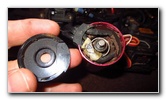 Rear Cap Removed |
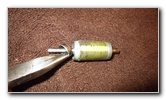
 Pull Out Rotor (Magnets) |
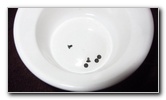
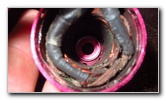
| Gently pry off the
rear cover with a small flathead screwdriver. Use a pair of needle nose pliers to pull out the rotor (part in the middle of the motor that spins). Slide the remaining parts of the old ball bearing off the rotor. Remove any remaining parts of the broken ball bearing from inside the motor housing. |
||
|
|
||
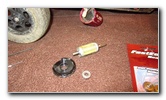
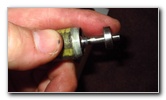
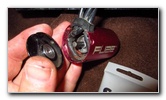
 Pull Off Broken Bearing |
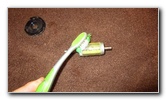 Brush Rotor Clean |
 Slide On New Bearing |
| Use a soft bristle
brush such as a toothbrush to clean off any debris from the rotor and the
stator (copper windings inside of the motor housing). Make sure that the motor shaft is clean. The correct replacement ball bearing size for the Dynamite Fuze DYN4950 540 size brushless motor is 5x13x4mm. Slide the new ball bearing on to the front shaft where the pinion gear is usually attached. |
||
 Stator (Copper Wires) |
 Replace Rotor - Install Bearing |
 Rotor In Housing |
| Carefully insert
the rotor into the motor housing. Push on the rotor to carefully seat the new ball bearing into the mount in the front of the motor. If you prefer, you could use a pair of long needle nose pliers to place the new bearing into the front of the motor. To check to see if the new front ball bearing is securely installed in its mount, you can pull out the rotor and look inside. |
||
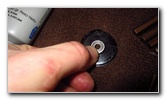 Pop In Rear Ball Bearing |
 Line Up Rear Cover |
 Pop Cover In Place |
| Snap the new rear
ball bearing into the plastic rear cover of the motor. Line up the rear cover and push it back into place. |
||
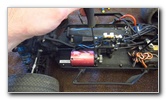
 Replace Tiny Hex Screws |
 Motor Re-Assembled |
 Replace Motor On Car |
| Replace the small
hex screws by turning them in the clockwise direction until they are snug. Secure the pinion gear to the motor shaft. Re-install the motor into the vehicle. To prevent the motor mount screws from vibrating loose, use a small amount of blue medium Loctite threadlocker. Carefully test the new ball bearings by operating the brushless motor at a slow speed at first. Monitor the outside temperate of the motor's "can". If the motor feels abnormally hot, the new bearings may not be spinning easily.
|
||
| If you found this guide to be helpful,
please consider making a small donation by clicking on the PayPal.com
"Donate" button located to the right of this paragraph. Thank you!
(Note: I am not a registered charity. Donations are not tax deductible.) |