
Nissan Murano
Tail Light Bulbs Replacement Guide
How to change a burnt out turn signal,
side marker & reverse bulb in a 2nd generation 2009-2014 Nissan Murano.

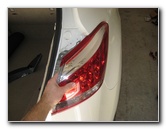
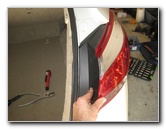
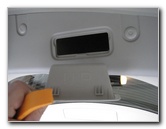
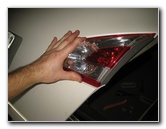
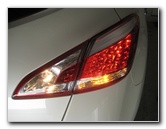
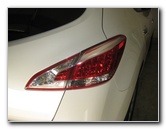 2014 Murano Tail Light |
 Open Tailgate Door |
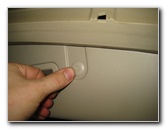
 Pry Off Plastic Cover |
| This
automotive maintenance tutorial was specifically written to assist
owners of the second generation (2009, 2010, 2011, 2012, 2013 &
2014) Nissan Murano SUV in changing a burnt out rear turn signal,
side marker or reverse bulb in the tail light assemblies. Owners of other Nissan or Infiniti vehicles such as the Versa, Maxima, Juke, Rogue, Altima, Xterra, Pathfinder, Sentra, Cube, Armada, Leaf, Quest, Frontier, Teana, 370Z, GT-R, Titan, G25, G37, M35, QX56, QX60 and M37 may also find these DIY instructions to be helpful. The replacement part numbers for the tail light bulbs are as follows: Brake LED (should last life time of vehicle), Rear Turn Signal # WY21W (also 7440NA or 992), Side Marker # 2825 (also 168 or W5W) and Reverse # 921 or W16W. The tools needed to replace the tail light bulbs include a plastic automotive panel removal pry bar tool, a small flathead screwdriver, a 10mm socket and a 1/4" drive ratchet. |
||
|
|
||
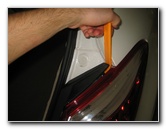
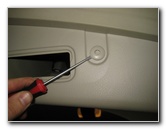
 Re-Insert Plastic Tool |
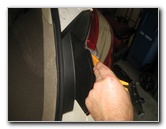
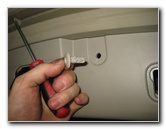
 Trim Panel Removed |
 Two Bolts Exposed |
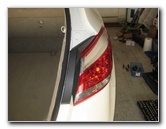
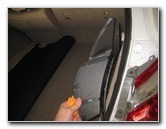
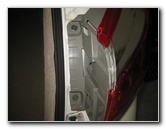
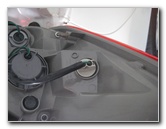
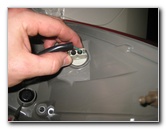
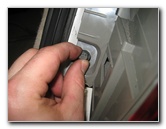
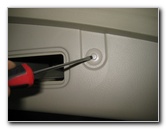
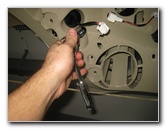
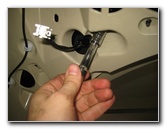
| The first two steps
are to open the tailgate door and then move to the side of the SUV with the
burnt out bulb. Gently pry off the black plastic trim cover on the inner edge of the tail light housing with an automotive panel removal tool. You may need to re-insert the plastic pry bar at a few locations to remove the trim panel. Try to avoid using excessive force to prevent from breaking the plastic. It should pop off relatively easily. |
||
 Loosen Counterclockwise |
 Loosen 2nd 10mm Bolt |
 Two 10mm Bolts Removed |
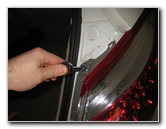
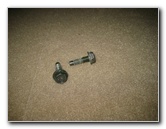
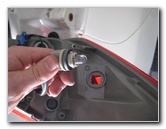
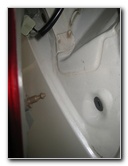
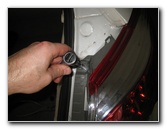
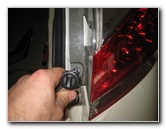
| Loosen the two
bolts on the inner edge of the tail light housing by turning them
counterclockwise with the 10mm socket and 1/4" drive ratcheting wrench. Set the two bolts aside in a safe place. |
||
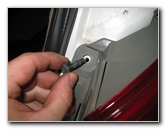
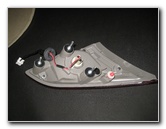
 Gently Pull Out To Right |
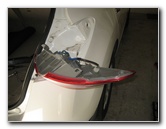 Housing Removed |
 First Metal Spike Fastener |
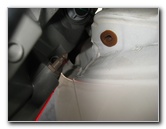
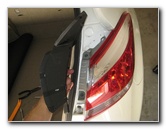
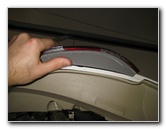
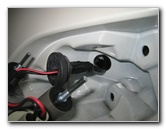
| The tail light
assembly is still held in place to the rear of the vehicle by two metal pegs
or "spikes" inserted in to plastic grommets on the outer edge of the car. Gently pull the tail light housing towards the outside of the vehicle to disengage the two pegs that are mounted perpendicular to the vehicle (pointing towards the other side of the vehicle). For example, on the passenger side tail light housing, the two pegs point in towards the cargo area. Turn over the tail light housing to access the bulb sockets. |
||
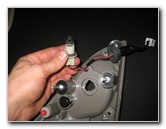
 2nd Metal Peg On Side |
 1/4 Turn Counterclockwise |
 Turn Signal Bulb Socket |
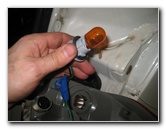
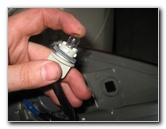
| Rotate the grey Rear Turn Signal bulb socket 1/4 turn counterclockwise before pulling it straight out of the housing. | ||
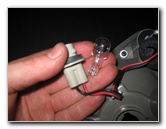
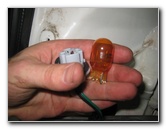 Pull Out Old Bulb |
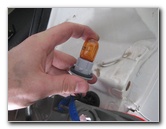 Push In New WY21W |
 1/4 Turn Clockwise - Lock |
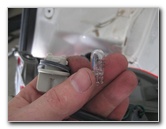
| Pull the old bulb
straight out of the socket and push in a new amber colored #
7440NA,
7440A or
WY21W bulb. Re-insert the bulb socket in to the housing and rotate it 1/4 turn clockwise to secure it in place. |
||
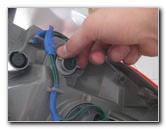
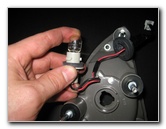
 Side Marker Bulb Socket |
 1/4 Turn Counterclockwise |
 Pull Out Old W5W Bulb |
| Rotate the smaller
grey plastic Rear Side Marker bulb socket 1/4 turn counterclockwise
and remove it from the housing. Pull the old bulb straight out of the socket. |
||
 Push In New W5W or 168 |
 1/4 Turn Clockwise - Lock |
 Line Up Two Metal Pegs |
| Push a new
miniature wedge base bulb such as the #
2825 168, W5W or
194 straight in to the
socket. Re-insert the socket in to the housing and rotate it 1/4 turn clockwise to secure it in place. Line up the two metal pegs on the back side of the tail light housing with their corresponding plastic grommets on the rear corner of the vehicle. |
||
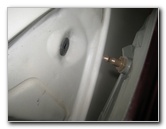
 Plastic Grommet & Metal Peg |
 Spin In Upper 10mm Bolt |
 Replace Lower 10mm Bolt |
| Gently push the
tail light housing back in to place. Spin in the two 10mm bolts a few turns in the clockwise direction by hand to prevent them from becoming cross threaded. |
||
 Tighten 10mm Clockwise |
 Tighten Lower 10mm Bolt |
 Line Up Plastic Cover |
| Tighten the two
bolts by turning them clockwise with the 10mm socket and 1/4" drive
ratcheting wrench until they are snug. Try to avoid over tightening the two bolts to prevent from cracking the plastic inner edge of the housing. Line up the plastic trim panel over the inner edge of the housing. |
||
 Pop Trim Panel In Place |
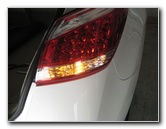 Test New Turn Signal |
 Reverse In Tailgate Door |
| Gently pop the trim
cover back in to place. Test the new rear turn signal and side marker bulbs by activating the hazard signals and turning on the headlights. The reverse or "back up" lamp is located in a separate housing attached to the tailgate door. |
||
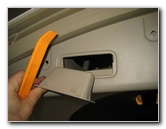
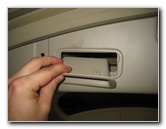
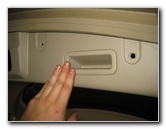
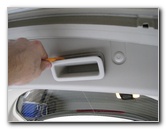 Pry Out Plastic Handles |
 Plastic Handle Removed |
 Push In Center of Fastener |
| To access the
reverse bulb socket, you'll need to remove the plastic panel that covers the
interior side of the tailgate door. Gently pry out the two handles with a plastic automotive panel removal tool. Set the handles aside in a safe place. Gently push in the round center piece of the four plastic fasteners along the bottom edge of the panel. |
||
|
|
||
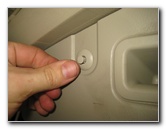
 Pry Out Base of Fastener |
 Remove Plastic Fastener |
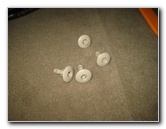 4 Fasteners Removed |
| Pry out the base of
each fastener to remove them. Set the four fasteners aside in a safe place. Gently pull off the tailgate panel to disengage the pop rivet friction fasteners. |
||
 Pry Out 2nd Plastic Handle |
 Disconnect Cargo Lights |
 Tailgate Panel Removed |
| Disconnect the
power plugs for both of the cargo area lights. Set the tailgate door plastic panel aside in a safe place. |
||
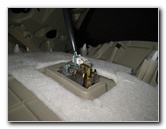
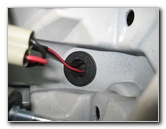
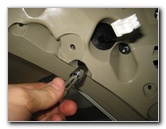
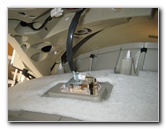
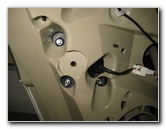 3 Recessed 10mm Nuts |
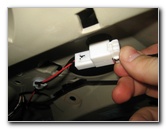
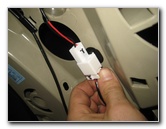 Press Release Tab |
 Disconnect Power Plug |
| The reverse bulb
housing is held in place three 10mm nuts that are recessed in to the
underside of the tailgate door. Press the release tab on the white plastic electrical connector before sliding the plug out of its socket. |
||
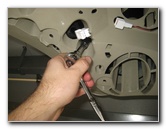
 Deep Well 10mm Socket |
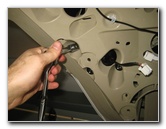 Loosen Counterclockwise |
 Loosen 2nd 10mm Nut |
| Use a deep well 10mm socket with an extension bar and ratcheting wrench to loosen the three nuts in the counterclockwise direction. | ||
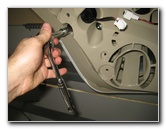
 Loosen 3rd 10mm Nut |
 Spin Out 3 Nuts |
 Three 10mm Nuts Removed |
| Spin out the three 10mm nuts and set them aside in a safe place. | ||
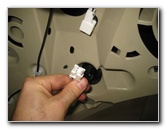
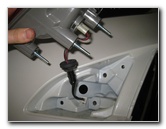
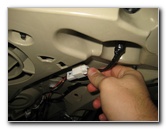
 Pull Off Reverse Bulb Housing |
 Pop Out Rubber Grommet |
 Tail Light Housing Removed |
| Carefully pull the
reverse light housing straight off the tailgate door. Pull out the rubber grommet and power plug through the hole if you'd like to entirely separate the housing from the car. You can leave the power plug connected if you'd just like to quickly change the reverse bulb. |
||
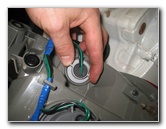
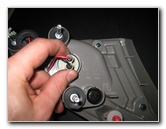
 1/4 Turn Counterclockwise |
 Pull Out Old 921 Bulb |
 Push In New W16W Bulb |
| Rotate the reverse
bulb socket 1/4 turn counterclockwise and pull it straight out of the
housing. Pull the old bulb straight out of the socket and push in a new # 921 or W16W bulb. |
||
 1/4 Turn Clockwise - Lock |
 Line Up Three Bolt Ends |
 Re-Insert Rubber Grommet |
| Re-insert the
socket in to the housing and rotate it 1/4 turn clockwise to secure it in
place. Re-insert the power plug through the hole and push in the rubber grommet. Line up the three bolt ends on the back side of the housing with their corresponding holes on the tailgate door. |
||
 Push On Light Housing |
 Spin On Three 10mm Nuts |
 Tighten Clockwise |
| Push the housing
straight on to the tailgate door. Spin on the three 10mm nuts by hand in the clockwise direction. Then tighten the three 10mm nuts with the ratcheting wrench until they are snug. Try to avoid over tightening the nuts to prevent from cracking the plastic light housing. |
||
 Tighten Three 10mm Nuts |
 Push In Power Plug |
 Electrical Connector Replaced |
| Push the power plug back in to its socket. | ||
 Cargo Lights - Power Plugs |
 Line Up Plastic Handles |
 Pop In Plastic Handles |
| Push in the power
plugs for the two cargo area lights. Line up the pop rivets on the back side of the plastic tailgate panel and push them back in to place. Re-insert the two plastic handles. |
||
 Re-Insert Four Fasteners |
 Pop In Center Piece |
 Test New Reverse Bulb |
| Make sure that the
round center part of each fastener is up before pushing them back in to
place. Push in the center piece of the four fasteners to secure them in place. Test the new bulb by having someone step on the brake pedal and place the transmission in reverse. For more,
check out my other
2009-2014 Nissan Murano DIY Repair & Maintenance Guides. |
||
| If you found this guide to be helpful,
please consider making a small donation by clicking on the PayPal.com
"Donate" button located to the right of this paragraph. Thank you!
(Note: I am not a registered charity. Donations are not tax deductible.) |