
Nissan Juke
A/C Cabin Air Filter Replacement Guide
How to clean or change the HVAC cabin air
filter element in a 1st generation 2010 to 2016 Nissan Juke with photos.

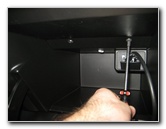
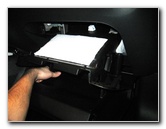
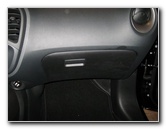
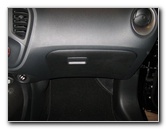 2014 Juke Glove Box |
 Open Glove Box - Empty |
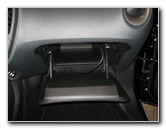
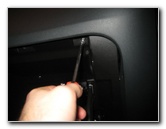
 Push Off Plastic Damper Arm |
| This
automotive maintenance tutorial was specifically written to assist
owners of the first generation (2010, 2011, 2012, 2013, 2014, 2015 &
2016) Nissan Juke in cleaning or changing
the A/C cabin air filter element in the HVAC blower motor housing. Owners of other Nissan vehicles such as the Versa, Sentra, Altima, Maxima, Cube, Leaf, Pathfinder, 370Z, Rogue, Xterra, Murano, Armada, Quest, Frontier and Titan may also find these DIY instructions to be helpful. Here are a few compatible replacement aftermarket cabin air filters with their part numbers : TYC 800138P, Fram CF11177, Denso 453-6031, Wix # 24012, ATP RA-136, OEM CAF268P, Beck Arnley 042-2187, Hastings AFC1534 and Pentius PHBT9052. The only tool needed to access the cabin air filter is a standard Phillips head screwdriver. |
||
|
|
||
 Damper Arm Removed |
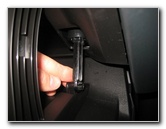
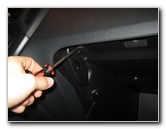
 Remove Phillips Head Screws |
 Inner Phillips Screws |
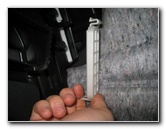
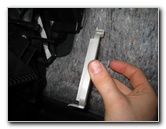
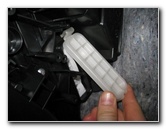
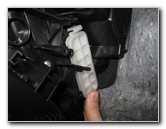
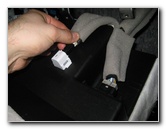
| The first two steps
are to open the glove box and them empty out the contents. (I'm not sure if the next step is necessary, but it has become a habit of mine when replacing cabin air filters.) I popped off the plastic damper arm on the right side of the glove box. Since you will be removing the entire glove box assembly from the dashboard, that step can probably be skipped. On most cars, the procedure is to pop off the plastic damper arm, push in the two side walls and lower the glove box. To access the cabin air filter on the Juke and other Nissan models, the glove box screws will have to be removed. Remove the two screws near the back of the glove box by turning them counterclockwise with the Phillips head screwdriver. |
||
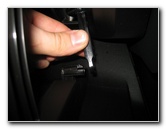
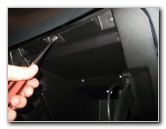
 Remove Top Outer Screws |
 |
 |
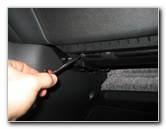
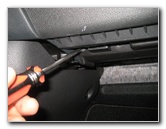
| Then remove the three Phillips screws along the top outer edge of the glove box. | ||
 |
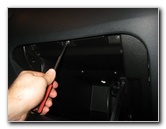
 Remove Lower Screws |
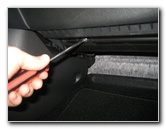 |
| Move to the bottom edge of the glove box and remove the four Phillips head screws by turning them counterclockwise. | ||
 |
 Pull Out Glove Box |
 Light & iPod Cable |
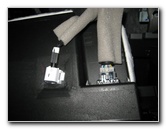
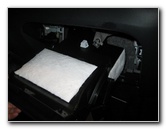
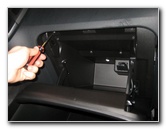
| Once all 9 screws have been removed, you can pull the glove box out of the dashboard. | ||
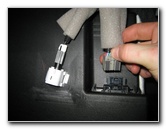 Press Release Tab |
 Disconnect Power Plug |
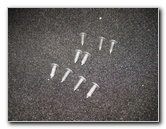 9 Screws Removed |
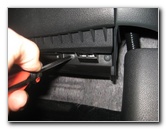
| Press the release
tabs on the electrical connectors for the iPod hook up and the glove box
light before pulling out their plugs. Set the glove box aside in a safe place along with the 9 screws. |
||
|
|
||
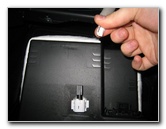
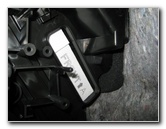
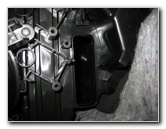
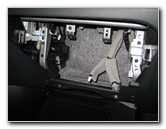 Glove Box Removed |
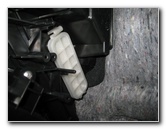 White Plastic Filter Cover |
 Pull Out Bottom Clip |
| With the glove box
out of the way, you'll be able to see the rectangular white plastic filter
access panel on the left side of the passenger foot well. Gently pull down the retaining clip at the bottom edge of the filter access cover and swing it open. |
||
 Remove Filter Access Panel |
 Old Filter Exposed |
 Pull Out Old Filter |
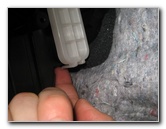
| Remove the plastic
hook at the top of the filter cover. Set the filter cover aside in a safe place. Pinch together the top and bottom of the old filter and pull it out of the slot in the HVAC blower motor housing. |
||
 Squeeze Together & Remove |
 Old Cabin Filter Removed |
 Filter Slot In Blower Housing |
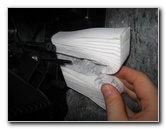
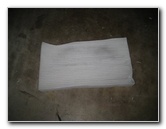
| If the old filter
is relatively clean, just tap out the large debris and remove any fine dust
with a vacuum. If the old filter is dark grey or black and clogged with dirt, dust, insects, leaves, twigs, hair and pollen, it should be replaced with a new element. I recommend buying the TYC 800138P cabin air filter since it has excellent reviews on Amazon. |
||
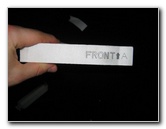 "Front" Air Flow Arrow |
 Compress Filter & Insert |
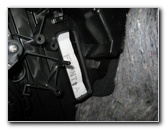 New Filter Installed In Slot |
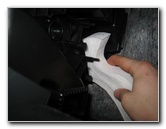
| Line up the "Front"
air flow arrow on the new filter so that it points in the correct direction
towards the front of the vehicle. Compress the new filter so that it will fit in to the small slot and insert it in to the blower motor housing. |
||
 Line Up Filter Cover |
 Re-Insert Hook On Top |
 Snap On Retaining Clip |
| Re-insert the hook
at the top of the filter access cover and then swing the cover closed
towards the bottom. Push on the bottom of the filter cover to snap in the retaining clip. |
||
 Raise Glove Box |
 Push In Electrical Plugs |
 Replace Phillips Screws |
| Raise the glove box
towards the dashboard. Push in the electrical connectors for the iPod cable and the glove box light. Replace the glove box and tighten the two Phillips head screws at the rear of the box by turning them clockwise. |
||
 Tighten Screws Clockwise |
 9 Screws Replaced |
 Close Glove Box |
| Then replace the
three Phillips head screws along the top edge of the glove box. If you removed the glove box damper arm, pop it back in place on its mounting peg. Replace the contents of the glove box. Close the glove box and replace the four screws at the bottom edge by turning them clockwise with the Phillips head screwdriver. For more,
check out my other
Nissan Juke DIY Repair Guides. |
||
| If you found this guide to be helpful,
please consider making a small donation by clicking on the PayPal.com
"Donate" button located to the right of this paragraph. Thank you!
(Note: I am not a registered charity. Donations are not tax deductible.) |