
Nissan Cube
Tail Light Bulbs Replacement Guide
How to replace the brake, turn signal and
reverse bulbs in the tail light assembly of a 2009-2014 Nissan Cube MPV.

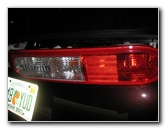
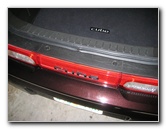
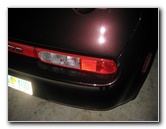 Nissan Cube Tail Lights |
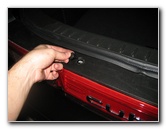
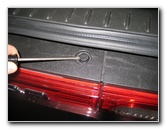 Pry Out Pop Rivets |
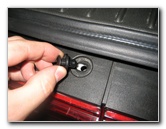
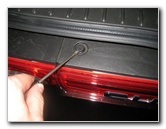 Remove 2nd Pop Rivet |
| This
automotive "how-to" guide was specifically written to assist owners
of the 3rd generation 2009, 2010, 2011, 2012, 2013 & 2014 Nissan Cube in replacing the
brake, reverse and rear turn signal bulbs in the tail light
assembly. Owners of earlier 1998-2002 or 2002-2008 Nissan Cube vehicles or other Nissan models such as the Versa, Sentra, Altima, Maxima, Juke, Rogue and Murano may also find this guide to be helpful. The tail light assembly of a 09-14 Nissan Cube contains the following light bulbs with their respective part numbers: brake (stop) # 7443, reverse (back up) # 921 and rear turn signal (parking) light # 7507. To replace any of the tail light bulbs requires a small flathead screwdriver and a 10mm socket with a 1/4" drive ratchet. |
||
|
|
||
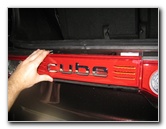
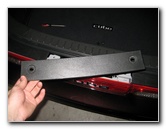 Lift Off Trim Panel |
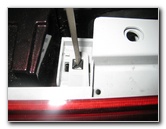
 Center Piece Fastener |
 Align Square With Hole |
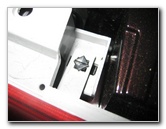
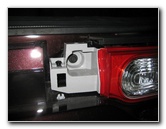
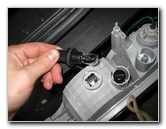
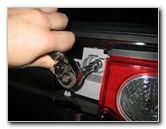
| The first step is
to open the rear cargo door of your Nissan Cube and locate the two pop
rivets on the top of the middle trim piece above the "CUBE" letters.
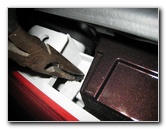
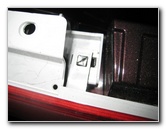
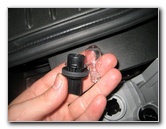
Pry out the two black plastic pop rivets with a small flathead screwdriver. Underneath that black plastic top cover, you'll see two black plastic square flathead screw heads that hold the red reflective center piece with "cube" written on it in place. Gently turn each of the square screw heads until they align with the square holes in the white plastic and lift up the center piece. |
||
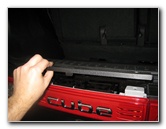
 Release Other Fastener |
 Lift Out Center Piece |
 10 MM Tail Light Bolt |
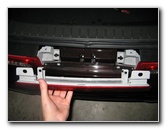
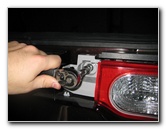
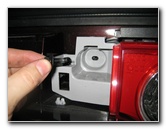
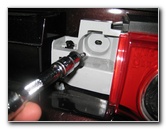
| Behind the center
"cube" trim piece there is one 10 MM bolt that holds each tail light in
place.
Remove the 10mm bolt with a socket and then gently pull the tail light assembly off the car. Besides the 10mm bolt, the tail light assembly is also held in place by a two "spikes" that act as friction fasteners. |
||
 Remove 10mm Bolt |
 |
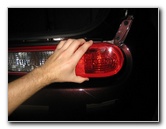
 Pry Out Tail Light Assembly |
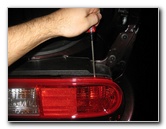
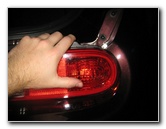
| Use the small
flathead screwdriver to gently pry out the side of the tail light assembly
closest to the outer edge of the vehicle.
Keep your other hand on the tail light to prevent it from falling down on to the bumper and damaging the paint. |
||
 Pull Off Tail Light |
 |
 |
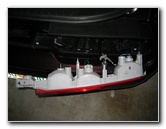
| Turn the tail light
assembly upside down and rest it on the bumper.
Use a towel or shop rag between the tail light and the bumper to prevent scratches. |
||
|
|
||
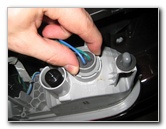 1/4 Turn Counter Clockwise |
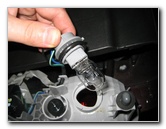 Brake Light Bulb |
 Part # 7443 Light bulb |
| The brake light
bulb or "stop lamp" is located closest to the outer edge of the vehicle.
Remove it by rotating the light bulb socket 1/4 turn counter clockwise and pull it straight out of the tail light assembly. Remove the old # 7443 brake light bulb from the socket by pulling it straight out. If you have trouble removing it, try gently wiggling the bulb while you pull it out. Push in a new # 7443 bulb straight into the socket, insert the bulb into the tail light assembly, and rotate the socket 1/4 turn clockwise to secure it in place. |
||
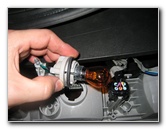 1/4 Turn Counter Clockwise |
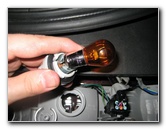 Push Down & 1/4 Turn CC |
 # 7507 Turn Signal Bulb |
| The turn signal
/ parking light bulb is located at the center of the tail light
assembly.
Remove it by rotating the socket 1/4 turn counter clockwise and pulling it straight out. To remove the bulb from the socket, push down and rotate the bulb 1/4 turn counter clockwise. Insert a new # 7507 amber colored turn signal bulb and rotate it 1/4 turn clockwise to secure it in the socket. Install the bulb and socket into the tail light assembly and rotate it 1/4 turn clockwise to lock it in place. |
||
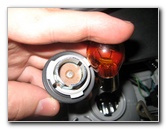
 1/4 Turn Counter Clockwise |
 Pull Out # 921 Reverse Bulb |
 Push Tail Light In Place |
| The reverse /
"back-up" light bulb is located closest to the center line of the
vehicle.
Rotate the light bulb socket 1/4 turn counter clockwise, remove it from the tail light assembly and pull the bulb straight out from the socket. Push in a new # 921 reverse light bulb into the socket, insert the bulb into the tail light assembly, and rotate it 1/4 turn clockwise to secure it in place. If you would like to have brighter reverse lights, install some compatible 921 LED bulbs. |
||
 Replace 10mm Bolt |
 Tighten With Socket & Wrench |
 Replace "Cube" Center Trim |
| After you've
installed the new light bulbs, line up the two "spikes" on the rear of the
tail light assembly with the corresponding holes on the rear of the vehicle.
Push the tail light assembly against the car until it rests flush with the body. Insert the one 10 mm bolt and tighten it with a socket and ratcheting wrench. |
||
 Turn Square Fasteners |
 Replace Top Trim Panel |
 Push In 2 Pop Rivets |
| Replace the center
piece that has "cube" written on it and turn the two square black plastic
screw heads with the flathead screwdriver until they can be passed through
the square holes. Replace the black plastic top cover on the "cube" trim piece and insert the two black plastic pop rivets to secure it in place. |
||
 |
 |
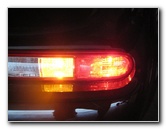 Test New Light Bulb(s) |
| Test the new tail
light bulbs by turning on the headlights, activating the hazard signals and
having someone put the car into reverse while pressing on the brake pedal. For more, please visit my
Nissan Cube Maintenance & Repair Guides page. |
||
| If you found this guide to be helpful,
please consider making a small donation by clicking on the PayPal.com
"Donate" button located to the right of this paragraph. Thank you!
(Note: I am not a registered charity. Donations are not tax deductible.) |