
Nissan Cube
Overhead Map Light Bulbs Replacement Guide
How to replace the overhead map light
bulbs in a 2009-2014 Nissan Cube MPV with picture illustrated instructions.

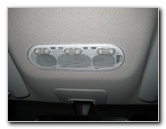 Map Light Bulbs |
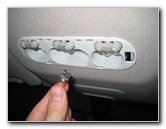
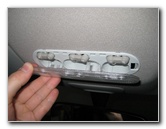
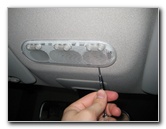 Pry Off Lens Cover |
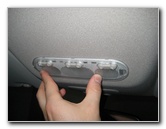
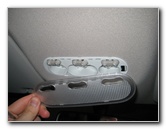 Lens Cover Removed |
| This
automotive "how-to" guide was specifically written to assist owners
of the 3rd generation 2009, 2010, 2011, 2012, 2013 & 2014 Nissan Cube in replacing a burnt
out overhead map light bulb. Owners of earlier 1998-2002 or 2002-2008 Nissan Cube vehicles or other Nissan models with similar key fobs such as the Versa, Sentra, Altima, Maxima, Juke, Rogue and Murano may also find this guide to be helpful. A replacement bulb for the three overhead map lights of a Nissan Cube is part # 168 from Sylvania, GE, Phillips and other manufacturers. You can also use a brighter 168 LED bulb. The only tool needed to replace the bulb is a small flathead screwdriver. Insert the blade of the flathead screwdriver in between the clear map light bulbs lens cover and the light grey plastic housing. Gently pry out the clear plastic cover. |
||
|
|
||
 Overhead Map Lights |
 Pull Out Map Light Bulb |
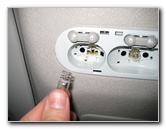 |
| Once the clear plastic lens cover has been removed, you can pull out the map light bulbs by grasping them with your thumb and forefinger. | ||
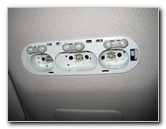
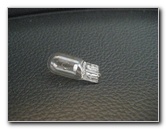 # 168 Map Light Bulb |
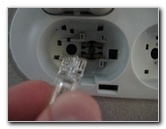 Push In New # 168 Bulb |
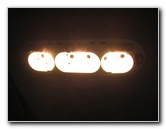 Test New Bulb(s) |
| Push a new #
168 bulb straight into the map light socket. Test the new
bulb by pushing the
corresponding buttons. If you want brighter map lights, choose some 168 LED bulbs. |
||
 Line Up Lens Cover |
 Snap Lens Cover On |
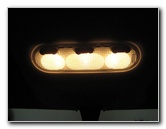 New Light Bulb(s) Working |
| Line up the clear
plastic lens cover over the map lights and gently snap it back into place.
Test that the overhead map light bulbs work properly by toggling the three switches. For more, please visit my
Nissan Cube Maintenance & Repair Guides page. |
||
| If you found this guide to be helpful,
please consider making a small donation by clicking on the PayPal.com
"Donate" button located to the right of this paragraph. Thank you!
(Note: I am not a registered charity. Donations are not tax deductible.) |