
Nissan Cube Headlight Bulbs
Replacement Guide
How to replace the combo low / high beam,
turn signal and side marker light bulbs in the headlights of a Nissan Cube.

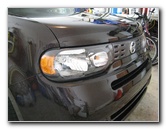 Nissan Cube Headlight |
 |
 Headlight Power Connector |
| This
automotive "how-to" guide was specifically written to assist owners
of the 3rd generation 2009 to 2012 Nissan Cube in replacing
combination low/high beam, front turn signal and front sidemarker
light bulbs in the headlight assemblies. Owners of earlier 1998-2002 or 2002-2008 Nissan Cube vehicles or other Nissan models such as the Versa, Sentra, Altima, Maxima, Juke, Rogue and Murano may also find this guide to be helpful. The headlight assembly of a 09-12 Nissan Cube contains the following light bulbs with their respective part numbers: High & Low Beam # 9003 (A.K.A. "HB2"), Turn Signal # 7507 (amber colored), and Side Marker (Parking) # 2825. No tools are needed to replace either the low/high beam headlight bulb or the turn signal bulb. A small flathead screwdriver is helpful when replacing the side marker bulb. |
||
|
|
||
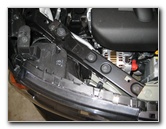
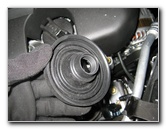
 Pull Off Power Plug |
 Remove Rubber Cover |
 Rear of Low/High Beam |
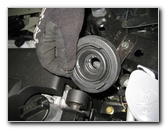
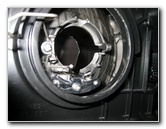
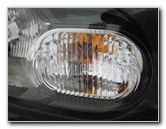
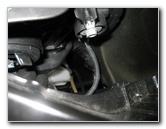
| The combination
high and low beam bulb is located in the middle of the headlight assembly
between the amber colored side marker and the amber colored turn signal.
Reach behind the headlight assembly and gently pull off the black power connector from the high/low beam bulb. Then remove the black rubber circular dust cover that prevents dust or dirt from entering the headlight. |
||
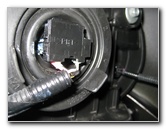
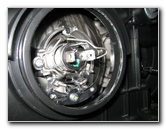
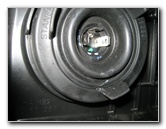
 Swing Open Retaining Clip |
 Headlight Bulb Loose |
 9003 / HB2 Halogen Bulb |
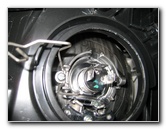
| The headlight bulb
is held in place by a metal retaining clip.
To release the clip, push down on the right side (when looking at it from behind the headlight assembly) and swing the metal arm towards the other side. Pull the old bulb straight out from the headlight. |
||
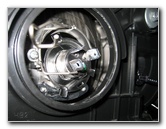
 Headlight Bulb Removed |
 Insert New Light Bulb |
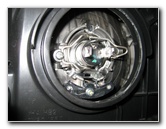 Secure Retaining Clip |
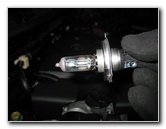
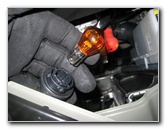
| Avoid touching the
glass part of the new 9003 or HB2 headlight bulb with your fingers or
anything dirty in the engine bay.
If you do get the bulb dirty, wipe it off with a paper towel or tissues moistened with rubbing alcohol. Insert the new bulb straight into the headlight assembly with the flat part of the third power prong facing up towards you as shown in the picture above. Swing the metal retaining clip over to the opposite side and hook it in place to secure the new headlight bulb. |
||
|
|
||
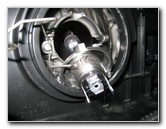
 |
 Replace Rubber Cover |
 |
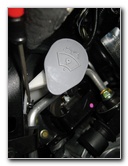
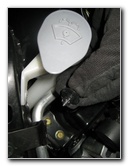
| Push the rubber
dust cover on to the back of the headlight assembly with the bulb's three
power prongs extending out of the hole in the middle.
Then push the power connector on to the bulb's power prongs. |
||
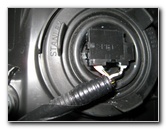 Push On Power Connector |
 Front Turn Signal |
 Turn Signal Bulb Socket |
| The front turn signal light bulb in the headlight assembly is located closest to the center line of the vehicle. | ||
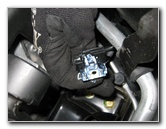
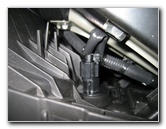
 Reach In To Turn Signal |
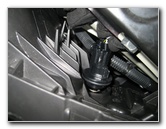 1/4 Turn Counter Clockwise |
 Turn Signal Bulb & Socket |
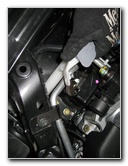
| Reach behind the
headlight assembly and rotate the base of the turn signal light bulb socket
1/4 turn counter clockwise to remove it.
To remove the turn signal bulb from the socket, push down on the bulb and turn it 1/4 turn counter clockwise before pulling it straight out. Insert a new amber colored # 7507 turn signal light bulb down into the socket and rotate it 1/4 turn clockwise to secure it in place. Then insert the bulb and socket back into the headlight assembly before turning it 1/4 turn clockwise to secure it in place. |
||
 Pull Out Turn Signal Bulb |
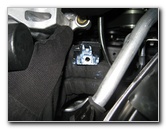
 Wiper Fluid Reservoir |
 Remove Pop Rivet |
| The side marker or
"parking light" bulb is located closest to the outside edges of the vehicle.
It's easier to access the side marker light bulb socket if you remove the one black plastic pop rivet holding the neck of the wiper fluid reservoir in place. |
||
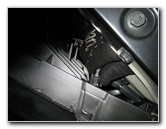
 Pull Back Reservoir Neck |
 Sidemarker Bulb Socket |
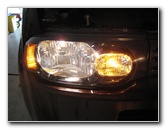 Test New Headlight Bulbs |
| Gently pull the
neck of the washer fluid reservoir back towards the rear of the car and
reach in to the side marker light bulb socket.
Turn the socket 1/4 turn counter clockwise and pull it straight out of the headlight assembly. To remove the old bulb, pull it straight out from the socket and push in a new # 2825 bulb. Test the new light bulbs by turning on the headlights, flashing the high beams and activating the hazard signals. For more, please visit my
Nissan Cube Maintenance & Repair Guides page. |
||
| If you found this guide to be helpful,
please consider making a small donation by clicking on the PayPal.com
"Donate" button located to the right of this paragraph. Thank you!
(Note: I am not a registered charity. Donations are not tax deductible.) |