
Mitsubishi
Lancer Headlight Bulbs Replacement Guide
How to change a low beam, high beam,
front turn signal or side marker bulb in an 8th generation 2008-2015 Lancer.

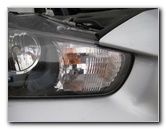
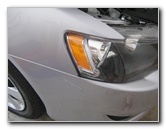
 2015 Lancer Headlight |
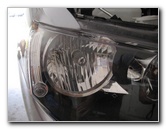 Low Beam Light |
 Base of Low Beam Bulb |
| This
automotive maintenance tutorial was specifically written to assist
owners of the eighth generation (2008, 2009, 2010, 2011, 2012, 2013,
2014 & 2015) Mitsubishi Lancer in checking or changing the
engine spark plugs in the MIVEC 4B11 2.0 liter or the MIVEC 4B12
2.4L inline four cylinder motors. Owners of other Mitsubishi vehicles such as the Mirage, Lancer Evolution ("Evo"), Outlander, 3000GT, Diamante, Eclipse, Endeavor, Galant, Montero, ASX, Triton L200 and Raider may also find these DIY instructions to be helpful. The replacement bulb part numbers are as follows: Low Beam # 9006, High Beam # 9005, Front Turn Signal 7440A (also WY21W or 7440NA) and Side Marker # 2827 (or WY5W). On most Lancer models, no tools are needed to change the low beam bulbs. You may need a 10mm socket with a 1/4" drive ratchet and a flathead screwdriver to access the high beam and turn signal bulbs. |
||
|
|
||
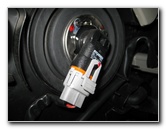
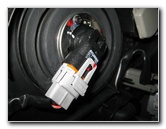
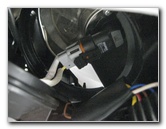
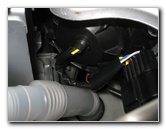
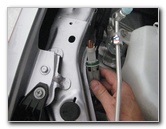
 Release Power Plug |
 1/4 Turn Counterclockwise |
 Pull Out Old Bulb |
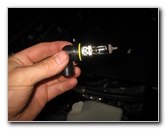
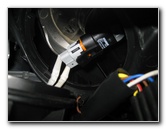
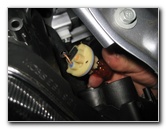
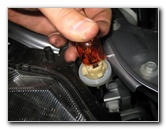
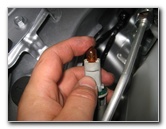
| The first two steps
are to open the hood and then move to the side of the vehicle with the burnt
out headlight bulb. The Low Beam bulb is located near the center of the assembly closer to the outer edge. (To access the driver side low beam bulb on Lancer models with the turbocharged engine, you will need to remove the 10mm bolt that secures the relay box in place. For the passenger side on a turbo model, just lift up the engine coolant reservoir.) Reach in behind the housing and gently pull back the retaining clip on the low beam bulb's electrical connector. Slide the plug straight off the base of the bulb. Rotate the old bulb 1/4 turn counterclockwise and pull it straight out of the housing. |
||
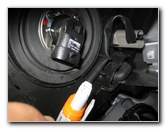
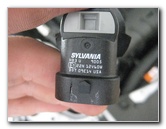
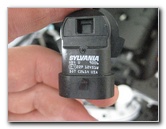 Sylvania 9006 Low Beam |
 Insert New # 9006 Bulb |
 1/4 Turn Clockwise - Lock |
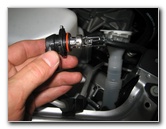
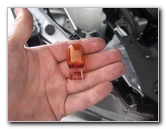
| Try to avoid
touching the glass part of the new halogen bulb with your fingers or
anything greasy in the engine bay. If you do get the new bulb dirty, wipe it clean with a paper towel moistened with rubbing alcohol. Insert the new # 9006 low beam bulb in to the housing and rotate it 1/4 turn clockwise to secure it in place. |
||
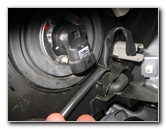
 Push On Power Plug |
 High Beam - Center of Housing |
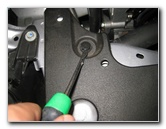
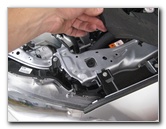
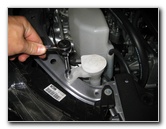 Loosen 10mm Bolt |
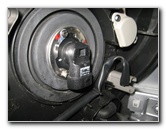
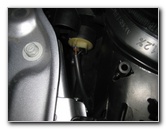
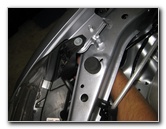
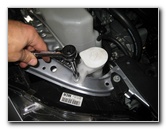
| Push the power plug
straight on to the base of the new bulb until it clicks securely in to
place. The High Beam bulb is located at the center of the headlight housing. To access the high beam bulb on the passenger side of the vehicle, you'll need to remove the 10mm bolt that holds the windshield wiper fluid filler hose in place. Loosen the 10mm bolt in the counterclockwise direction and then push back the wiper fluid hose. Set the 10mm bolt aside in a safe place. |
||
 Push Back Wiper Fluid Hose |
 High Beam Dust Cover |
 1/4 Turn Counterclockwise |
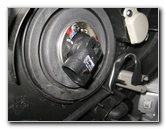
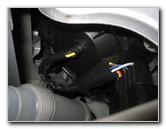
| Rotate the round black plastic dust cover on the high beam bulb housing 1/4 turn counterclockwise before pulling it straight off. | ||
 Base of High Beam Bulb |
 1/4 Turn Counterclockwise |
 Sylvania # 9005 |
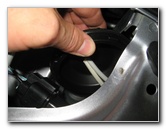
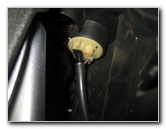
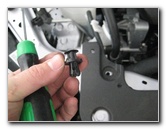
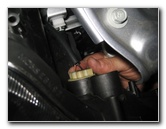
| Gently pull back
the retaining clip on the electrical connector and slide the plug straight
off the base of the old bulb. Rotate the base of the old high beam bulb 1/4 turn counterclockwise before pulling it straight out of the housing. |
||
 Install New High Beam |
 Cover - 1/4 Turn Clockwise |
 Turn Signal - Inner Corner |
| Avoid touching the
glass part of the new halogen bulb with your fingers or anything greasy in
the engine bay. Insert the new 9005 bulb in to the housing and rotate it 1/4 turn clockwise to lock it in place. Replace the black plastic dust cap and rotate it 1/4 turn clockwise to secure it in place. The Front Turn Signal bulb is located at the inner edge of the headlight housing. |
||
|
|
||
 Turn Signal Bulb Socket |
 Plastic Radiator Cover |
 Pry Up Center of Pop Rivet |
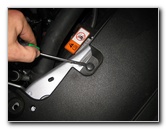
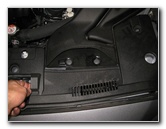
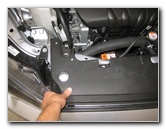
| To access the front
turn signal bulb sockets, you'll need to remove the fasteners on the black
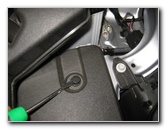
plastic radiator cover. Pry up the center part of each pop rivet with a flathead screwdriver and then remove the entire fastener. |
||
 Remove Plastic Fastener |
 Remove Other Pop Rivets |
 |
| Remove all of the
pop rivets on the radiator cover. To detach the air intake duct, you'll need to remove the two plastic Phillips head screws. You don't have to detach the air intake duct if you are just replacing the passenger side front turn signal light bulb. |
||
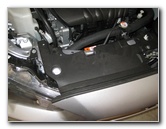
 |
 Lift Up Radiator Shield |
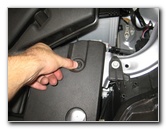
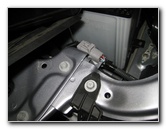 Driver Side - Relay Box Bolt |
| Either remove the entire radiator cover or just raise the passenger side of the shield to access the turn signal bulb socket. | ||
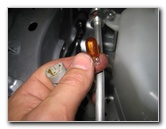
 1/4 Turn Counterclockwise |
 Remove Bulb Socket |
 Pull Out Old Bulb |
| Reach in behind the headlight housing and rotate the yellow turn signal bulb socket 1/4 turn counterclockwise before pulling it straight out. | ||
 Two Air Intake Screws |
 Stripped Plastic Screw |
 Push In New # 7440A |
| I took pictures of
the two plastic Phillips head screws on the air intake duct that I wasn't
able to remove since they stripped immediately.
I would recommend that you pry out these screws and replace them with pop rivet fasteners that are easier to remove in the future. Pull the old turn signal bulb straight out of the socket and push in a new # 7440A bulb. You may also be able to use the # 7440NA or WY21W bulb. |
||
 1/4 Turn Clockwise - Lock |
 Replace Plastic Cover |
 Push In Pop Rivets |
| Re-insert the bulb
socket in to the housing and rotate it 1/4 turn clockwise to secure it in
place. Lower the plastic radiator cover back in to place. Re-insert the plastic pop rivets and push down the center part of fastener to secure them in place. |
||
 Replace Fasteners |
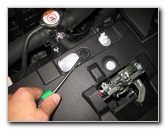
 Side Marker - Outer Edge |
 1/4 Turn Counterclockwise |
| The Front Side
Marker bulb is located at the outer edge of the housing. Reach in and rotate the bulb socket 1/4 turn counterclockwise before pulling it straight out of the housing. |
||
 Bulb Socket Removed |
 Pull Out Old Bulb |
 Push In New # 2827 |
| Pull the old bulb straight out of the socket and push in a new amber colored # 2827 or WY5W bulb. | ||
 1/4 Turn Clockwise - Lock |
 Replace Wiper Fluid Hose |
 Test New Headlight Bulbs |
| Re-insert the side
marker bulb socket in to the housing and rotate it 1/4 turn clockwise to
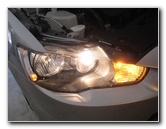
secure it in place. If you removed the windshield wiper fluid fill tube, replace the 10mm bolt by turning it clockwise until it is snug. Test the new bulbs by turning on the headlights, activating the hazard signals and flashing the high beams. For more, check out my other
2008-2015 Mitsubishi Lancer DIY Repair & Maintenance Guides. |
||
| If you found this guide to be helpful,
please consider making a small donation by clicking on the PayPal.com
"Donate" button located to the right of this paragraph. Thank you!
(Note: I am not a registered charity. Donations are not tax deductible.) |