
MINI Cooper
Front Turn Signal Light Bulb Replacement Guide
How to change a burnt out front turn
signal light bulb in the headlight housing of a 2014 to 2020 MINI Cooper.

 2019 MINI Cooper |
 Turn Front Wheels |
 2 Round Access Covers |
| This automotive
maintenance tutorial was specifically written to assist owners of the third
generation (2014, 2015, 2016, 2017, 2018, 2019 and 2020) MINI Cooper in
changing a burnt out front turn signal light bulb located in the headlight
housing. Owners of other MINI models or some smaller BMW vehicles such as the Cooper S, "JCW" John Cooper Works, Convertible, Hatch, Clubman, One, One First, One D, Coupe, Roadster, Countryman, Paceman, 3 Series, 318i, 328i, 320i, 323i, 325i, 330i, 340i, 230i, M240i, M2, M3, M4, i3, 228i, 230i, 128i, 135i, Z3, Z4 and Z8 may also find these DIY instructions to be helpful. The compatible replacement light bulb part number is PW24W. If you would like to have brighter front turn signal light bulbs, you can upgrade them with PW24W LED bulbs. No tools are needed to access and replace the bulbs. |
||
|
|
||
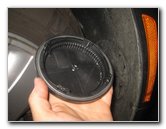
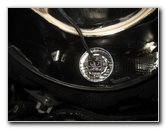
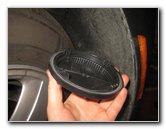
 Round Plastic Cover |
 Rotate Counterclockwise |
 Access Cover Removed |
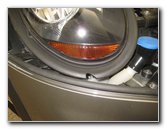
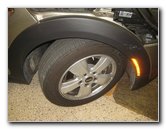
| The front turn
signal light bulbs can be accessed through the wheel well liner in front of
the tires.
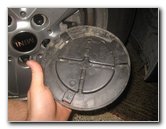
To create more working room in the wheel well, turn the front wheels all the way in the opposite direction of the burnt out light bulb. Once the front tire is out of the way, you'll be able to see the two round black plastic access covers. The lower cover is for the front side marker light bulb. The upper cover is for the front turn signal light bulb. Rotate the top cover 1/4 turn in the counterclockwise direction before pulling it straight out of the wheel well liner. Set the cover aside in a safe place. |
||
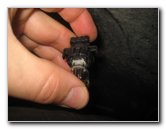
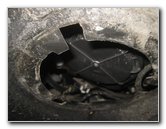
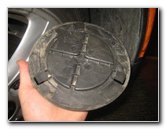
 Bulb Housing Cover |
 Rotate Counterclockwise |
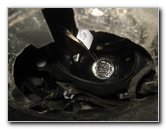 Base of Old Light Bulb |
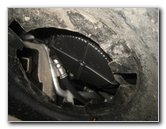
| There is also a
round black plastic dust cap on the back side of the front turn signal bulb
housing. Rotate the cover 1/4 turn in the counterclockwise direction before pulling it straight off. Set the cover aside in a safe place. |
||
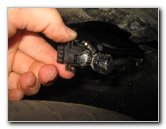 Squeeze Sides - Release |
 Empty Bulb Housing |
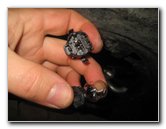 Pull Bulb Out Of Socket |
| Squeeze together
the left and right sides of the bulb socket to release the retaining clips. Pull the bulb socket straight out of the housing. Gently pull the old light bulb straight out of the socket. |
||
|
|
||
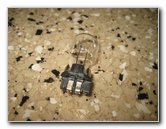 Old Light Bulb Removed |
 Push In New Light Bulb |
 New Bulb In Socket |
| The original OEM
bulb in this 2019 MINI was a Philips PW
24W. Push a new bulb straight into the socket. It should "click" securely into the socket. If you would like to have brighter front turn signal lights, install some compatible replacement PW24W LED bulbs. |
||
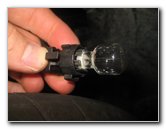
 Push In New Light Bulb |
 Bulb Housing Cap |
 1/4 Turn Clockwise - Lock |
| Push the bulb
socket straight into the housing. The retaining clips should be facing towards the left and right side of the car. You should feel or hear the bulb socket "click" securely into the socket. Replace the debris cap on the back side of the housing by turning it 1/4 turn in the clockwise direction. |
||
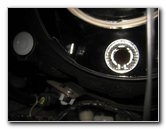
 Round Access Cover |
 1/4 Turn Clockwise - Lock |
 Test New Light Bulb |
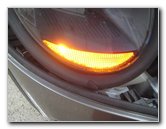
| Replace the access
cover into the wheel well liner by turning it 1/4 turn in the clockwise
direction. To test the new light bulb, activate the hazard lights. Be sure to record the bulb change in your vehicle's service records. For more,
check out all of my
MINI Cooper DIY Repair & Maintenance Guides. |
||
| If you found this guide to be helpful,
please consider making a small donation by clicking on the PayPal.com
"Donate" button located to the right of this paragraph. Thank you!
(Note: I am not a registered charity. Donations are not tax deductible.) |