
Mazda Mazda6
A/C Cabin Air Filter Replacement Guide
Pictures illustrated instructions for how to replace
or clean the HVAC cabin air filter in a 2003 to 2008 Mazda 6 sedan.

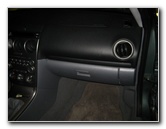 Mazda6 Glove Box |
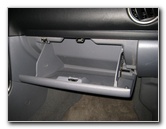 Open Glove Box |
 Pull In Retaining Hooks |
| This
automotive how-to guide was specifically written to assist owners of
the 2004 Mazda Mazda6 in cleaning or replacing the air conditioner's
cabin air filter element. Owners of other first generation Mazda 6 or "Atenza" vehicles from 2003, 2004, 2005, 2006, 2007 & 2008 should also find these DIY instructions to be useful. The cabin air filter replacement procedure may be similar in additional Mazda vehicles such as the MX-5 Miata, Mazda5, Mazda2, Mazda3, RX-8, Tribute, CX-7 and CX-9. A few compatible replacement filters with their part numbers are as follows: TYC 800024P, Fram CF10372, ATP CF-55, K&N VF2018, Beck Arnley 042-2045, Purolator C35643, ACDelco CF3272, Hastings AF1271 and Mazda GK3J-61-148. No tools are needed to replace the air filter, although a flathead screwdriver helps when popping out the black clip attached to the retaining strap. |
||
 |
 |
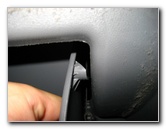
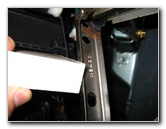
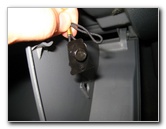
 Push Down Retaining Clip |
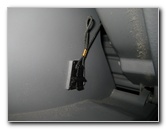
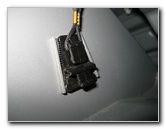
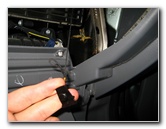
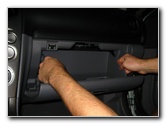
| The first step is
to open the glove box and locate the black plastic retaining clip and string
located on the passenger side.
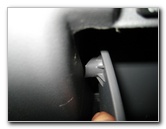
Remove it by pushing down on the wedge shaped clip until the button inside the glove box moves to the larger opening and can be pulled out of the glove box's passenger side wall. |
||
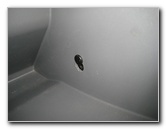 |
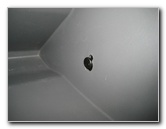 Retaining Clip Button |
 Lower Glove Box |
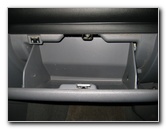
| Then push both sides of the glove box inwards to release the two retaining hooks/hinges and allow the glove box to lower down towards the floor mat. | ||
 Retaining Clip & Cord |
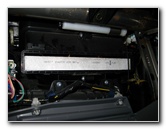
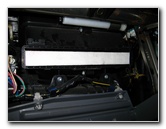
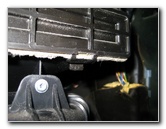
 Cabin Air Filter Cover |
 Push Down 2 Upper Clips |
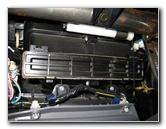
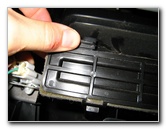
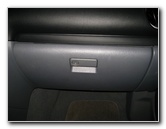
| Behind the glove
box, you'll see a black plastic rectangular piece that covers the cabin air
filter.
Push down on the two clips at the top side of the cabin air filter cover to remove it. |
||
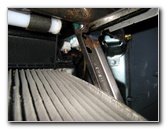
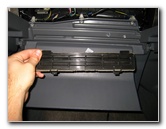 Filter Cover Removed |
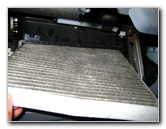
 Cabin Air Filter |
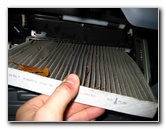 Pull Out Filter Element |
| Behind the filter
cover, you'll see the white edge of the cabin air filter element.
Pull it out while bending the passenger side around the oddly placed metal supporting bar. |
||
 Bend Around Metal Bar |
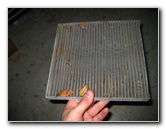 Full Of Leaves & Dust |
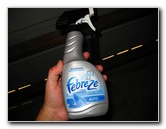 Febreze Auto Spray |
| We were still
waiting for the new cabin air filter to arrive from UPS, so I cleaned out
the old filter with a Rigid 5 HP wet/dry shop vacuum and sprayed it with a
few squirts of Febreze Auto spray. I recommend buying the TYC 800024P filter since it has great reviews on Amazon. |
||
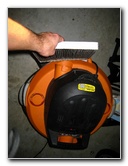 Blowing Out Debris |
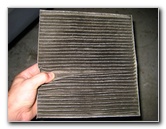 Old Filter Cleaned |
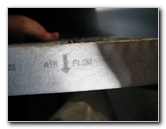 Air Flow Direction Arrow |
| Once I thoroughly cleaned out the old filter and sprayed it with Febreze, I took note of the "Air Flow" direction arrow and re-inserted it back into the air filter housing. | ||
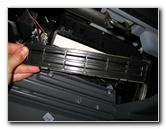
 Re-Insert Air Filter |
 Bend Around Metal Bar |
 Air Filter Replaced |
 Re-Attach Filter Cover |
 Cabin Filter Cover Replaced |
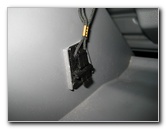
 Retaining Clip & String |
| Then I placed the black plastic rectangular cabin air filter back into place and re-attached the retaining clip and string to the passenger side wall of the glove box. | ||
 Retaining Clip Holder |
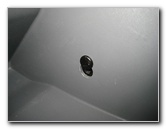 Pop Clip Button Up |
 Clip Re-attached |
| Once the black
plastic retaining clip is back in place, push inwards on the sides of the
glove box and re-insert the two hinges/hooks.
Check that the glove box closes smoothly. If it works well, you're done. |
||
 Push In Retaining Tabs |
 Glove Box Re-Attached |
 Glove Box Closed |
| For more of
automotive reviews and how-to guides, click on the following links:
Mazda6 2.3L I4 Engine Oil Change Guide,
Meguiar's Headlight Restoration Kit Review,
Zaino Bros Show Car Polish Review,
WeatherTech FloorLiner Mats Review,
Headlight / Tail Light Condensation Solution Guide,
Sunforce 50012 Solar Battery Maintainer Review,
Corroded Car Battery Terminal Replacement Guide, and the
Garmin Nuvi 260W GPS Review. |
||
| If you found this guide to be helpful,
please consider making a small donation by clicking on the PayPal.com
"Donate" button located to the right of this paragraph. Thank you!
(Note: I am not a registered charity. Donations are not tax deductible.) |