
Mazda Mazda3
Cabin Air Filters Replacement Guide
How to clean or change the two HVAC cabin
air filter elements in a second generation 2010-2013 Mazda Mazda3.

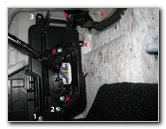
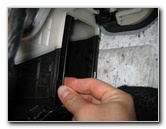
 Glove Box & Kick Panel |
 Pull Off Forward Kick Panel |
 Kick Panel Removed |
| This
automotive "how-to" guide was specifically written to assist owners
of the second generation (2010, 2011, 2012 & 2013) Mazda 3 in
cleaning or changing the A/C system's two cabin air filter elements
in the blower motor housing. Owners of other Mazda vehicles such as the Mazda2, Mazda5, Mazda6, MX-5 Miata, Mazdaspeed3, CX-5, CX-7, CX-9, MPV, Tribute, RX-8, Axela, Demio, Verisa, Premacy, and Atenza may also find these DIY instructions to be helpful. A few compatible sets of new air filter elements with their part numbers are as follows: Beck Arnley 042-2180, Wix 24046, Mazda BBM4-61-J6X, Cleenaire CAF4616, Hastings AFC1521, ACDelco CF3271, Purolator C16098, ATP CF-223, and Mahle LA 501/S. The only tool required to access the filters is a Phillips head screwdriver. A wet/dry shop vacuum can also be useful for cleaning the existing filters. |
||
|
|
||
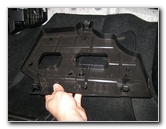
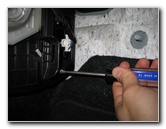
 Plastic Foot Well Cover |
 |
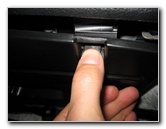 Press Release Tab |
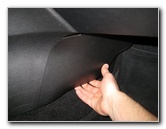
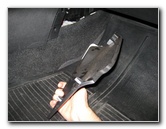
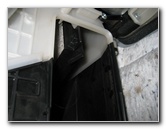
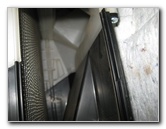
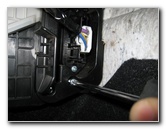
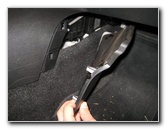
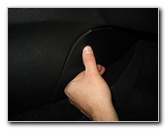
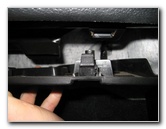
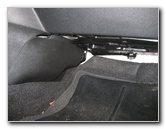
| The first two steps
are to move to the front passenger seat and pull off the forward kick panel
just to the left the glove box. Then remove the black plastic foot well cover below the glove box by pressing the two release tabs on the front edge. |
||
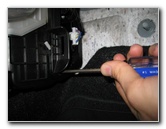
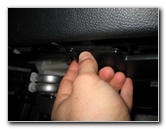 Press 2nd Release Tab |
 Foot Well Cover Removed |
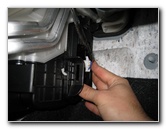
 Cabin Air Filter Cover |
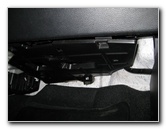
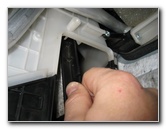
| Pull the rear edge
of the foot well cover off the exposed bolt end that it rests on. Locate the rectangular shaped filter access cover at the front left corner of the foot well with a white electrical connector plugged in to the middle. |
||
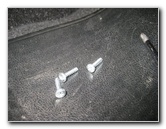
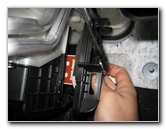
 Remove Two Screws |
 Take Out First Screw |
 Remove 2nd Screw |
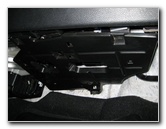
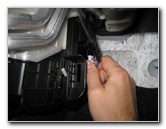
| View
Picture # 10 above this line to see the two Phillips head screws at
the bottom of the filter access panel that need to be removed. One screw is at the very bottom left of the filter cover. The 2nd screw is just above and to the right of the first one. Remove the two screws by turning them counter clockwise. Set them aside in a safe place. |
||
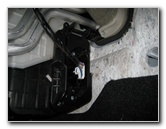
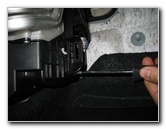
 Only Need To Remove 2 Screws |
 Lift Filter Access Panel Off |
 Filter Cover Removed |
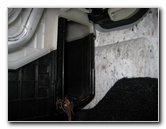
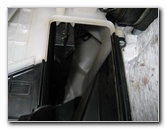
| I mistakenly
removed a third screw that did not hold the filter cover in place. So please
disregard the picture above with three screws. Once the two screws at the bottom of the filter cover have been removed, you can lift it up and away from the blower motor housing. |
||
|
|
||
 Slide Out Lower Filter |
 1st Lower Filter Removed |
 Upper 2nd Cabin Filter |
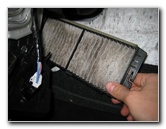
| Grasp the lower
cabin air filter with your thumb and forefinger before sliding it straight
out. Then reach in and pull the upper cabin air filter down to the bottom before pulling it straight out. If you plan on cleaning and replacing the existing filters, make a note of which filter is the upper and lower unit. |
||
 Pull Out Upper 2nd Filter |
 Lower Filter - Upper Filter |
 Vacuum Old Filters |
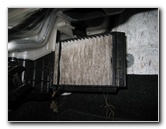
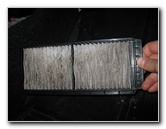
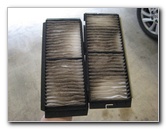
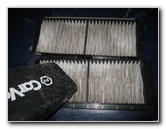
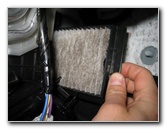
| If the old filters
look relatively clean, tap out the large debris and clean out any dust with
a wet/dry shop vacuum. If the old filters are dark grey or black and clogged with dirt, dust, hair, twigs, leaves, insects and other debris, they should be replaced with brand new elements. I recommend buying the Beck Arnley 042-2180 filters since they have excellent reviews on Amazon. |
||
 Metal Mesh Screen |
 Install New Upper Filter |
 New Top Filter Installed |
| If you have a
vacuum cleaner hose that can reach in to the blower motor housing, clean out
any leaves or other debris that may be attached to the metal wire mesh
screen. Insert the cleaned or new upper cabin air filter element back in to the housing and lift it up in to place. Be sure to pay attention to any "Air Flow" indicator arrows which should be pointed towards the rear of the vehicle. |
||
 Insert Bottom Filter |
 Two Cabin Filters Installed |
 Insert Filter Cover |
| Insert the lower
air filter element in to the housing and push it securely in to place. Line up the cabin air filters access panel and push it back in to place. |
||
 Push Securely In Place |
 Replace Two Screws |
 Replace 2nd Phillips Screw |
| Insert and tighten the two Phillips head screws at the bottom of the access panel. | ||
 Line Up Kick Panel |
 Snap Panel In Place |
 Bolt In Foot Well Panel |
| Line up the white
plastic friction fasteners on the rear of the kick panel and push it back in
to place. Insert the exposed bolt end in to the hole in the rear edge of the foot well cover. |
||
 Line Up Fastener Clips |
 Push Two Clips In Place |
 Foot Well Panel Replaced |
| Raise the foot well
cover up towards the glove box and push the two plastic fastener clips in to
place. For more, check out my other
2010-2013 Mazda Mazda3 Repair & Maintenance Guides. |
||
| If you found this guide to be helpful,
please consider making a small donation by clicking on the PayPal.com
"Donate" button located to the right of this paragraph. Thank you!
(Note: I am not a registered charity. Donations are not tax deductible.) |