
Mazda MX-5
Miata Rear Turn Signal Light Bulb Replacement Guide
How to change a burnt out rear turn
signal light bulb in the tail light housing of a 4th generation 2016 to 2021
Miata.

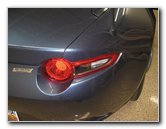 2018 Miata Tail Lights |
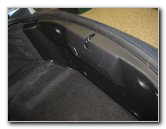
 Open Trunk Lid |
 Screw - Top of Assembly |
| This automotive
maintenance tutorial was specifically written to assist owners of the 4th
generation (2016, 2017, 2018, 2019, 2020 & 2021) Mazda MX-5 Miata in
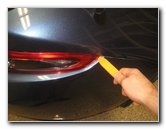
changing a burnt out rear turn signal light bulb in the tail light housings. Owners of other Mazda vehicles such as the Mazda2 (Demio), Mazda3 (Axela), Mazda5, Mazda6 (Atenza), CX-3, CX-5, CX-7, CX-9, RX-8 and MPV may also find these DIY instructions to be helpful. The compatible replacement rear turn signal light bulb part number is 7440NA (also known as 7440A or WY21W). The tools needed to access and replace the bulb include a Phillips head screwdriver, a 10mm socket with a 1/4" drive ratchet and a plastic pry bar tool. The first two steps are to open the trunk lid and then move to the side of the car with the burnt out light bulb. |
||
|
|
||
 Loosen Counterclockwise |
 Move To Corner of Trunk |
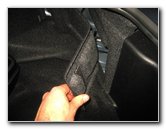 Pull Off Access Cover |
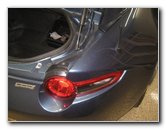
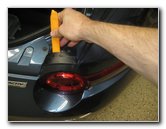
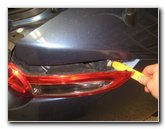
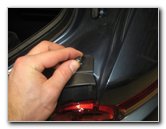
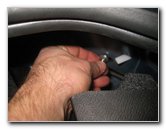
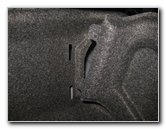
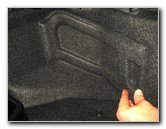
| Remove the screw
located at the top of the housing by turning it in the counterclockwise
direction with a Phillips head screwdriver. Move to the inside of the trunk and locate the fabric access cover at the rear corner. Gently pull off the rectangular shaped access panel and set it aside in a safe place. |
||
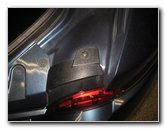
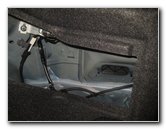 Fabric Cover Removed |
 Silver Metal Nut |
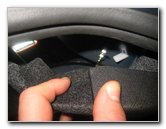 Pull Back Trunk Liner |
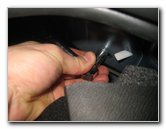
| Locate the single
silver metal nut threaded on to a bolt end at the rear of the trunk. You can pull back the trunk liner to access the nut from above. |
||
 Loosen Counterclockwise |
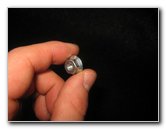 Nut Removed |
 Plastic Pry Bar Tool |
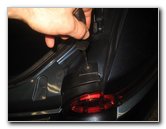
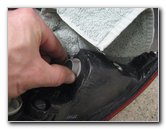
| Remove the nut by
turning it in the counterclockwise direction with a 10mm socket and a 1/4"
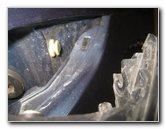
drive ratchet. Set the nut aside in a safe place. The tail light assembly is still held in place to the rear corner of the vehicle by a slot attached to the button head top of a plastic pop rivet near the front outer edge of the housing. Insert the plastic pry bar tool in between the front outer corner of the tail light housing and the car's rear quarter panel. Gently pry to loosen the friction fastener. Avoid using excessive force. |
||
 Loosening Light Housing |
 Friction Fastener Released |
 Rest On Bumper Cover |
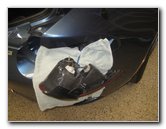
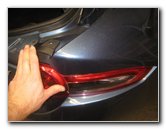
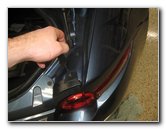
| You can also loosen
the light housing by using the pry bar tool at the top inner edge. Once the housing feels loose, gently pull it straight off the rear of the car. Place a towel on the rear bumper cover to protect the paint and prevent the tail light lens cover from being scratched. Turn over the tail light housing and rest it on the towel to access the bulb socket. |
||
 1/4 Turn Counterclockwise |
 Bulb Socket Removed |
 Pull Out Old Light Bulb |
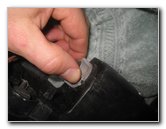
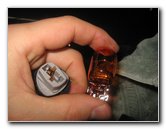
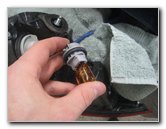
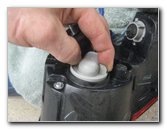
| Rotate the grey and
black plastic rear turn signal bulb socket 1/4 turn in the counterclockwise
direction. Pull the bulb socket straight out of the housing. Gently pull the old light bulb straight out of the socket. If you have trouble removing a stuck, stubborn or rusted in light bulb, wear some gloves and try gently wiggling it back and forth while pulling it straight out of the socket. |
||
|
|
||
 Push In New Light Bulb |
 1/4 Turn Clockwise - Lock |
 LED Brake Lights |
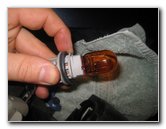
| The original OEM
bulb in this 2018 Miata was marked as part number WY21W. Push a new amber colored number 7440NA or # 7440A light bulb straight into the socket. Re-insert the bulb socket into the housing and rotate it 1/4 turn in the clockwise direction to secure it into place. The brake lights are LED bulbs that should last the life time of the vehicle. If you would like to upgrade your rear turn signal lights, install some 7440NA LED bulbs. |
||
 LED Brakes Wiring |
 Replace Cover |
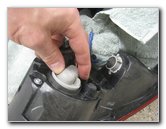
 Line Up Slot & Pop Rivet |
| Line up the slot on the front outer edge of the tail light housing with the button head on the white plastic pop rivet attached to the car. | ||
 Push On Tail Light Housing |
 Spin In Phillips Screw |
 Spin On 10mm Nut |
| Carefully slide the
tail light housing on to the rear corner of the car.
Spin in the Phillips head screw a few turns in the clockwise direction. Reach into the rear corner of the trunk and spin on the 10mm nut a few turns in the clockwise direction to prevent it from becoming cross threaded. |
||
 Tighten Clockwise |
 Tighten Screw Clockwise |
 Fabric Access Cover |
| Use the 10mm socket
and a 1/4" drive ratchet to tighten the nut in the clockwise direction until
it is snug. Try to avoid over tightening the nut to prevent from cracking or breaking the plastic tail light housing. Line up the fabric access cover with the opening in the trunk carpet liner. |
||
 Line Up Two Tabs |
 Replace Access Cover |
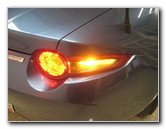 Test New Turn Signal |
| Re-insert the two
tabs on the outer edge of the access cover. Pop in the retaining tab at the inner edge of the access cover. To test the new light bulbs, activate the hazard signals. Be sure to record the bulb change in your vehicle's service records. For more,
check out all of my
2016-2021 Mazda MX-5 Miata DIY Repair & Maintenance Guides. |
||
| If you found this guide to be helpful,
please consider making a small donation by clicking on the PayPal.com
"Donate" button located to the right of this paragraph. Thank you!
(Note: I am not a registered charity. Donations are not tax deductible.) |