
Shower & Tub
Faucet Valve Stem Replacement Guide
How to repair or replace a leaking hot or
cold water faucet valve stem for a shower, tub or sink including pictures.

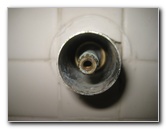
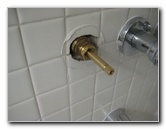
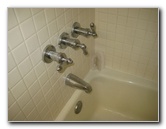
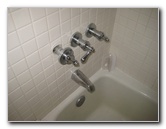 3 Handle Tub/Shower |
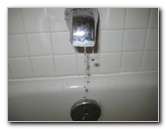 Hot Water Leaking Out |
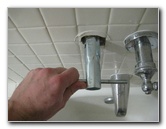
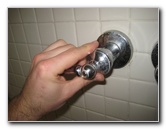
 Remove Trim Cap & Screw |
| This home
repair and maintenance tutorial was specifically written to assist
homeowners with three handle (hot, diverter, cold) Price Pfister
brand fixtures in replacing a leaky hot or cold water faucet valve
stem for a shower, tub or sink. These DIY instructions should also be helpful for replacing other similar faucet valve stems from manufacturers such as Delta, Kohler, American Standard, Glacier Bay, Peerless, Sears, Danco, Gerber, Sterling, Moen, Crane and Nibco. To complete this procedure, you'll need the following tools: a Phillips head screwdriver, a flathead screwdriver, a set of plumber sockets, a faucet seat removal tool, a roll of plumbers Teflon tape and a new faucet valve stem that matches the original unit from your kitchen or bathroom. You might be able to stop the water leak by just replacing the rubber washer at the end of the valve stem that pushes against the metal seat. For a long term repair, I recommend just replacing both the valve stem assembly and the seat. |
||
|
|
||
 Spin Out Phillips Screw |
 Long Screw Removed |
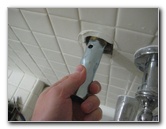
 Pull Off Faucet Handle |
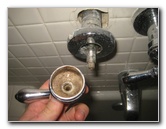
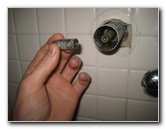
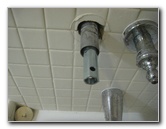
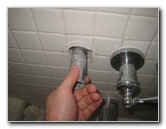
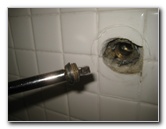
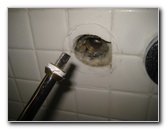
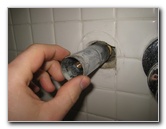
| The first step is
to turn off the water supply.
Since the leaking faucet in our bath tub was the hot water valve, I was able to just turn off the hot water supply valve located above the hot water heater. If you have a leaky cold water faucet in your tub or shower, you will need to turn off the water to the entire house. For a leaking sink faucet, just turn off the water supply valves located under the sink by turning them clockwise until they stop. If your faucet handle has a trim cap, gently pry it off with a small flathead screwdriver and set it aside in a safe place. Remove the screw that secures the faucet handle in place by turning it counterclockwise with a Phillips head screwdriver. Set the long Phillips head screw aside in a safe place. Gently pull off the faucet handle. |
||
 Remove Trim Ring |
 Flathead Screw On Side |
 Old Stem In Sleeve |
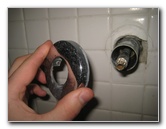
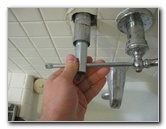
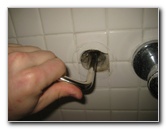
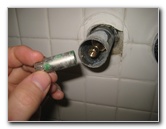
| Loosen the fastener
on the chrome metal ring or "collar" around the faucet sleeve by loosening
the flathead screwdriver in the counterclockwise direction. Slide the collar off the sleeve and set it aside. |
||
 Handle Splines Extension |
 Turn Off Water Supply |
 Plumber's Socket Set |
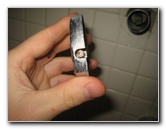
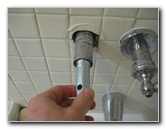
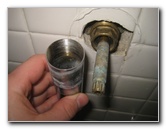
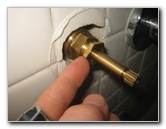
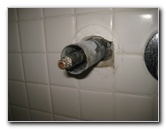
| Your valve stem
might have a splines extension bar piece. Pull it off and set it aside. If you haven't already, remember to turn off the water supply! |
||
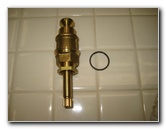
 Packing Nut - End of Stem |
 Removing Packing Nut |
 Loosen Counterclockwise |
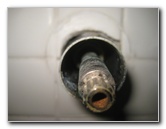
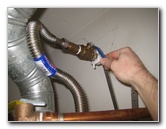
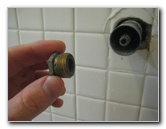
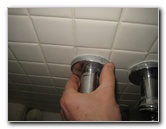
| An optional step is
to first remove the "packing nut" located at the end of the old valve stem. I was concerned that it might interfere with the larger plumber socket while removing the valve stem. I used a 27/32" plumber socket to remove the packing nut by turning it counterclockwise. |
||
 |
 Packing Nut Removed |
 |
| Once the old packing nut was out of the way, I was able to more easily get a look at the valve stem. | ||
 Twist Off Metal Sleeve |
 Trim Sleeve (Tube) Removed |
 Old Faucet Stem Exposed |
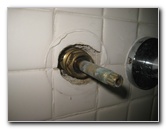
| If your faucet has
a trim sleeve (metal tube) installed on the old valve, remove it by twisting
it off in the counterclockwise direction. Set the sleeve aside in a safe place. |
||
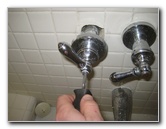
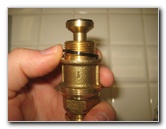
 31/32" Counterclockwise |
 Loosening Valve Stem |
 Valve Stem Removed |
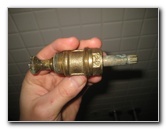
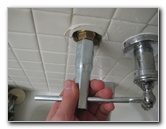
| Then use a
plumber socket to remove the old
valve stem by turning it counterclockwise. If you have trouble removing the old valve stem, make sure the valve is all the way open (out towards you), just in case the old rubber washer is stuck to the old seat or rubbing against it. This Price Pfister valve stem from 1987 required the use of a 31/32" plumbers socket. |
||
|
|
||
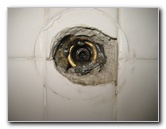
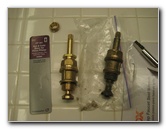
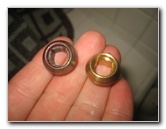
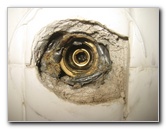
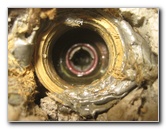 Old Metal Seat |
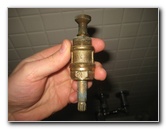 Inspecting Old Stem |
 Original 1987 Price Pfister |
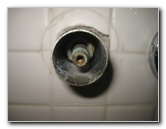
| Inspect the old
valve stem.
Our old valve stem was rusted and damaged beyond repair. The rubber seat washer was missing and the metal rim around the washer was partially missing. |
||
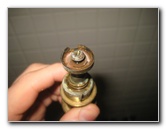 Washer Missing - Broken Rim |
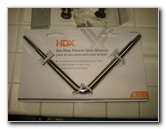
 New Part & Tool |
 New PartsmasterPro Stem |
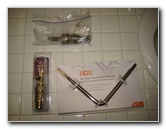
| I purchased a new
PartsmasterPro Hot & Cold Valve Stem which was compatible with Price Pfister
for just $10. It also included a replacement "seat".
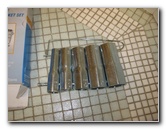
The six sizes stepped faucet seat wrench was about $7.50. |
||
 Stepped Seat Removal Tool |
 Loosen Counterclockwise |
 Old Seat Removed |
| Test fit the two
sides of the faucet seat wrench to see which side has a better grip on the
old seat. Loosen the old seat by turning the tool counterclockwise. |
||
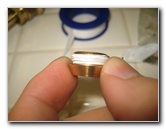
 Old Seat & New Seat |
 Black Plastic Gasket |
 Install Washer On Stem |
| Continue loosening
the old seat in the counterclockwise direction until it can be removed. Push the "bonnet washer" (plastic gasket) on to the threads of the new valve stem. |
||
 Teflon Tape On Seat |
 Attach New Seat To Tool |
 Tighten Clockwise |
| Wrap some plumbers
Teflon tape around the threads
on the new seat. Attach the new seat to the wrench. Tighten the new seat in to place by turning it clockwise to just barely past hand tight. Try to avoid over tightening the new seat. |
||
 New Faucet Valve Stem |
 Spin In Clockwise |
 31/32" Tighten Clockwise |
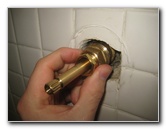
| Line up the new
valve stem and carefully spin it in to place in the clockwise direction. Try to avoid cross threading the new valve stem. Use the 31/32" plumber socket to tighten the new valve stem to just past hand tight. |
||
 New Valve Stem Installed |
 Packing Nut - New Valve |
 Tighten Packing Nut |
| Use the 27/32" plumber socket to tighten the smaller "packing nut" near the end of the new valve stem in the clockwise direction until it is snug. | ||
 Turn On Hot Water |
 Test New Faucet Valve |
 Spin On Metal Sleeve |
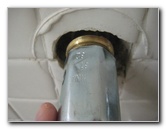
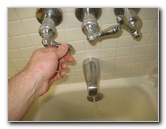
| I recommend testing
the new valve stem before finish re-assembly all of the trim pieces and the
handle. Turn on the water supply and open the new valve. Check for leaks from the valve itself or from the area around the packing nut. Turn off the valve and check for leaks from the valve and also the shower head or tub spout. If there was water leaking from the packing nut when the valve was open, try tighten the packing nut an extra 1/4 turn with the 27/32" socket. Twist the sleeve (metal tube) on to the new valve in the clockwise direction until it is snug. |
||
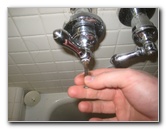
 Splines Extension Bar |
 |
 Push On Trim Collar |
| If your faucet was
equipped with a splines extension bar, push it back in to place over the
splines on the new valve. Slide the trim collar (metal ring) over the sleeve and up against the tile. |
||
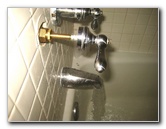
 Re-Attach Handle & Screw |
 Testing New Faucet |
 Faucet Valve Replaced |
| Push the faucet
handle back in to place and spin in the Phillips head screw. Tighten the Phillips head screw in the clockwise direction until it is snug. Double check that the new valve is working properly and doesn't leak when it is open or closed. For more, check out my other
Home Repair & Maintenance DIY Guides. |
||
| If you found this guide to be helpful,
please consider making a small donation by clicking on the PayPal.com
"Donate" button located to the right of this paragraph. Thank you!
(Note: I am not a registered charity. Donations are not tax deductible.) |