
Keurig Coffee
Machine Water Draining & Storage Guide
How to drain the internal water tank &
tubes of a Keurig B40 K-Cup coffee machine for a move, to ship, or to store it long term.

|
|
||
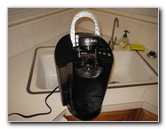 Keurig B40 Machine |
 Remove Drip Tray & Tank |
 Rest Machine On Side |
| Most
Keurig K-Cup coffee machines have a metal internal water tank and
rubber tubing that should be drained if you don't plan on using the
machine for an extended period of time. It is also important to empty out the water tank if you are going to ship the machine, pack it in a box with your other belongings for a move, or for long term storage. Neglecting to drain the inner water reservoir may result in bacteria or mold growing which will then require a thorough cleaning with bleach or vinegar before the machine can be safely used again. This tutorial was specifically created to assist owners of the Keurig Elite Brewing System model number "B40" coffee maker. It may also be useful for owners of other similar models such as the B50, B60, B70, B130, B140, B150, B200, K150, K45, K40, K65 and the K75. The tools needed to complete this procedure include a Phillips head screwdriver and a small pair of scissors. |
||
|
|
||
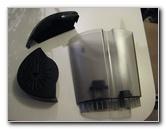
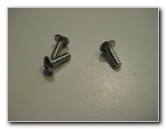
 Remove 5 Philips Screws |
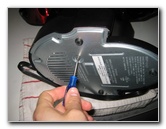 Screw Near Center of Plate |
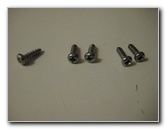 5 Phillips Head Screws |
|
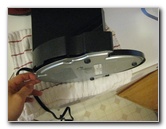
Then remove the large external water reservoir by lifting it straight off the side of the machine. Also lift and remove the black plastic drip tray at the front of the machine where the coffee mug rests during the brewing process. Set those pieces aside in a safe place. Rest the machine on its side with the metal base plate facing towards you. You may want lay down a towel first to protect the plastic on the machine and/or your counter top surface. Please double check that you have unplugged the machine before moving on to the next steps. Remove the 5 small screws on the bottom of the machine by turning them counter clockwise with the Phillips head screwdriver. Set the screws aside in a safe place. |
||
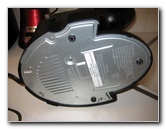
 Gently Slide Plate Back |
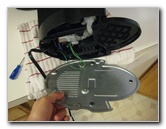 Metal Plate Removed |
 Green Ground Wire Attached |
| Carefully slide the metal base black towards the back of the machine to remove it. The green ground wires are riveted to the base and should be left attached. | ||
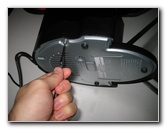
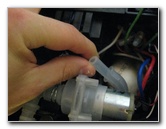
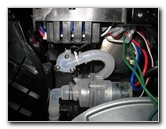
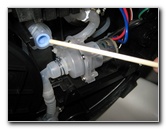
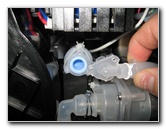
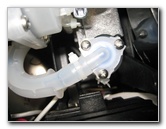 Tube To Water Pump |
 Cut Small White Cable Tie |
 Zip Tie Snipped - Remove |
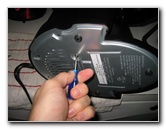
| The first tube that
I drained was the one that attaches the water pump to the metal internal
tank. Carefully cut the small white cable or "zip" tie with a pair of scissors. Try to avoid damaging the rubber hose. |
||
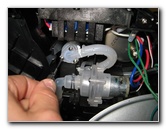
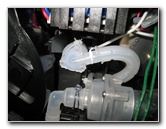
 Wiggle Hose Off Nipple |
 Drain Water From Tube |
 Shake Water Out of Hose |
| Wiggle the hose off
the spout, turn the machine upside down over the sink and allow the water to
drain out.
You may need to turn the machine upside down and then over again several times while gently shaking the machine to get all of the water out. |
||
|
|
||
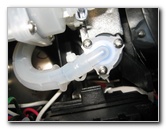
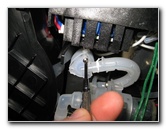
 Push Tube On Nozzle |
 White Twist Tie |
 Tighten Tube With Twist Tie |
| Then push the tube back on to the nozzle and secure it with either another small cable tie or a common household twist tie such as the ones that keep a bag of bread closed. | ||
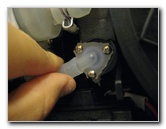
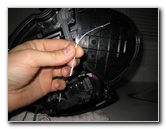
 3 Small Phillips Screws |
 Remove 3 Screws |
 Set Screws Aside |
| Next remove the 3
small Phillips head screws that hold the triangular cover in place at the
bottom of the machine. Set the screws aside in a safe place. |
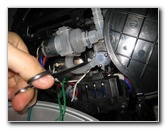
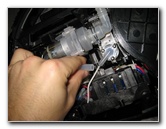
||
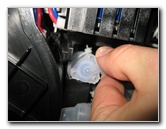 Wiggle Out Connector |
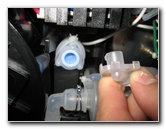 Blue Rubber One Way Valve |
 Use Clean Skewer Stick |
| Remove the
connector by wiggling it out of the fitting. Behind the triangular connector, you'll see a light blue rubber one way valve at the end of the tube that leads to the internal metal tank. |
||
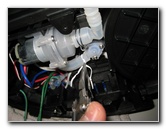
 Open Valve With Stick |
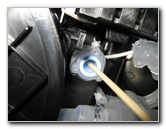 Water Draining From Tank |
 Shake Out Water |
| Turn the machine
over with the valve facing down towards your sink.
Insert a clean object such as a wooden skewer or toothpick to open the rubber one way valve and drain the water from the internal tank. You may need to turn the coffee machine upside down and over a few times to drain out most of the water from the tank. It is nearly impossible to empty out every last drop of water from the tubes and the internal tank, but the more you get out the safer your other belongings will be when you pack the machine for your move. Getting as much water out as possible is also important if you are shipping the package via USPS, Fed Ex or UPS since those carriers may find you liable for damages or delays caused by a leaking box and levy extra fees or charges. If you have a few days to spare, I'd recommend leaving the coffee machine out in a cool dry place with the bottom cover off and the tubes disconnected to allow time for more water to evaporate. |
||
 Re-Insert Tube Fitting |
 Connection In Place |
 Tighten 3 Small Screws |
| Gently re-insert
the triangular fitting at the end of the tube over the opening with the blue
rubber one way valve. Tighten the 3 small Phillips head screws until they are snug. |
||
 Tubes Re-Assembled |
 Insert Front Edge & Slide In |
 Tighten 5 Phillips Screws |
| Double check that
all of the connections are tight. Insert the front of the metal base plate in first and then slide it in place above the black plastic retaining tabs. Tighten the five screws until they are snug with the Phillips head screwdriver by turning them clockwise. Even though you have drained out most of the water in the tubes and internal tank of your Keurig machine, I'd still recommend flushing it out with vinegar or a mild bleach solution before using it again. Be sure to rinse the inner workings of the machine after using a cleaning solution by "brewing" several large mugs of plain water before you drink your next cup of coffee. For more,
check out my
Home Repair & Maintenance Guides. |
||
| If you found this guide to be helpful,
please consider making a small donation by clicking on the PayPal.com
"Donate" button located to the right of this paragraph. Thank you!
(Note: I am not a registered charity. Donations are not tax deductible.) |