
How To Clean a K&N Air Filter
A picture illustrated guide on how to service and clean a K&N automotive air filter.
|
Main Menu Home Digital Cameras Misc. Pictures Articles My Blog |

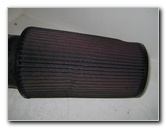
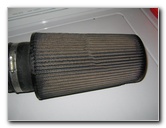
 9" K&N Cone Filter |
 Towel In Intake |
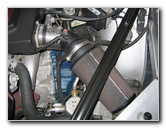
| Above you'll see my very dirty
K&N 9" open
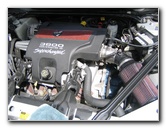
cone automotive air filter attached to the 3.8L supercharged V6 engine in my
2001 Pontiac Grand Prix GTP sedan.
As you probably know, K&N air filters are cleanable, reusable and come with a million mile limited warranty. A K&N air filter will also increase horsepower, and filter better than your stock OEM paper air filter. But I think the best benefit is that every time you get an oil change you don't have to tell the Jiffy Lube tech that you "have a new filter at home." Who wants to pay for
their over priced generic replacement filter anyway?
|
|
|
|
|
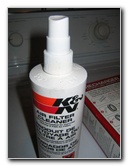
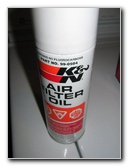
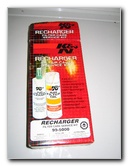 K&N Recharger Kit |
 |
|
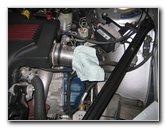
After I loosened the ring clamps and removed the K&N air filter from the engine bay, I stuffed a towel in the air intake to prevent any foreign objects from getting into the Eaton M90 roots style supercharger housing. Then I found my well worn K&N Air Filter Recharger kit and headed to the laundry room sink. I liberally sprayed the K&N Air Filter Cleaner liquid cleaning solution into each of the filter's pleats and let it sit for 30 minutes. |
|
 |
 K&N Filter Cleaner |
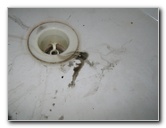
| Once the 30 minutes were up, the filter was
dripping an oil and dirt mixture down the drain.
I then flushed the filter from the inside out with tepid water from the faucet. Spraying water from the outside or against the side of your filter that meets the "dirty" air will just force the dirt and foreign objects further into the pleats. |
|
 Dirty Oily Drips |
 |
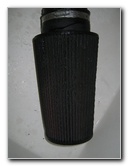
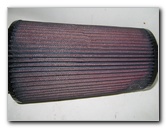
 Clean K&N Filter |
 Recharger Kit Instructions |
| On the left is the freshly cleaned
K&N
filter which I left to dry naturally over night.
Using compressed air could damage the filter so it's best to do this procedure when you know you don't have to drive anywhere for at least 6-8 hours. |
|
 K&N Aerosol Air Filter Oil |
 Clean & Oiled K&N Filter |
| In the morning before work, I sprayed the
K&N Air Filter Oil down each pleat while holding the can a few inches away
from the filter.
Then I went back and sprayed the white spots that I may have missed. The K&N Air Filter Oil has a pinkish red dye that helps you see where you sprayed and the areas that need a second pass. |
|
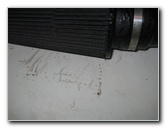
 Reattach IAT Sensor |
 |
|
Finally I pulled out the towel from the intake (don't
forget that step
Now the car feels a bit
quicker on the butt dyno. But I'm probably just imagining that.
For more, check out all of my Pontiac
Grand Prix DIY Repair & Maintenance Guides. |
|
| If you found this guide to be helpful,
please consider making a small donation by clicking on the PayPal.com
"Donate" button located to the right of this paragraph. Thank you!
(Note: I am not a registered charity. Donations are not tax deductible.) |
Main Menu Home My Digital Cameras Misc. Pictures Articles My Blog
Copyright 2024 © PaulsTravelPictures.com
All Rights Reserved ®