
Hyundai
Veloster Serpentine Belt Replacement Guide
How to change the serpentine accessory
belt on a 1st generation 2012 to 2017 Hyundai Veloster Gamma 1.6L I4 engine.

 2017 Veloster Gamma 1.6L |
 Left Side of Engine |
 Serpentine Belt & Pulleys |
| This
automotive maintenance tutorial was specifically written to assist
owners of the first generation (2012, 2013, 2014, 2015, 2016 and
2017) Hyundai Veloster in changing the serpentine accessory belt on
the Gamma GDI 1.6 liter inline four cylinder engine. Owners of other Hyundai or Kia vehicles such as the Elantra, Sonata, Azera, Santa Fe, Tucson, Accent, Ioniq, Genesis, Tiburon, ix20, i20, i30, i40, Veracruz, Optima, Cadenza, K900, Soul, Niro, Sportage, Sorento, Sedona, Rio, Forte and Spectra may also find these DIY instructions to be helpful. The OEM serpentine belt was the Hyundai 25212-2B020. A few other compatible replacement serpentine accessory belts with their part numbers are as follows: Bando 6PK1255, Gates K060494, ACDelco 6K494, Dayco 5060495 and Continental Elite 4060374. The tools needed to complete this procedure include a 12mm socket, a 14mm socket and a 3/8" drive ratchet. |
||
|
|
||
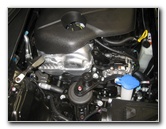
 Alternator - Top Front |
 Water Pump - Under Alt |
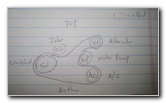 Belt Routing Diagram |
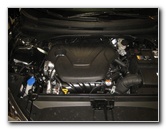
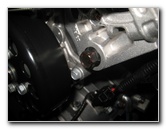
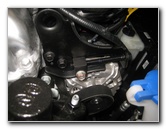
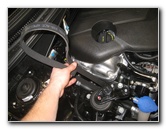
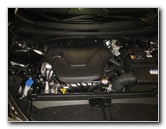
| The first two steps
are to open the hood and then move to the left (passenger) side of the
engine bay. The alternator is located at the front of the engine bay and just below the plastic engine cover. There are three bolts that need to be loosened in order to pivot back the alternator and release the tension on the old belt. I drew a belt routing diagram for myself that is shown in Picture # 6. I recommend that you take a moment to study how the old belt is routed around the various pulleys on your engine and also take a look at my routing diagram. |
||
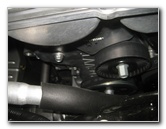
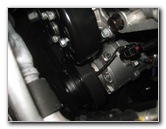
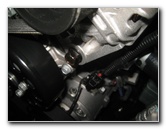
 Loosen Top Alternator Bolt |
 Loosen Tensioner Bolt |
 Lower Alternator Bolt |
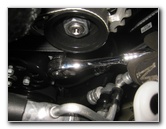
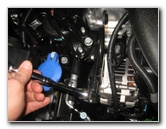
| First loosen the
short bolt that is mounted from left to right on the top of the alternator
bracket. Loosen the bolt by turning it counterclockwise with a 12mm socket and a 3/8" drive ratchet. Do NOT remove the bolt. Just loosen it a few turns. Then locate the larger bolt at the bottom corner of the alternator. |
||
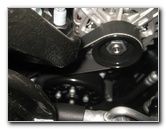
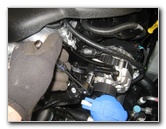
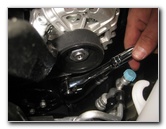
 Loosen Counterclockwise |
 Loosening Tension Bolt |
 Push Back Alternator |
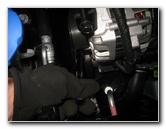
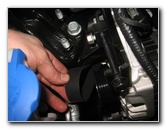
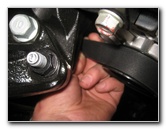
| Loosen the bottom
alternator bolt by turning it counterclockwise with the 14mm socket and a
3/8" drive ratchet. Do NOT remove the bolt. Just loosen it a few turns. The third and final bolt that needs to be loosened is the long belt tensioner bolt that is orientated from front to back on the top of the alternator bracket. Loosen the belt tensioner bolt by turning it counterclockwise with the 12mm socket and 3/8" drive ratchet. Do NOT remove the tensioner bolt. Firmly push the alternator towards the rear of the engine bay until it rotates backwards. If you have trouble pivoting the alternator towards the back of the engine bay (closer to the windshield), you may need to loosen the top 12mm and bottom 14mm bolt an extra few turns. |
||
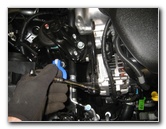
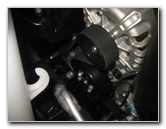
 Belt Tension Released |
 Slip Off Old Belt |
 Old Belt Removed |
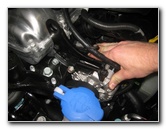
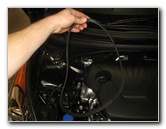
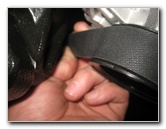
| Continue rotating
the alternator back until enough tension has been released from the old belt
to remove it. Slip the old belt off the top of the alternator pulley. Remove the old belt from the rest of the pulleys (crankshaft, water pump, A/C compressor, idler). Lift the old belt out of the engine bay. |
||
 Inspect Old Belt |
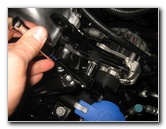
 Lower In New Belt |
 Wrap Around Pulleys |
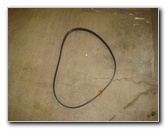
| Inspect the old
belt for any unusual wear, chunks of rubber missing, exposed steel wire or
fraying.
If the old belt is in decent condition, I recommend saving it in your trunk or garage just in case the new belt fails prematurely. I recommend buying either the genuine OEM Hyundai 25212-2B020 belt or the Bando 6PK1255 serpentine belt since it has excellent reviews on Amazon. Lower the new belt in to the engine bay and next to the left side of the engine. The ribbed side of the belt should be on the inner side and the smooth side facing out towards you. |
||
|
|
||
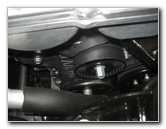
 Slip Over Alternator |
 Over Water Pump |
 Belt Tension Bolt |
| A good rule to
remember is that the ribbed side of the belt gets wrapped around ribbed
pulleys and the smooth / flat side of the belt should be against the smooth
pulleys. Wrap the bottom end of the new belt around the large crankshaft pulley at the bottom rear corner of the engine. Bring the smooth section of the belt up from the crankshaft and under the smooth idler pulley. Wrap the front lower section of the belt around the air conditioner (HVAC system) compressor. Wrap the rear side of the water pump (coolant system) with the smooth part of the belt. Pull the last ribbed loop of the new belt up and over the ribbed alternator pulley. Firmly pull the alternator forward towards yourself to place some tension on the new belt. Double check that the new belt is routed properly around the pulleys. |
||
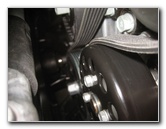
 Tighten Tensioner Bolt |
 Check Belt Tension |
 Rotate 90 Degrees |
| Tighten the long
tensioner bolt in the clockwise direction with the 12mm socket and a 3/8"
drive ratchet. Check the tension on the belt by grabbing and twisting it in the middle of the section between the alternator and the idler pulley. If you can rotate the belt more than 90 degrees compared to the belt on the pulleys, it is too loose. If you can't rotate the belt to 90 degrees, it is too tight. Loosen or tighten the tensioner bolt until the belt can only be twisted to about 90 degrees compared to the belt resting on the pulleys. |
||
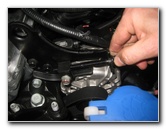
 Tighten Bracket Bolt |
 Lower Alternator Bolt |
 Tighten Clockwise |
| Once you are happy
with the belt tension, you can tighten the two bolts that secure the
alternator in place to the engine. Tighten the top alternator bracket bolt by turning it in the clockwise direction with the 12mm socket until it is snug. Tighten the larger bolt on the bottom of the alternator by turning it clockwise with the 14mm socket and 3/8" drive ratchet until it is snug. |
||
 Double Check Bolts |
 Start Engine - Listen Closely |
 Serpentine Belt Installed |
|
Double check that the alternator bolts are tight before continuing. Start the engine and listen closely for any strange sounds or noises that might indicate a problem. If you hear an immediate and continuous loud screeching or squealing noise, turn off the engine. The belt might be way too tight which is causing it to stay stationary while the crankshaft pulley spins and rubs against it. If you hear an occasional and faint "chirp chirp chirp" or a quick momentary screeching sound when you first start the engine, the new belt might be too loose. A loose belt may skip on the pulleys and cause a squeaking sound. Be sure to record the serpentine belt change in your car's service records. For more,
check out all of my
2012-2017 Hyundai Veloster DIY Repair & Maintenance Guides. |
||
| If you found this guide to be helpful,
please consider making a small donation by clicking on the PayPal.com
"Donate" button located to the right of this paragraph. Thank you!
(Note: I am not a registered charity. Donations are not tax deductible.) |