
Hyundai
Sonata 2.4L Engine Oil Change Guide
How to replace the motor oil and replace the filter
on a 2011, 2012, 2013 & 2014 Hyundai Sonata with the 2.4L I4 engine.

By Paul B. Michaels Author & Photographer Auto Mechanic Since 1989 |
||
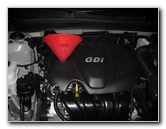
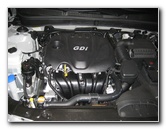 2.4 Liter Theta II GDI I4 |
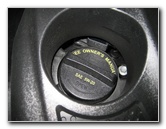 Oil Filler Cap SAE 5W-20 |
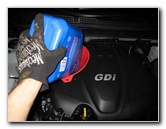
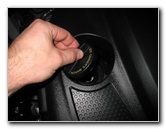
 Remove Oil Filler Cap |
|
This
automotive "how-to" guide was specifically written to assist owners
of the sixth generation (2011, 2012, 2013 & 2014) Hyundai Sonata in
changing the motor oil and replacing the oil filter in the 2.4 liter
Theta II GDI inline four cylinder engine. Owners of other Hyundai or Kia vehicles equipped with the 2.4L Theta II engine such as the Tucson, Santa Fe, Optima, Rondo, Cadenza, Sportage, Sorento, and Forte may also find these DIY instructions to be helpful. The items needed to complete this oil change include the following: a floor jack, jack stands, a 17mm socket with a 3/8" drive ratchet, a used oil catch container, an automotive funnel, a new oil filter and 5 U.S. quarts of SAE 5W-20 oil. A few compatible oil filters include the following with their respective part numbers: Purolator PL14459, Mobil1 M1-104, Bosch 3312, K&N PS-1004, Fram PH9688, ACDelco PF1127, Motorcraft FL810, and Driveworks DW-4459. |
||
|
|
||
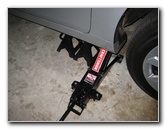 Raise Vehicle |
 Lower Engine Cover |
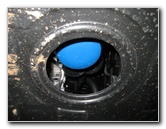 Oil Filter Access Hole |
| The first few steps
are to start the engine, allow it to warm up for a few minutes, and then
shut if off.
Warming up the engine helps suspend any contaminants within the old oil and also allows the old oil to drain out more quickly. Next remove the black plastic oil filler cap on the top of the engine by twisting it counter clockwise. Removing the oil filler cap will prevent a vacuum from forming while draining out the old oil and also help it to drain out more quickly. Then engage the parking brake and chock the rear wheels to prevent the vehicle from moving. Raise the front passenger side of the vehicle with the floor jack and securely support it with two jack stands. Alternatively, you could also raise the front of the vehicle with automotive ramps. |
||
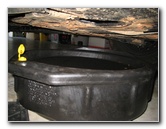
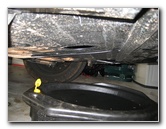
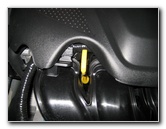
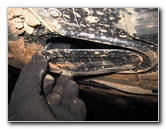 Open Access Door |
 Oil Drain Bolt Access Hole |
 Loosen 17mm Drain Bolt |
| Slide under the
vehicle along with the used oil catch container, a 17mm socket and a
3/8" drive ratchet. Locate and remove the triangular shaped oil drain bolt access door near the rear of the engine which is marked with the words "Engine Oil". Move the used oil catch container to below the drain bolt and remove it with the 17mm socket and a 3/8" drive ratchet.
|
||
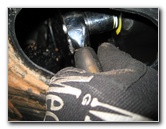
 Draining Old Oil |
 Replace Oil Drain Bolt |
 Tighten Oil Drain Bolt |
|
|
||
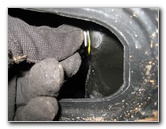
| Allow the old oil
to drain out for at least a few minutes before re-inserting the oil drain
bolt and tightening it with the 17mm socket and ratcheting wrench.
Tighten the oil drain bolt to just past hand tight or about 25 lb-ft of torque if you have a torque wrench. Note - The service manual torque specification for tightening the oil drain bolt is 25.3 to 32.5 lb-ft (34.3 to 44.1 N*m). Do not over tighten the oil drain bolt or you risk damaging the threads or the oil pan, which may cause an oil leak. |
||
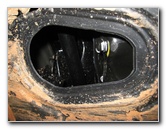
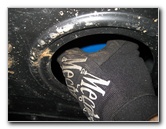
 Replace Oil Drain Cover |
 Twist Off Old Oil Filter |
 Draining Oil From Filter |
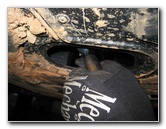
| Double check that
the oil drain bolt is snug and then snap the oil drain bolt access cover
back into place on the black plastic engine underside cover. Move the used oil catch container forwards to below the oil filter access hole and twist off the old oil filter by turning it counter clockwise. If you have trouble turning the old oil filter by hand, use an oil filter wrench such as the Lisle 63600 to help get it started. |
||
 Dip Finger In New Oil |
 Lubricate New Filter O-Ring |
 Twist On New Oil Filter |
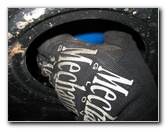
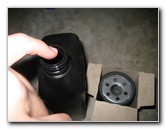
| I recommend buying
the Mobil1 M1-104 oil filter
since it has excellent reviews on Amazon. While the old oil is draining out of the oil filter receptacle, dip your pinky finger into some new SAE 5W-20 oil and run it around the rubber o-ring on the new oil filter. Lubricating the rubber o-ring on the new oil filter will allow it to form a better seal, prevent oil leaks, and also make it easier to remove the filter during the next oil change. Twist the new oil filter on to the engine and tighten it to about 1/4 to 1/2 turn past hand tight. Do not use the oil filter wrench to tighten the new filter. Over tightening the new oil filter may damage the rubber o-ring and lead to oil leaks. |
||
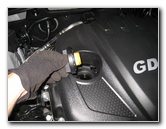
 Insert Automotive Funnel |
 Pour In 4-4.5 Qts New Oil |
 Engine Oil Level Dipstick |
| Lower the car from
the jack stands and the floor jack. Insert the automotive funnel into the oil filler hole and carefully pour in about 4 to 4.5 quarts of the 2.4L I4 engine's 4.86 U.S. quarts (4.6L) total engine oil capacity. (2.0L Turbo Owners - The oil capacity for the Hyundai Sonata with the 2.0L Turbo GDI engine is the same 4.86 Qts.) Replace the oil filler cap, run the engine for a few minutes, shut it off and let it rest for 5 to 10 minutes. |
||
 Lower Vehicle From Jack |
 Check Oil Level - Fill To "F" |
 Replace Oil Filler Cap |
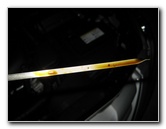
| Check the engine
oil level on the yellow handled dipstick and slowly add more oil into the
oil filler hole while repeatedly checking the dipstick until the level
reaches the "F" (full) mark indicated by the upper hole in the metal.
You may not need to pour in the entire 4.86 U.S. quarts of new SAE 5W-20 oil in order to reach the maximum line. When the oil level is correct, re-insert the oil filler cap and tighten it by turning it clockwise. Be sure to check the oil level on the dipstick several times over the next few days and watch your driveway for oil spots that may indicate a leak from the oil drain bolt or oil filter. Record the mileage and oil change details in your service record book. For more,
check out my other
Hyundai Sonata Repair & Maintenance Guides. |
||
| If you found this guide to be helpful,
please consider making a small donation by clicking on the PayPal.com
"Donate" button located to the right of this paragraph. Thank you!
(Note: I am not a registered charity. Donations are not tax deductible.) |