
GMC Terrain
Electrical Fuse Replacement Guide
How to check or change a blown fuse in a
1st generation 2010 to 2016 GMC Terrain with photo illustrated steps.

 2016 Terrain Fuse Box |
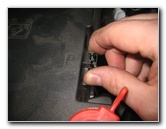
 Tabs On Left Side |
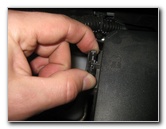 Squeeze Together Tabs |
| This
automotive maintenance tutorial was specifically written to assist
owners of the first generation (2010, 2011, 2012, 2013, 2014, 2015 &
2016) GMC Terrain in checking or changing a faulty or "blown" fuse
or relay in either the engine bay or the interior passenger
compartment electrical panels. Owners of other General Motors vehicles such as the Buick Verano, Regal, LaCrosse, Cascada, Encore, Enclave, Envision, GMC Canyon, Sierra 1500, Acadia, Yukon, Denali, Savana, Spark, Sonic, Cruze, Malibu, Impala, Volt, Camaro, Corvette, SS, Trax, Equinox, Traverse, Tahoe, Suburban, Colorado, Silverado and Express may also find these DIY instructions to be helpful. This 2016 Terrain is equipped with standard mini blade fuses which can be purchased at any auto parts store, Walmart or online at Amazon. A white plastic fuse puller tool should be included on the engine bay electrical panel. If the tool is missing, you may use a pair of needle nose pliers with rubber insulated handles. |
||
|
|
||
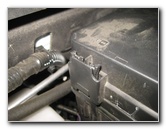
 Pinch Together Right Side Tabs |
 Pull Off Fuse Box Cover |
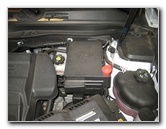
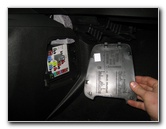
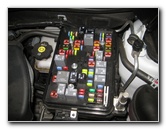 Engine Bay Fuse Block |
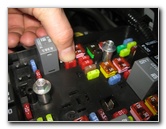
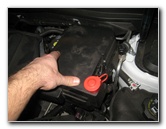
| The first two steps
are to open the hood and then move to the right (driver) side of the engine
bay. The engine bay fuse box is located just behind the 12V automotive battery and to the right of the brake fluid reservoir. There are two tabs on both the left and right sides of the engine bay fuse box cover. Pinch the two tabs on each side towards each other to release the retaining clips. Lift off the fuse box cover to access the electrical panel. |
||
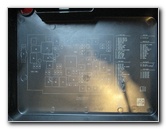 Fuse Location Diagram |
 White Plastic Fuse Puller |
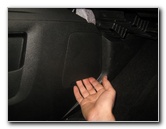
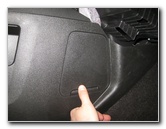
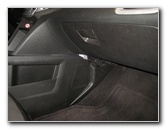 Passenger Side Kick Panel |
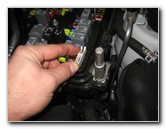
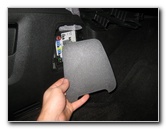
| Turn over the cover
to view the fuse location diagram. There is also a fuse location diagram in the owner's manual. The white plastic fuse puller tool is located at the front right corner of the engine bay fuse block. The interior passenger compartment electrical panel is located behind a plastic cover on the passenger side kick panel below the center stack. |
||
 Pull Out Access Cover |
 Fuse Location Diagram |
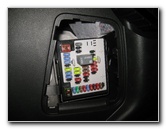 Interior Fuse Panel |
| Gently pull out the
bottom edge of the access cover and turn it over to view the fuse location
diagram. There is also a fuse location diagram in your owner's manual. |
||
|
|
||
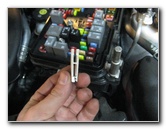
 Place Jaws Over Old Fuse |
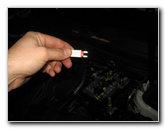 Pull Out Old Fuse |
 Hold Up To Light Source |
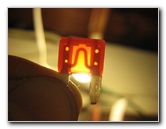
| Place the jaws of
the tool over the old fuse and gently pull it straight out of the socket. Hold up the old fuse to a light bulb to check it. If the thin metal band or strip in the translucent plastic center of the old fuse appears to be broken or burnt, the fuse is most likely burnt or "blown" and should be replaced with a new fuse of the same amperage rating (e.g. 5, 10, 15, 20A). If the thin metal bar in the middle of the old fuse appears to be intact, the fuse is probably still good. But since new fuses are so inexpensive, you should still replace the old fuse as part of your electrical issue troubleshooting process. |
||
 Push In New Fuse |
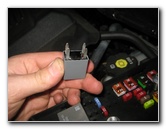 Checking Old Relay |
 Replace Fuse Puller Tool |
| Push a new
mini blade fuse of the same
amperage rating straight in to the socket. If you suspect that a relay is faulty, the easiest way to check is to replace it with a new or another known to be working relay on the panel. Otherwise you can check the relay by using a safe 12V power source (not the car battery) and a multi-meter. Replace the fuse puller tool in to its holder at the front right corner of the engine bay fuse block. |
||
 Push On Fuse Box Cover |
 Line Up Interior Cover |
 Pop In Access Panel |
| Push the fuse box
cover back in to place until the two retaining clips "click". Line up the interior fuse block cover and gently snap it back in to place. Test the electrical component that you were having problems with such as the radio, 12V socket, window wipers, power seat, power windows, radio, headlights, interior lights, etc. If you are still having the same problem, you might have a shorted wire somewhere or the component itself needs to be replaced. For more,
check out my other
2010-2016 GMC Terrain DIY Repair & Maintenance Guides. |
||
| If you found this guide to be helpful,
please consider making a small donation by clicking on the PayPal.com
"Donate" button located to the right of this paragraph. Thank you!
(Note: I am not a registered charity. Donations are not tax deductible.) |