
GM Wheel
Bearing Hub Assembly Replacement Guide
Picture illustrated instructions for
replacing the wheel bearing hub assembly on a General Motors Pontiac Grand Prix
GTP.

| This automotive maintenance guide was written specifically for
replacing the front wheel bearing hub assembly on a 6th generation
(1997, 1998, 1999, 2000, 2001, 2002 & 2003) General Motors
Pontiac Grand Prix GTP FWD (front wheel drive) four door sedan.
It also might be useful for owners of other GM brands such as Chevrolet, Buick, Oldsmobile, Cadillac, GMC, Holden, Opel, Hummer and Saturn. Specific cars or trucks that might have the same basic procedure for replacing the wheel bearing hub assembly include the Regal GS, Grand Am, Monte Carlo, Impala, Lumina, Intrigue, Cutlass Supreme, Eldorado, Riviera, Century, Monaro, GTO, G6, Bonneville, Firebird Trans Am, and the Fiero. |
||
|
|
||
| Basically any
owner of a GM car, truck or SUV with FWD in the E-Body or W-Body
chassis family should find this guide helpful. Please Note - This
guide is not to be used as a replacement for a professional mechanic's
education and assistance. The guide creator and this website take
absolutely no responsibility for any vehicle damage or injuries. Take
care.
A few compatible replacement front wheel bearing hub assemblies with their part numbers are as follows: ACDelco FW293, Prime Choice Auto Parts HB613123PR, Detroit Axle 513121, GMB 730-0003, Timken 513179, Dura International 29513179, Precision Automotive 513121, Callahan C513179 and Raybestos 713179. Please verify the correct replacement part number for your vehicle by using the Amazon Part Finder website. The correct part may vary depending on the model year, trim level and whether it has an ABS (anti-lock) braking system or not. |
||
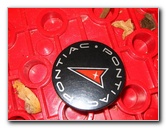
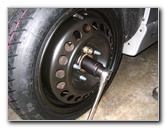
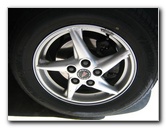 Pontiac Torque Star Wheel |
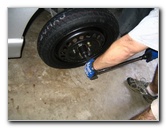
 First Step - Remove Wheel |
 |
| My brother and I had
previously replaced a front wheel bearing hub assembly on my Pontiac
Grand Prix GTP about a year ago.
We used a "Made In China" DynaPak brand hub that immediately caused a loud popping noise during low speed parking maneuvers. Recently the other GM OEM wheel hub began to wear out and cause a loud droning inside the car from the friction of the worn metal bearing. The sound of a wheel bearing that needs to be replaced is similar to the road noise created by low quality tires but much louder. We researched the different wheel bearing brands online and read consumer reviews. It seemed that most people disliked the Chinese made replacement parts due to their lower quality. |
||
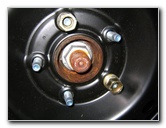
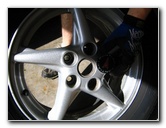 Pontiac Center Cap Removed |
 |
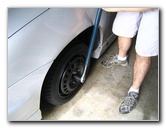
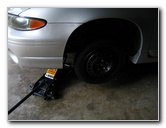
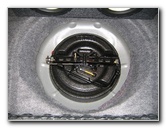 Car Jack & Spare Tire Storage |
| We
removed both of the front Torque Star wheels on my 2001 Pontiac Grand Prix
GTP and also took out the spare tire from the trunk.
Removal of the front axle nut on GM E-Body and W-Body cars requires a 36mm socket. The axle nut socket wouldn't fit through the hole in my wheel where the "Pontiac" center cap pops in so we had to use the spare tire instead. Lowering the spare tire in contact with the garage floor kept the wheel from spinning while removing the axle nut using a breaker bar. If you own an electric or air powered impact wrench, it makes this part of the procedure much easier. |
||
 |
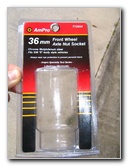 E-Body 36mm Axle Nut Socket |
 Two Lug Nuts On Spare |
|
It's also possible to remove the axle nut without using the spare tire and lowering the car. You can place a large screwdriver in one of the brake rotor's vanes and it will hold the wheel hub in place against the brake caliper while you remove the axle nut. |
||
 |
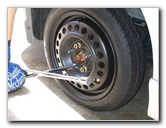
 Using Breaker Bar For Axle Nut |
 36mm Front Wheel Axle Nut |
| While
using a breaker bar to loosen the axle nut, be careful not to scratch your
paint.
During the upward rotation, the bar came very close to making contact with the pristine Galaxy Silver Metallic paint on my beloved Grand Prix GTP. |
||
 Axle Nut Removed |
 Spare Tire Mounted |
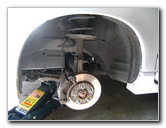
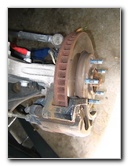 Caliper, Rotor, & Hub |
 Removing Brake Caliper |
 Removing Brake Rotor |
 Brake Caliper Resting |
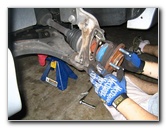
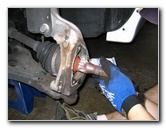
| After
removing the axle nut, you can then move on to taking off the brake caliper
and brake rotor.
The front brake caliper is held on by two 15mm bolts that may require a small breaker bar to loosen. We rested the brake caliper on the car's shock tower so that it wouldn't hang down and place stress on the brake lines. The next step is to slide off the brake rotor and place it out of the way. |
||
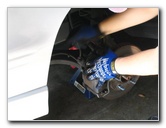
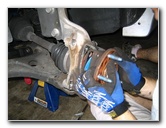
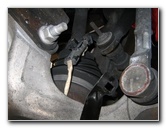 ABS Sensor Clip & Wire |
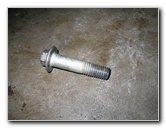 1 of 3 13mm Wheel Hub Bolts |
 Bolt Breaker Bar |
|
Then we popped apart the ABS (antilock braking system) wire connector that is attached to the wheel bearing hub assembly. Next the three 13mm bolts on the back of the hub can be removed, again with the help of a small breaker bar. |
||
|
|
||
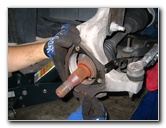
 |
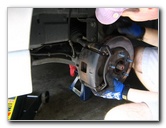
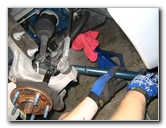
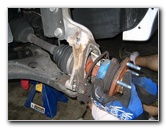
 Removing Old Hub |
 |
|
We had rented an axle puller from the auto parts store but it was unnecessary since the old hub came off easily without much effort. The hub on the other side of the car just required a small tap with a common hammer to free it from the spindle. |
||
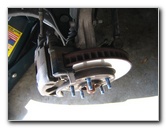
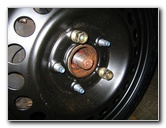
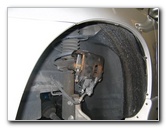
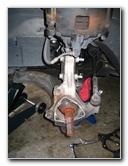
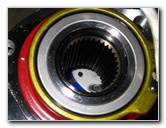
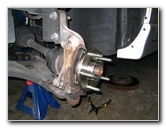
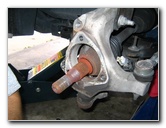 Drive Shaft & Hub Spindle |
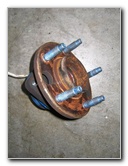
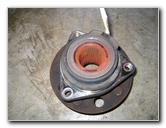 GM OEM Wheel Hub Assembly |
 Holding Metal Bracket |
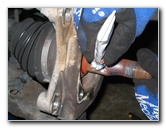
| Once
the old wheel bearing hub assembly is removed from the drive shaft and
spindle, you'll see a thin metal bracket.
The old OEM GM hub pictured in the row above and below had about 73,000 miles on it before it began to make noise. I recommend buying the OEM General Motors ACDelco FW293 front wheel bearing hubs since they have excellent reviews on Amazon and seem to last a long time. |
||
 |
 |
 CarQuest Warranty Receipt |
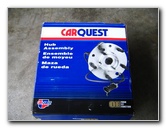 Car Quest Brand Part |
 |
 New Wheel Bearing |
| Now we
had both front wheel bearing hub assemblies removed and were ready to go
return the defective DynaPak hub and purchase some higher quality parts.
I mentioned above that the Chinese made DynaPak hub was the cause of a loud thump, clank, pop or banging sound in the front end of my car during low speed turning such as in a parking lot. |
||
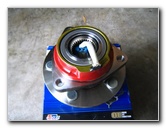 Made In Korea Hub |
 |
 Greasing Axle Spindle |
| Since
my DynaPak hub was less than a year old, we were able to return it to
AutoZone, but unfortunately they didn't have any American made replacement
parts in stock.
We visited a few parts stores before finally buying two wheel hubs from CarQuest that were assembled in Korea but contained American made bearings. The CarQuest Korean brand hubs appeared to be of a much higher quality than the DynaPak brand and but not better than the General Motors original equipment manufacturer parts. The grand total for the two assemblies was slightly less than $400 with a one year replacement only warranty. |
||
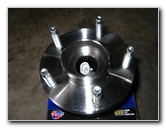
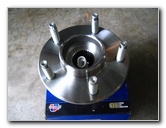
 Wheel Hub Close Up |
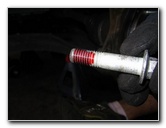 Red Threadlocker On Bolt |
 New Hub On Spindle |
| I
unpacked the new wheel bearing hub assemblies from the CarQuest boxes while
my brother placed some white lithium grease on the car's spindles.
We guided the ABS sensor wire through past the axle and pushed the hub onto the spindle. Make sure that you don't forget to reconnect the antilock brake system at this point. Also be sure that the hub was mounted with the ABS
wire at the bottom of the assembly so that it won't rub the axle boot.
To keep the bolts from vibrating loose, apply a small amount of high strength Loctite Red threadlocker. |
||
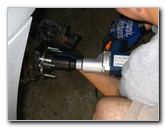 Impact Wrenching Axle Nut |
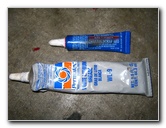 White Lithium Grease & Loctite |
 |
|
Then you can line up the metal bracket, re-attach the three 13mm wheel hub bolts, put on the brake caliper with the two 15mm bolts, replace the brake rotor, and tighten the axle nut with a torque wrench. I read on a message board that the torque settings for the caliper and hub bolts was about 100 foot pounds. Finally, the wheels can go back. Use a torque wrench to tighten the lug nuts to about 100 ft-lbs. That's it! I hope you found this guide useful for your wheel bearing hub assembly replacement. If you also need to replace a
GM power window motor &
regulator or perform an
Eaton M90 supercharger
oil change, click on the preceding links.
For more, check out all of my
Pontiac Grand Prix DIY Repair & Maintenance Guides. |
||
| If you found this guide to be helpful,
please consider making a small donation by clicking on the PayPal.com
"Donate" button located to the right of this paragraph. Thank you!
(Note: I am not a registered charity. Donations are not tax deductible.) |