
GM Chevrolet Malibu Engine
Oil Change Guide
How to change the motor oil and oil
filter on a 2004 to 2007 Chevy Malibu with the GM 3500 3.5L LX9 V6 engine.

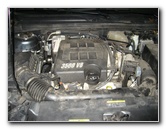 GM 3500 V6 3.5L LX9 |
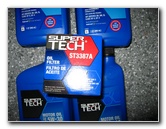 Super Tech ST3387A Filter |
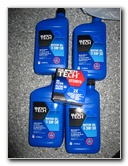 4 Quarts SAE 5W-30 |
| This
automotive how-to guide was specifically written to assist owners of
the 2004, 2005, 2006 and 2007 Chevrolet Malibu in replacing the
motor oil and oil filter on the GM 3.5L 3500 LX9 V6 engine. Owners of other General Motors vehicles equipped with the 3500 V6 engine such as the Pontiac G6, Montana, Buick Terraza, Rendezvous, Chevrolet Uplander, Impala, Monte Carlo, Saturn Relay, and Aura may also find this guide to be helpful. The owner's manual of this 2006 Chevrolet Malibu specified that 4 quarts of SAE 5W-30 oil is needed for an oil change with a new oil filter. Some compatible oil filters for the GM 3500 3.5L V6 engine include the Purolator PL10111, ACDelco PF47, Mann-Filter ML 1000, Fram PH3387A and Pennzoil HPZ-9A. |
||
|
|
||
Please verify the correct replacement oil filter part numbers for Malibu by using the Amazon Part Finder website. The correct parts may vary depending on the model year, trim level and engine type (3.5L V6, 2.2L I4 or 3.9L V6). |
||
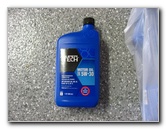 Wal-Mart Super Tech Oil |
 13mm Oil Drain Bolt |
 Engine Oil Filter |
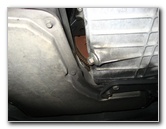
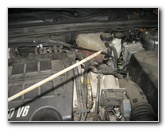
| The tools needed to
complete this oil change procedure include a 13mm wrench or socket for the
oil drain bolt, an oil filter wrench, a used oil catch container, a
floor
jack, and jack stands.
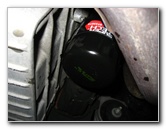
Other useful items to have are latex gloves, paper towels, an automotive funnel, and newspapers. If it isn't already, warm up the engine for a few minutes to suspend contaminants in the oil and help the old oil flow out more quickly. The first step is to jack up the passenger side of the car and then secure it with two jack stands. Place blocks or wheel chocks behind the rear wheels to keep the vehicle from moving. Engaging the parking brake is also a good idea for additional safety. The 13mm oil drain bolt is located at the rear of the engine's oil pan facing towards the back end of the car. The engine's oil filter is located just in front of the oil pan and behind an exhaust pipe. |
||
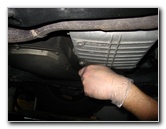
 Turn Bolt Counter Clockwise |
 Old Oil Draining Out |
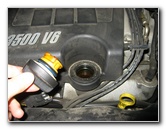
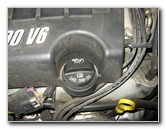 Remove Oil Filler Cap |
| Since used engine
oil can contain carcinogens (cancer causing agents), it's recommended that
you wear latex gloves.
Place your oil catch container under the oil drain bolt and remove it by turning it counter clockwise with a 13mm wrench or socket and ratcheting wrench. Allow the old oil to drain out for at least a few minutes. Removing the oil filler cap on the top of the engine will let air into the engine and cause the old oil to drain out faster. |
||
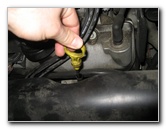
 Allow Air To Enter Engine |
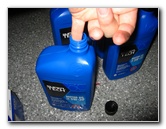 Dip Finger In New Oil |
 Lubricate Oil Filter O-Ring |
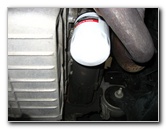
| I recommend buying
the Fram PH3387A oil filter
since it has excellent reviews on Amazon. Next, dip a finger into some new engine oil and run it around the rubber o-ring on the new oil filter to lubricate it. This will help the o-ring create a better seal, prevent leaks, and makes it easier to remove during the next oil change. |
||
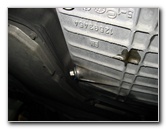
 Replace Oil Drain Bolt |
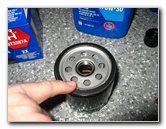
 Twist Off Old Oil Filter |
 Allow Filter To Drain |
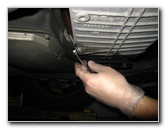
| You may be able to
remove the old oil filter just by turning it counter clockwise by hand.
An oil filter wrench can make removing a stubborn oil filter much easier and they only cost a few dollars. I've been using the Lisle 63600 oil filter wrench for a few years and it works really well. Be sure to move your old oil catch container underneath the oil filter since some oil will leak out when it is removed. |
||
|
|
||
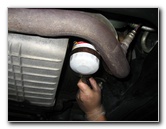
 Hand Tighten New Oil Filter |
 Tighten 13mm Drain Bolt |
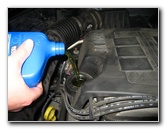 Pour In New 5W-30 Oil |
| Once the old oil
has mostly stopped leaking out from the oil filter receptacle, screw on the
new oil filter in the clockwise direction until it stops.
Then twist it about 1/4 to 1/2 turn past hand tight. Do not tighten the new oil filter with an oil filter wrench since it can cause damage to the filter or o-ring and result in a leak. Replace the 13mm oil drain bolt with the wrench or socket until it is just past hand tight. Do not over tighten the oil drain bolt as the threads or aluminum oil pan may be damaged causing a leak. Double check that the drain bolt and oil filter are tight before lowering the car down from the jack stands and removing the floor jack. The GM 3500 3.5L V6 engine requires 4 US Quarts of new SAE 5W-30 oil for an oil change with a new oil filter. Pour in about 3.5 quarts of oil, run the engine for a minute, allow it to rest for a few minutes, and then check the oil level on the dipstick. Slowly add the rest of the fourth quart of oil until the level on the dipstick reaches the "MAX" or "FULL" line. |
||
 Check Oil Level On Dipstick |
 Replace Dipstick |
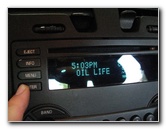 Display Oil Life on DIC |
| It's much better to
run an engine with slightly less oil than needed than to run it with too
much oil.
Running an engine with too much oil can cause damage to the seals, gaskets or other components. Depending on how long you allowed the old oil to drain out from the engine, you may not need the entire 4 quarts as specified in the manual to reach the "FULL" mark on the dipstick. |
||
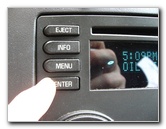
 Press & Hold ENTER Button |
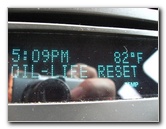 Oil Life Reset Screen |
 Press & Hold Enter Again |
| The last step to
complete the oil change is to reset the oil life meter on the "DIC" (Driver
Information Center) feature of the Chevy Malibu's radio.
Change the display of the DIC until the "Oil Life xx%" screen appears. Then press and hold the "Enter" button until the "Oil Life Reset" message is displayed. Release the "Enter" button and then hold it again for a few seconds until the "Acknowledged" message appears. Release the "Enter" button and you should see "Oil Life 100%" on the screen. |
||
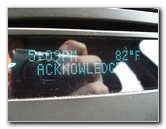 "Acknowledged" Message |
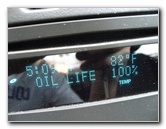 Oil Life 100% |
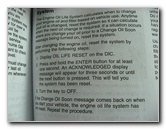 Oil Life Reset Instructions |
| Check the oil level
on the engine's dipstick after your first drive and again a few days later.
Look for oil spots on your driveway, garage floor, or parking spot for the
first week to be sure that the drain bolt and filter are on tight enough. |
||
| For more of my
automotive repair guides or product reviews, click on the following links:
GM Chevy Malibu Tail Lights On With Brake Pedal Up Repair Guide,
GM Chevy Malibu Headlight Bulbs Replacement Guide,
GM Chevrolet Malibu Tail Light Bulbs Replacement Guide,
GM Low Coolant Sensor Guide,
GM Key Fob Remote Control Battery Replacement Guide,
GM Front Brake Pads Replacement Guide,
How To Reattach Car Molding,
Meguiars Headlight Restoration Buffing Kit Review,
GM Power Window Tracks Lubrication Guide,
GM Power Window Switch Copper Contacts Cleaning Guide,
GM Pontiac Key Fob Battery Replacement Guide,
GM HVAC Condensate Water Drain Elbow Unclogging Guide,
Zaino Bros Show Car Polish Review,
WeatherTech FloorLiner Review,
GM Power Steering Whine Repair Guide,
GM Brake Line Fluid Bleeding Guide,
GM Front Brake Pads Replacement Guide,
GM Rear Brake Pads Replacement Guide,
How To Stop Tail Light & Headlight Condensation,
Sunforce 50012 Solar Battery Maintainer Review,
Corroded Car Battery Terminal Replacement Guide,
GM Power Window Motor & Regulator Replacement Guide,
GM Wheel Bearing Hub Assembly Replacement Guide, and
K&N Air Filter Cleaning Guide. |
||
| If you found this guide to be helpful,
please consider making a small donation by clicking on the PayPal.com
"Donate" button located to the right of this paragraph. Thank you!
(Note: I am not a registered charity. Donations are not tax deductible.) |