
Ford Fusion
Dome Light Bulb Replacement Guide
How to replace the bulbs in the overhead
dome light of a 2006-2012 Ford Fusion with picture illustrated instructions.

By Paul B. Michaels Author & Photographer Auto Mechanic Since 1989 |
||
 |
 |
 |
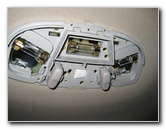
| This
automotive "how-to" guide was specifically written to assist owners
of the 2006, 2007, 2008, 2009, 2010, 2011 and 2012 Ford Fusion in replacing a burnt out overhead
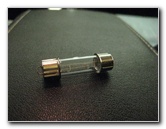
dome light bulb. Owners of other Ford, Lincoln or Mercury vehicles such as the Fiesta, Mustang, Focus, Taurus, Flex, Edge, Expedition, Escape, Ranger, F-150, MKZ, MKS, MKX, MKT, Navigator, Milan, Grand Marquis, Mariner, and Mountaineer may also find this instruction guide to be helpful. A replacement "festoon" style base bulb for any of the three dome lights is part # 578 from various manufacturers such as Sylvania, GE, Philips and ACDelco. If you would like to have brighter dome lights, install some compatible 578 LED bulbs. The only tool needed to replace the dome light bulbs is a small flathead screwdriver used to pry off the dome light lens cover. |
||
|
|
||
 |
 |
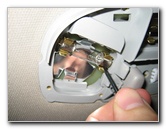 |
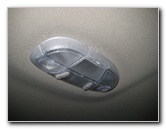
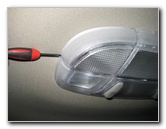
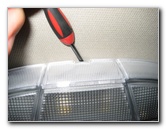
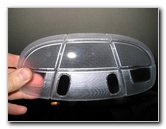
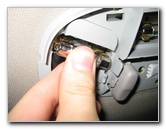
| To remove the dome
light lens cover, gently insert the blade of the screwdriver in between the
headliner and the cover before prying downward.
If you have trouble removing the lens cover, insert the screwdriver at several locations such as the left side, right side and in the notch at the rear. Once the lens cover has been removed, you'll be able to see the three # 578 festoon base dome light bulbs. The burnt out bulb can either be pried out with the flathead screwdriver or pulled out with your fingers. Avoid putting excessive pressure on the glass part of the bulb to prevent it from breaking. |
||
|
|
||
 |
 |
 |
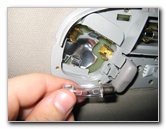
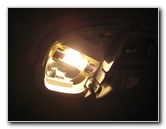
| Push a new #
578 bulb straight into the dome light socket and test it by moving the rocker
switch to the "On" position. Tip - If you are installing LED bulbs and they don't work at first, try flipping them around in the socket. |
||
 |
 |
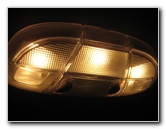 |
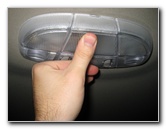
| Line up the dome
light lens cover over the housing and gently push it back into place. For more,
please check out my
Ford Fusion Repair & Maintenance Guides page. |
||
| If you found this guide to be helpful,
please consider making a small donation by clicking on the PayPal.com
"Donate" button located to the right of this paragraph. Thank you!
(Note: I am not a registered charity. Donations are not tax deductible.) |