
Dodge
Charger Fog Light Bulbs Replacement Guide
How to replace a burnt out fog light bulb in
a 2006-2010 Dodge Charger sedan with picture illustrated instructions.

By Paul B. Michaels Author & Photographer Auto Mechanic Since 1989 |
||
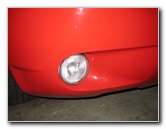 Passenger Fog Light |
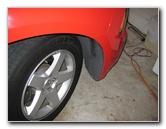
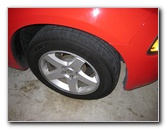 Passenger Wheel & Tire |
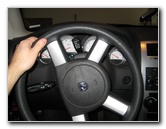 Turn Steering Wheel |
| This
automotive "how-to" guide was specifically written to assist owners
of the 2006-2010 Dodge Charger in replacing a burnt out fog light
bulb. Owners of other Dodge or Chrysler vehicles such as the 300C, Magnum, Challenger, Caliber, Journey, Avenger, Nitro, Durango, Grand Caravan, 200 and Town & Country minivan may also find this guide to be useful. Replacement fog light bulbs for the 2006-2010 Dodge Charger sedan are part # 2504 according to the Sylvania website. The manual lists them as part # PSX24W. Other owners on the Dodge Charger forums claim that the correct bulb is part # 9145 or H10 but those both don't seem to have the correct base. Be sure to select a new bulb that is 24 or 42 watts rather than 55 watts to prevent overheating. The only tool needed to replace the bulbs is a small flathead or Phillips head screwdriver. |
||
|
|
||
 Tire Turned To Left |
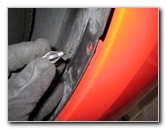
 Push In Center Pins |
 Pull Out Wheel Well Fastener |
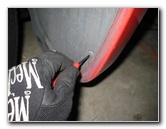
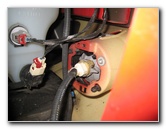
| In order to access
either fog light bulb, you'll first need to turn the steering wheel all the
way to the opposite direction or remove the wheel entirely.
Since I was replacing the passenger side fog light bulb, I started the engine and turned the steering wheel to the left until it stopped. Then move to the wheel well behind the fog light and pop out 2 or 3 of the wheel well fasteners with a small flathead or Phillips head screwdriver. The fasteners are an odd type that have a small round plastic piece in the middle with threads on it. To remove the fasteners, you have to push the screwdriver hard into the middle of the circle until the threaded piece pops into the wheel well. I'd recommend purchasing some "X-Mas" or "Christmas" tree type replacement fasteners since the OEM fasteners are difficult to re-use. Other options are nylon rivets, Tuflok fastners, nylon arrow clips or "pine tree" fasteners. |
||
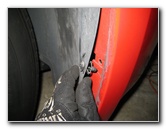
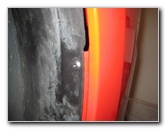
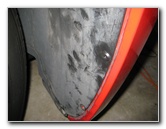
 Wheel Well Cover Fastener |
 Pull Back Wheel Well Cover |
 Fog Light Bulb Socket |
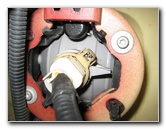
| Once you have at least two of the wheel well cover fasteners removed, you can pull back the plastic liner and see the fog light bulb socket. | ||
|
|
||
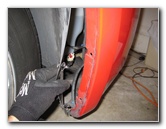
 Pry Up Clips On Either Side |
 Pull Bulb Out of Fog Light |
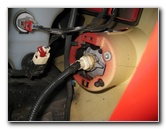
 Disconnect Power Connector |
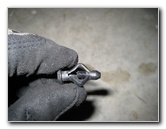
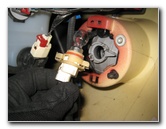
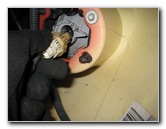
| My first attempt to
remove the fog light bulb ended up with just the white plastic power
connector coming off by itself.
The fog light bulb itself doesn't come out of the fog light assembly with just a 1/4 turn counter clockwise like many other automotive bulbs. To remove the fog light bulb, you have to push in or squeeze together both of the tan colored retaining clips on either side. To remove the power connector first, push in the white power connector release button indicated in Picture # 10 above. The new PSX24W or 2504 # bulb has the same tan colored base and shape as the OEM part. Snap the new bulb into place inside the fog light assembly and then push the power connector on to the base. |
||
 Install New Bulb |
 Test New Fog Light Bulb |
 Re-Insert Fastener |
| Test the new fog light bulb by activating the lights before continuing to the next steps. | ||
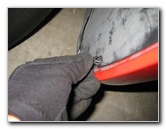
 Install 2nd Fastener |
 Fasteners Inserted |
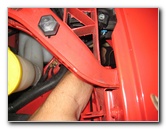 Reach Down To Fasteners |
| If you bought new
X-Mas tree type pop rivet fasteners, line up the wheel well liner with the holes on
the body and push them into place.
To re-use the old fasteners, squeeze the sides of the fastener until it can be inserted through the wheel well liner and into the hole in the metal body work. Then you'll have to reach down with one hand through the engine bay while holding the fastener with your other hand. Push the small end of the fastener until you feel the threaded plastic dowel piece click into the circular end exposed on the outside of the wheel well. (This step may not be easy. You may end up just going to buy new fasteners.) |
||
 |
 |
 |
Be sure to record the bulb change in your vehicle's service records.
For more, check out my
Dodge
Charger Maintenance & Repair Guides page. |
||
| If you found this guide to be helpful,
please consider making a small donation by clicking on the PayPal.com
"Donate" button located to the right of this paragraph. Thank you!
(Note: I am not a registered charity. Donations are not tax deductible.) |