
Blitzsafe Toyota Corolla Aux
Input Adapter Install Guide & Review
How to remove a Toyota Corolla radio and
install the Blitzsafe TOY/AUX DMX V.2 auxiliary input adapter with a review.

By Paul B. Michaels Author & Photographer Auto Mechanic Since 1989 |
||
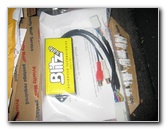 Blitzsafe TOY/AUX DMX V2 |
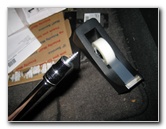
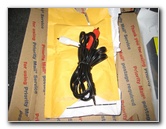 $0.99 RCA To 3.5mm Headphone |
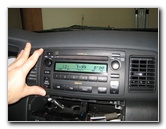
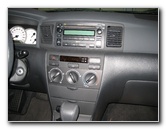 2005 Toyota Corolla Radio |
| We've been
wishing that our 2005 Toyota Corolla S had an auxiliary or "aux"
audio input for years. I finally decided to purchase the
Blitzsafe TOY/AUX DMX V.2 electronic interface adapter for $59.99 plus
$5 shipping from Enfig Car Stereo in New Jersey. The Blitzsafe adapter arrived quickly via USPS Priority Mail a few days after I placed my order. I also ordered a 6 foot long male stereo RCA plugs to 3.5mm headphone jack cable for $0.99 with free shipping from a seller on eBay. It took me a little over 30 minutes to remove the radio, plug in the aux input adapter, route the headphone jack cable and re-install everything. The process was relatively quick and easy. I tested the audio quality of the TOY/AUX DMX V.2 by playing MP3 songs and videos with an Acer netbook, a Samsung smartphone and an LG Incite phone. Overall the sound quality is excellent and I think the Blitzsafe is well worth the money. |
||
|
|
||
For instructions on how to remove the internal six CD changer radio and install the Blitzsafe TOY/AUX DMX V.2 auxiliary audio input adapter in a 2003 to 2009 Toyota Corolla, please continue reading below. |
||
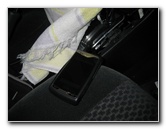
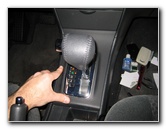
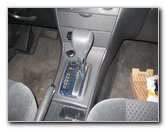 Gear Shifter & Trim Piece |
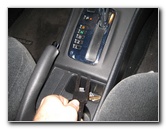 Pry Up With Panel Tool |
 Pull Off Gear Shift Trim |
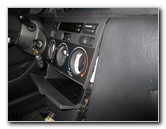
| The first step is to pry up the trim panel that surrounds the gear shifter with an automotive panel tool. You can also use a plastic knife, small flathead screwdriver or any other similar tool. | ||
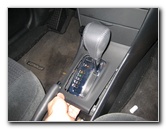
 Gear Shift Trim Removed |
 Disconnect 12V Power Plug |
 12V Power Disconnected |
| There are two friction fasteners at the bottom, two in the middle and two at the top of the gear shifter trim piece. Once you have the panel removed, you can disconnect the 12V socket power supply. | ||
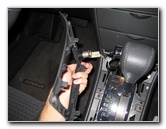
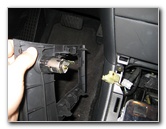
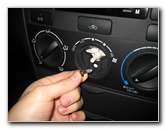
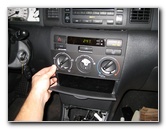
 Pull Out A/C Fan Speed |
 Fan Speed Knob Removed |
 Remove Philips Head Screw |
| Next pull out the air conditioner fan speed control knob and remove the single Philips head screw located behind it. | ||
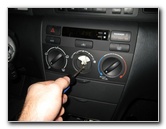
 Philips Head Screw Removed |
 Open Upper Compartment |
 Place Both Hands Inside |
| Place both of your hands into the upper storage compartment, exert outward pressure, and gently pull the bottom of the panel out towards you. | ||
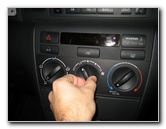
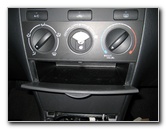
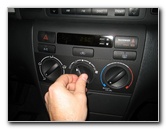
 Pull Out Center Control Panel |
 Panel Tool - Pry Clips |
 Control Panel Removed |
| Use the panel tool to release the clips at the top left and top right of the panel. | ||
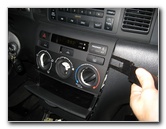
 Four 10mm Screws |
 |
 8" Extension Bar |
| With the A/C control panel removed, you'll be able to see the four 10mm screws that hold the radio in place. They are all located just below the bottom of the radio's faceplate. | ||
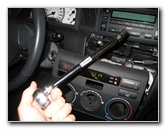
 10mm Socket & Wrench |
 Loosen 4 10mm Screws |
 Magnet Attached To Tool |
| Use a 10mm socket attached to an 8" extension bar and a ratcheting wrench to loosen the four screws. Then use a magnetic tipped tool to remove the four screws and avoid dropping them down below the radio. I just taped a powerful magnet to the top of a screwdriver. | ||
 Use Magnet - Remove Screws |
 Pry Out A/C Vents Trim |
 Gently Pry Out Top Clips |
| Next use the panel tool to pry out the trim piece that surrounds the radio and contains the two center A/C vents. | ||
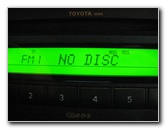 Eject CDs - "No Disc" |
 |
 |
| Be sure to eject any CDs that may be in your 6 CD changer radio before pulling out the radio. | ||
 |
 |
 A/C Vents & Radio Trim |
| Place the center A/C vents and radio trim panel aside in a safe place. | ||
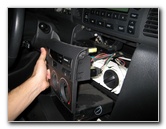
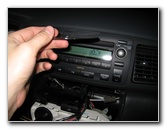
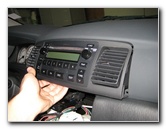
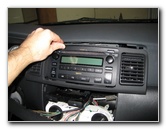
 Lift Up Radio |
 Metal Tabs Clear |
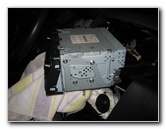 Pull Out Radio |
| Look below the radio while slightly lifting it to make sure that the metal pieces with the screw holes are clear of the black plastic. Then gently slide the radio out of its housing. You'll probably unknowingly unplug the radio antenna wire. | ||
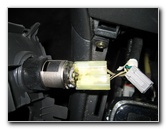
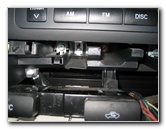
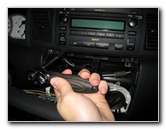
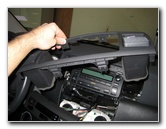
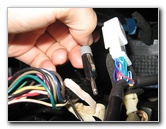
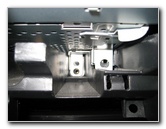
 Easy Access To Glove Box |
 Blitz Safe 12 Pin Connector |
 12 Pin CD Changer Control |
| With the radio removed, you can easily route the 6 foot RCA-Headphone cable either into the glove box or out through one of the lower kick panels. | ||
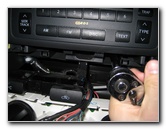
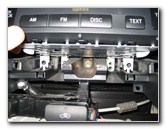
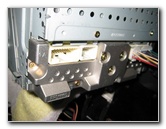
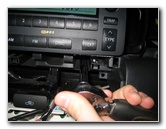
 Aux Adapter Plugged In |
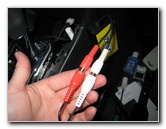 Stereo RCA Cables Attached |
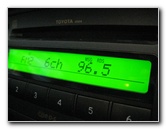
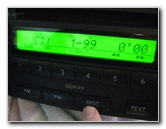 Press Disc - Disc 1 Track 99 |
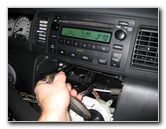
| Plug the male 12
pin connector from the Blitzsafe adapter into the CD changer control socket
on the rear of the radio. Attach the two RCA plugs on the 6' cable to the RCA plugs from the Aux adapter. Press the "Disc" button on the radio until you see it display "CD1 1-99". Plug in your MP3 player, phone or other 3.5mm headphone jack equipped audio device to test the Blitzsafe aux input adapter. |
||
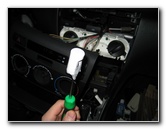
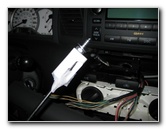
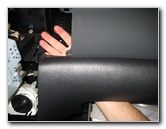
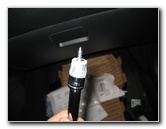
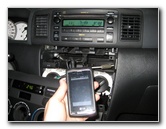
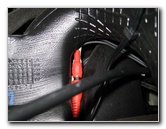 Tuck In Adapter & Wires |
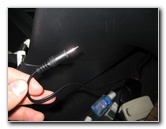 Route 3.5mm Headphone Jack |
 Testing With LG Incite Phone |
| Once you're sure
that the aux adapter and the cable are working properly, you can tuck the
Blitzsafe back behind the radio or under an A/C vent. Route the 3.5mm
headphone jack to your desired location.
I chose to route the headphone cable down under the passenger side kick panel where it can be easily tucked out of the way or pulled out for use. |
||
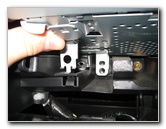
 Radio Antenna Plug |
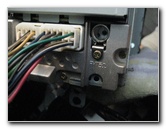 Antenna Socket - Top Right |
 Test FM Radio Reception |
| Turn on the radio
and choose a local FM station. Hold the radio head unit close to its housing
in the dashboard while plugging in the antenna plug.
The antenna plug socket is located on the rear of the radio at the edge closest to the steering wheel. You'll see the number "75" just below the antenna plug socket. Make sure the antenna plug is securely in place and verify that the radio stations come in clearly before continuing. |
||
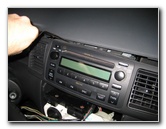
 Push Radio In - Align Holes |
 10mm Screw & Tape |
 Tape Holding Screw |
| Look below the
radio and line up the metal holes with the screw holes in the black plastic.
To avoid losing a screw behind or below the radio, use a small piece of tape to attach the 10mm screws to the socket. |
||
 Tighten 10mm Screws |
 Push In Vents & Radio Trim |
 Double Check 10mm Screws |
| Screw in the four
10mm screws a few turns so that the radio won't move around. Carefully line up the center A/C vents and trim panel that surrounds the radio. Gently push the trim piece back in place until it is flush with the radio's face plate. |
||
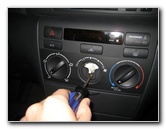
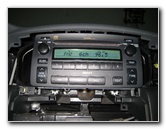
 Checking FM Radio |
 Testing Aux Input LG Phone |
 Re-Install Control Panel |
| Once again check the FM radio and Blitzsafe aux input adapter to make sure they work properly before continuing. | ||
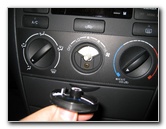
 Push Clips In Place |
 Tighten Philips Head Screw |
 Replace Fan Speed Knob |
| Carefully line up
and gently push the A/C control panel back in place until it is flush with
the rest of the dashboard. Screw in the single Philips head screw that goes behind the A/C fan speed knob and then push the fan speed knob back in place. |
||
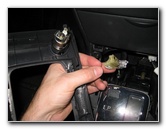 Plug In 12V Power |
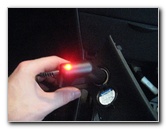 Testing 12V Power Socket |
 Snap On Shifter Trim Panel |
| The last two steps
are to re-attach the 12V power socket's electrical connector and snap the
shifter trim panel back in place. For more, check out my 2003-2008 Toyota Corolla Repair & Maintenance Guides page.
(This TOY/AUX DMX V.2 adapter is also compatible
with the following models: 2003-2009 4Runner, 03-09 Avalon, 03-09 Camry,
03-06 Celica, 04-09 Highlander, 03-09 Land Cruiser, 03-06 MR2, 03-09
Sequoia, 03-09 Sienna, 03-09 Tacoma, 03-09 Tundra, 03-09 Scion tC, 04-09
Scion xA, and 04-09 Scion xB.) |
||
| If you found this guide to be helpful,
please consider making a small donation by clicking on the PayPal.com
"Donate" button located to the right of this paragraph. Thank you!
(Note: I am not a registered charity. Donations are not tax deductible.) |