
Acura MDX
Subwoofer Replacement Guide
How to change or upgrade the Bose
subwoofer speaker in a 1st generation 2001-2006 Acura MDX Touring SUV.
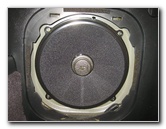
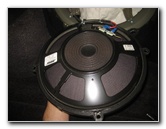
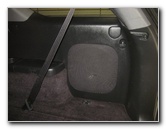 2006 MDX Subwoofer |
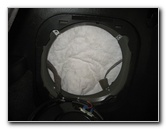
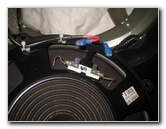
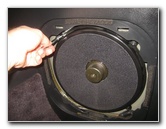
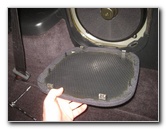
 Small Notch - Left Side |
 Pry Out Speaker Cover |
| This
automotive maintenance tutorial was specifically created to assist
owners of the first generation (2001, 2002, 2003, 2004, 2005 & 2006)
Acura MDX in changing a blown OEM Bose subwoofer speaker in the rear
cargo area panel or upgrading it with an aftermarket speaker. Owners of other Acura or Honda vehicles such as the RDX, ILX, TLX, RLX, TL, CL, RSX, RL, TSX, ZDX, NSX, Integra, Pilot, Accord, Civic, Fit, Clarity, CR-V, CR-Z, HR-V, Odyssey, Element and Ridgeline may also find these DIY instructions to be helpful. The tools needed to complete this procedure include a small plastic pry bar tool, an 8mm socket, an extension bar and a 1/4" drive ratchet. The OEM Bose subwoofer speaker size is 25cm (9.84") and can be replaced with a shallow free air subwoofer speaker or a standard component speaker that is 8" or 10" in size. |
||
|
|
||
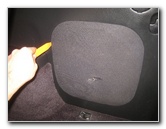
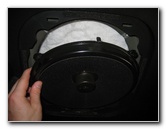
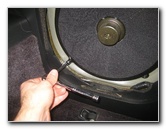
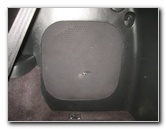
 Speaker Grille Removed |
 Old Subwoofer Exposed |
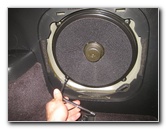 Loosen Counterclockwise |
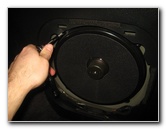
| The first two steps
are to open the tailgate door to the cargo area and then move to the right
(passenger) side. Locate the small notch on the left (front) edge of the speaker cover. Insert the blade of a small flathead screwdriver or a plastic pry bar tool into the notch. Carefully pull out the speaker cover from the plastic cargo area panel. Set the speaker grille aside in a safe place. |
||
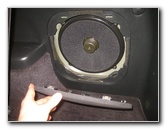
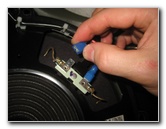
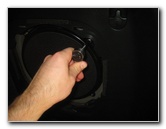
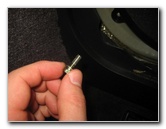 1st Bolt Removed |
 |
 Remove Other Bolts |
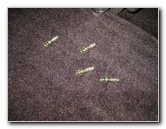
| Remove the four bolts that secure the subwoofer speaker in place by turning them counterclockwise with an 8mm socket, an extension bar and a 1/4" drive ratchet. | ||
 |
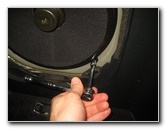
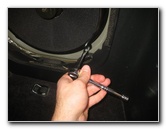
 Four Bolts Removed |
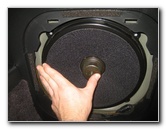
 Pull Out Old Subwoofer |
| Set the four bolts
aside in a safe place. Carefully pull the old speaker out of the enclosure. |
||
 |
 |
 |
| You'll notice that
the OEM Bose subwoofer isn't very deep, which is why the replacement needs
to be an 8" or 10" sized shallow free
air subwoofer.
The original speaker is Bose part number 39120-S3V-A61 (265263-001). It is 25 CM (centimeters) in size which is approximately 9.84" (inches). You might also consider just installing an 8" or 10" component car speaker if you don't plan on upgrading the subwoofer amp. I've read that the OEM Bose subwoofer amp is only rated at about 35 watts of power. The amplifier for the subwoofer is located inside the enclosure behind the speaker mounting ring. |
||
|
|
||
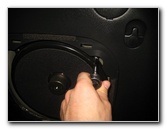
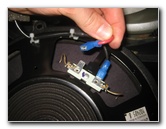 Disconnect Positive Wire |
 Pull Off Negative Cable |
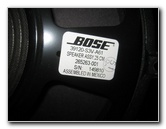 Bose 39120-S3V-A61 |
| Pull off the red
"+" positive wire connector and the "-" negative / ground connector. Push the connectors on to the terminals of the new speaker. |
||
 Install New Speaker |
 |
 Replace Four Bolts |
| I was just
inspecting the OEM speakers in our "new" used MDX. So I re-installed the
original subwoofer. In the future, I plan on removing the plastic cargo area panel and applying some Dynamat sound deadener to help stop any rattles or vibrations from the area around the sub when I crank up the volume and turn up the bass. If you do need to drill holes for your new subwoofer, be sure to use a short drill bit so that you don't accidentally cause a dent or make a hole in the rear quarter panel. |
||
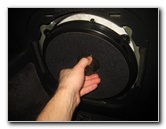
 Tighten Clockwise |
 |
 |
| Tighten the four bolts in the clockwise direction until they are snug. | ||
 Line Up Bottom Hooks |
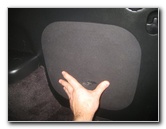 Push In Retaining Clips |
 Speaker Cover Replaced |
| Line up the two
hooks on the bottom edge of the speaker cover with their corresponding slots
on the cargo area panel. Re-insert the hooks and then swing the speaker cover closed. Push on the top of the speaker grille to secure the two metal retaining clips in place. For more,
please check out all of my
2001-2006 Acura MDX DIY Repair & Maintenance Guides. |
||
| If you found this guide to be helpful,
please consider making a small donation by clicking on the PayPal.com
"Donate" button located to the right of this paragraph. Thank you!
(Note: I am not a registered charity. Donations are not tax deductible.) |

|