
Acura MDX
Rear Door Speaker Replacement Guide
How to upgrade the OEM speaker in the
rear plastic interior door panel of a 1st generation 2001 to 2006 Acura MDX.

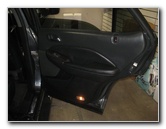 2006 MDX Rear Door Panel |
 Rear Door Speaker |
 Notch - Bottom Front Edge |
| This
automotive maintenance tutorial was specifically created to assist
owners of the first generation (2001, 2002, 2003, 2004, 2005 & 2006)
Acura MDX in changing a blown OEM rear door speaker in the plastic
interior panel or upgrading it with an aftermarket car speaker. Owners of other Acura or Honda vehicles such as the RDX, ILX, TLX, RLX, TL, CL, RSX, RL, TSX, ZDX, NSX, Integra, Pilot, Accord, Civic, Fit, Clarity, CR-V, CR-Z, HR-V, Odyssey, Element and Ridgeline may also find these DIY instructions to be helpful. The tools needed to access and remove the OEM rear door speaker include a small plastic pry bar tool and a standard Phillips head screwdriver. The OEM front door speakers can be replaced with new aftermarket car speakers in the following sizes: 5 1/4" (5.25") or 6 1/2" (6.5") or 6 3/4" (6.75"). |
||
|
|
||
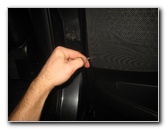 Insert Flathead Screwdriver |
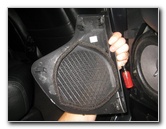 Speaker Cover Removed |
 Set Aside Speaker Grille |
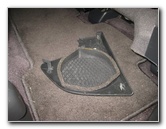
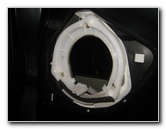
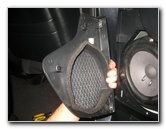
| The first step is
to fully open the rear passenger door. Locate the small notch at the bottom front corner of the speaker cover. Use the small flathead screwdriver or a plastic pry bar tool to gently remove the speaker cover. Set the speaker grille aside in a safe place. |
||
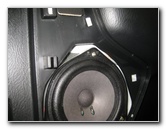
 OEM Rear Door Speaker |
 Loosen Counterclockwise |
 Remove 2nd Screw |
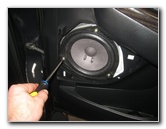
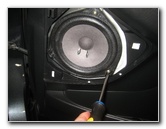
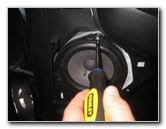
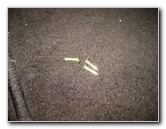
| Remove the three screws that secure the OEM speaker in place by turning them counterclockwise with a Phillips head screwdriver. | ||
 Remove 3rd Screw |
 Three Screws Removed |
 Pull Out Old Speaker |
| Set the three
screws aside in a safe place. Carefully pull the old speaker out of the door panel. |
||
 Pinch Two Tabs |
 Old Speaker Disconnected |
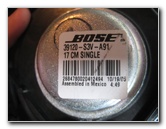 Bose 39120-S3V-A91 |
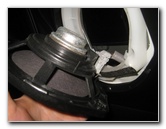
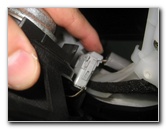
| Pinch together the
two tabs on the electrical connector before sliding it straight off the rear
of the speaker. The OEM speaker was Bose part number 39120-S3V-A91 (17 CM Single). I recommend installing some 5 1/4" aftermarket car speakers since they are small enough to easily replace the OEM units without much extra alteration or work. You may have to drill some new holes to mount a 5 1/4" speaker or use a plastic mounting bracket. If you do have to drill holes, make sure that the power window is raised all the way up since the glass is right behind the speaker location when the window is lowered. Also, avoid using a long drill bit so that you don't make a dent in the metal door panel or drill a hole through it. |
||
|
|
||
 Empty Speaker Bracket |
 Push In Power Plug |
 Install New Speaker |
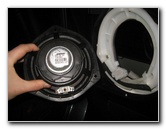
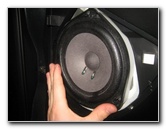
| You may choose to
cut the original wiring to install an aftermarket speaker. If you plan on ever removing the new speakers when you sell the car, use some Honda Speaker Wire Harness Adapters so that you can just plug in the new speakers without damaging the original wiring. Use a digital multimeter to determine which wires are the 12V "+" positive power supply and which wires are the "-" negative ground wires. I was just inspecting the OEM speakers on our used 11 year old SUV, so I didn't go through the process. |
||
 Tighten Screws Clockwise |
 New Speaker Installed |
 Line Up Hooks - Rear Edge |
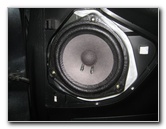
| Attach the new
speaker with the original screws or the new screws that came with it.
To help your new speakers sound their best, I highly recommend applying some sound deadener such as Dynamat. The sound deadener will help stop any vibrations or rattles when you crank up the volume. For a more thorough job, check out my Acura MDX Rear Door Panel Removal Guide so that you can take off the plastic door panel and apply sound deadener to the back of the plastic panel and also the metal door frame. |
||
 Slots On Door Panel |
 Push On Speaker Cover |
 Speaker Cover Secured |
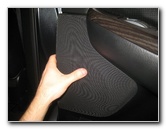
| Line up the speaker
cover with the door panel. Re-insert the plastic hooks on the back of the speaker cover with the slots on the door panel. Gently push the speaker cover back into place to secure the retaining clips. For more,
please check out all of my
2001-2006 Acura MDX DIY Repair & Maintenance Guides. |
||
| If you found this guide to be helpful,
please consider making a small donation by clicking on the PayPal.com
"Donate" button located to the right of this paragraph. Thank you!
(Note: I am not a registered charity. Donations are not tax deductible.) |