
Acura MDX
Rear A/C Blower Motor Filter Screen Cleaning Guide
How to clean the rear A/C fan blower
motor and metal filter screen in a 1st generation 2001 to 2006 Acura MDX.

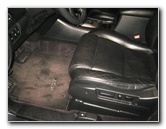 2006 MDX Driver Seat |
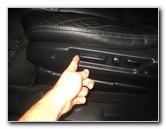 Move Pack Power Seat |
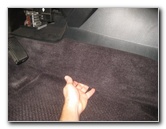
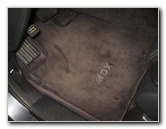
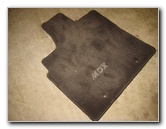 Remove Floor Mat |
| This
automotive maintenance tutorial was specifically created to assist
owners of the first generation (2001, 2002, 2003, 2004, 2005 & 2006)
Acura MDX in cleaning the rear passenger air conditioning system's
blower fan motor and the metal filter screen to stop a rattling
noise or screeching sound. Owners of other Acura or Honda vehicles such as the RDX, ILX, TLX, RLX, TL, CL, RSX, RL, TSX, ZDX, NSX, Integra, Pilot, Accord, Civic, Fit, Clarity, CR-V, CR-Z, HR-V, Odyssey, Element and Ridgeline may also find these DIY instructions to be helpful. No tools are needed to access and clean the metal filter screen for the back seat passengers HVAC system. If you would like to remove the filter screen and clean the inside of the rear A/C blower fan motor, you'll need either a 7mm socket with a 1/4" drive ratchet and an extension bar or a Phillips head screwdriver. |
||
|
|
||
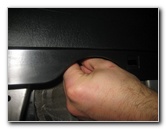
 Pull Off Carpeted Kick Panel |
 Pull Off Plastic Top Front |
 Access Panel Removed |
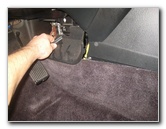
| I noticed that the
rear A/C unit for our 2006 Acura MDX would sometimes make a lot of noise and
rattle, vibrate, squeak or screech. To stop the sounds and make the system
quiet again, I decided to try cleaning out the filter and "squirrel cage"
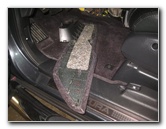
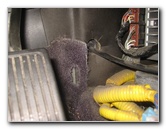
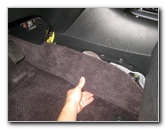
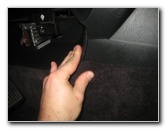
type blower fan motor assembly. The first two steps are to move the power driver seat all the way back towards the rear of the SUV. Then remove the driver side floor mat and set it aside in a safe place. There is a kick panel located along the bottom of the center console close to the right side of the driver seat and the accelerator (gas) pedal. It is held in place by several plastic and metal retaining clip friction fasteners. Gently pull on the bottom edge and front of the kick panel to remove it from the side of the center console. Try to avoid using excessive force. The clips should pop out relatively easily. Set the access cover aside in a safe place. |
||
 Rear HVAC Exposed |
 Clogged & Dirty Filter Screen |
 Top Metal Screw |
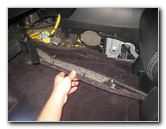
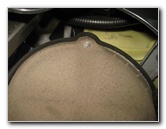
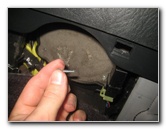
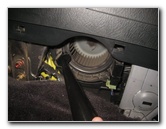
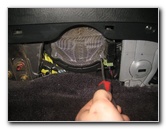
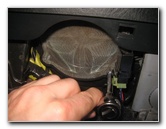
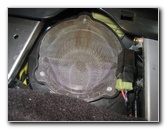
| Once the kick panel
is out of the way, you'll have easy access to the rear passenger air
conditioning system's round metal filter screen and the transistor (A.K.A.
"thermal resistor unit"). If your rear A/C system doesn't work at all, you should try checking for a blown fuse or replace the transistor. Take a look at my DIY tutorial for the procedure: 2001-2006 Acura MDX Rear A/C Transistor Replacement Guide. (Coming soon!) You do not have to remove the filter screen in order to clean it. Use a wet/dry shop vacuum with a crevice attachment to clean off all the dust, hair, insects and other debris that is clogging the metal filter screen. Just cleaning the debris from the metal filter screen might be enough to solve your rear A/C noise problem. The sound you heard may have been from the blower motor being starved for air and not spinning fast enough which caused the squirrel cage to slip on the motor's output shaft. To be thorough, I decided to fully remove the filter screen and clean out any debris inside the blower motor's round plastic "squirrel cage wheel". |
||
 Loosen Counterclockwise |
 1st Screw Removed |
 Loosen Top Screw |
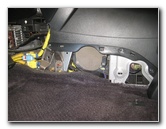
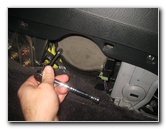
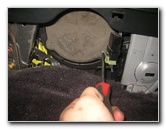
| Remove the three
screws by turning them counterclockwise with a 7mm socket an extension bar and a 1/4" drive
ratchet. You can also use a Phillips head screwdriver. Although the top screw is hidden by part of the plastic center console and difficult to reach with a standard screwdriver. |
||
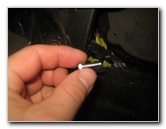
 2nd Screw Removed |
 Remove 3rd Screw |
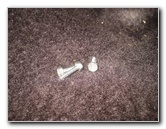 Three Phillips / 7mm Screws |
| Set the three 7mm screws aside in a safe place. | ||
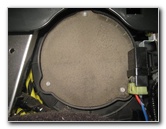
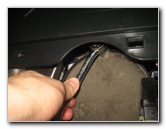
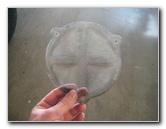
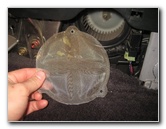
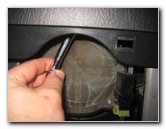
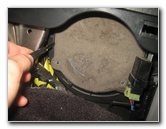 Pry Out Metal Filter Screen |
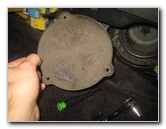 Filter Screen Removed |
 Rear A/C Blower Fan |
| Use a small
flathead screwdriver to gently pry out the edge of the metal filter screen.
Try to avoid bending or damaging the screen. |
||
|
|
||
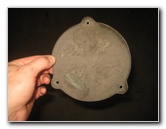 Thick Layer of Dust |
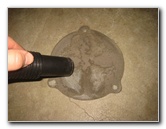 Clean With Vacuum |
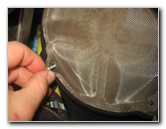
 Wash Filter With Water |
| Use a wet/dry shop
vacuum to carefully clean the dust, pollen, lint and debris off the filter screen. I chose to also thoroughly wash the filter with water in the sink. If you do wash the filter with water, be sure to dry it completely before re-installing it. |
||
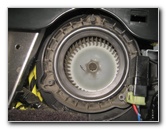
 Clean "Squirrel Cage" |
 Line Up Filter Screen |
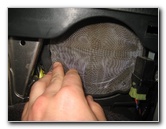 Push On Filter Screen |
| Use the small
cleaning brush or crevice attachment of your wet/dry
shop vacuum to
thoroughly remove any dust, hair or debris inside the blower motor housing. Line up the filter with the blower motor and gently push it back into place. |
||
 Spin In Screws By Hand |
 Tighten Phillips Clockwise |
 Replace Top Screw |
| Replace the screws by rotating them a few turns by hand in the clockwise direction to prevent them from becoming cross threaded or have them fall down out of reach. | ||
 Tighten Clockwise |
 Tighten Front Screw |
 Tighten Rear Screw |
| Tighten the three screws by turning them clockwise with the 7mm socket and a 1/4" drive ratchet or the Phillips head screwdriver. | ||
 Clean Filter Secured |
 Center Console Kick Panel |
 Plastic Tab - Front Edge |
| To test the rear
A/C system, turn the ignition switch to the "On" position but you don't have
to start the engine. Turn on the main air conditioning system. Press the "RR A/C Manual" switch to activate the manual controls for the rear passenger air conditioning system. Rotate the fan speed control knob on the back of the center console to the various settings and listen closely for any strange noises. If you don't hear any odd sounds, congratulations on having a quiet and perfectly functional rear A/C system again. Locate the plastic tab on the front edge of the kick panel and its corresponding slot in the carpet floor liner. |
||
 Slot Opening - Carpet Liner |
 Line Up Friction Fastener Clips |
 Push To Secure Panel |
| Re-insert the
plastic tab at the front of the kick panel into the slot in the carpet
liner. Line up the retaining clips on the back side of the access cover with their corresponding slots on the center console. Gently push on the kick panel to secure it in place. |
||
 Rear Edge Secured |
 Access Panel Replaced |
 Replace Floor Mat |
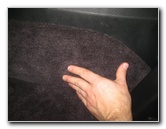
| Double check that
all of the retaining clips are secured at the front, center and rear edge of
the access panel. Replace the floor mat and re-attach the two hooks that prevent it from sliding forward, bunching up under your pedals and impeding your use of the brake pedal or accelerator. Be sure to record the rear A/C filter and blower motor cleaning in your SUV's service records. For more,
please check out all of my
2001-2006 Acura MDX DIY Repair & Maintenance Guides. |
||
| If you found this guide to be helpful,
please consider making a small donation by clicking on the PayPal.com
"Donate" button located to the right of this paragraph. Thank you!
(Note: I am not a registered charity. Donations are not tax deductible.) |