
Acura MDX EGR
Valve Replacement Guide
How to clean or change the EGR (exhaust
gas recirculation) valve in a 1st generation 2001 to 2006 Acura MDX.

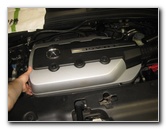
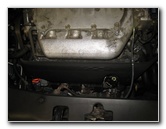
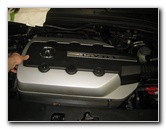
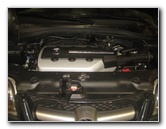 2006 MDX Engine Bay |
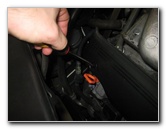
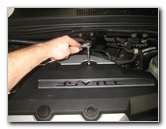
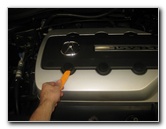 Pry Off Bolt Caps |
 Four Outer Round Covers |
| This
automotive maintenance tutorial was specifically created to assist
owners of the first generation (2001, 2002, 2003, 2004, 2005 & 2006)
Acura MDX in cleaning or changing the EGR (exhaust gas
recirculation) valve on the J35A3 or J35A5 VTEC 3.5L V6 engine. Owners of other Acura or Honda vehicles such as the RDX, ILX, TLX, RLX, TL, CL, RSX, RL, TSX, ZDX, NSX, Integra, Pilot, Accord, Civic, Fit, Clarity, CR-V, CR-Z, HR-V, Odyssey, Element and Ridgeline may also find these DIY instructions to be helpful. A few compatible replacement EGR valves with their part numbers are as follows: Standard Motor Products EGV658, EvanFischer EVA122828256, Wells EGR4175, PT Auto Warehouse EGRV658, OEM 9164, Airtex 4F1001 and the OEM Acura 18011-RCA-A00. The tools needed to complete this procedure include a small plastic pry bar tool, a 10mm socket with a 1/4" drive ratchet, a flathead screwdriver, a spray can of penetrating oil, a 12mm socket with an extension bar and a 3/8" drive ratchet. |
||
|
|
||
Some symptoms of a clogged or failing EGR valve include poor fuel economy (lower MPG), loss of power, rough idling, misfires, detonation (knocking / pinging), stalling and hard starting. You may also see a CEL / SES (check engine light / service engine soon) and/or the VTM-4 warning light with an engine error code of P1491 or P0401. |
||
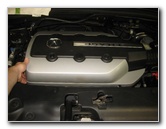
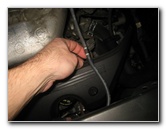
 Rear Right Cover |
 Front Right Cover |
 Loosen Counterclockwise |
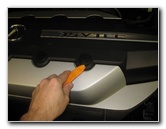
| For easier access
to the EGR valve, I recommend removing the plastic engine cover and the
plastic cover over the front three ignition coils. Use a small plastic pry bar tool to gently pop out the four round black plastic bolt covers at the corners of the engine cover. (The two middle covers are decorative only and do not need to be removed.) Set the four bolt caps aside in a safe place. |
||
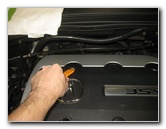
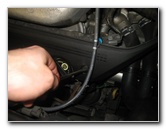
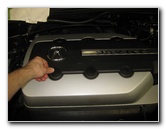
 Rear Right Bolt |
 Remove Front Right Bolt |
 Plastic Engine Cover |
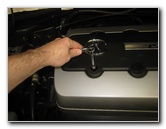
| Remove the four
bolts by turning them counterclockwise with a 10mm socket, an extension bar
and a 1/4" drive ratchet. Set the four bolts aside in a safe place. |
||
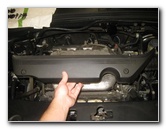
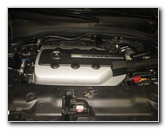
 Remove Manifold Cover |
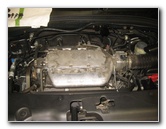 Top of Engine Exposed |
 Air Intake & Throttle Body |
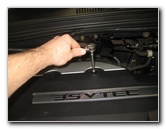
| Carefully lift off the engine cover and set it aside in a safe place. | ||
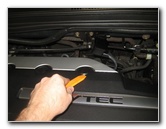
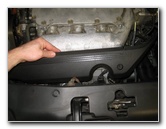
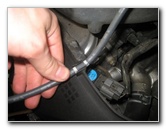
 Plastic Ignition Coils Cover |
 Round Plastic Fastener |
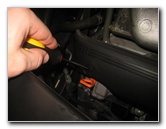 1/4 Turn Counterclockwise |
| Then locate the two
round black plastic fasteners on the cover on the front lower part of the
engine. Rotate the fasteners 1/4 turn counterclockwise to unlock them. |
||
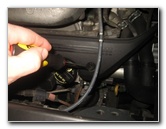 Release Right Side Fastener |
 Pull Off Rubber Hose |
 Lift Off Plastic Cover |
| Pull the rubber
hose off the top right side of the plastic cover. Lift off the plastic cover to reveal the front three ignition coils. Set the cover aside in a safe place. |
||
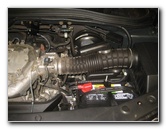
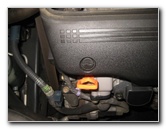
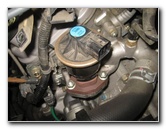
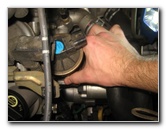
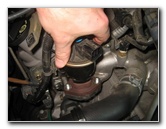
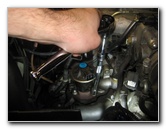
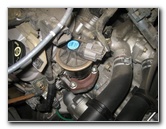 Old EGR Valve |
 Push In Release Tab |
 Disconnect Power Plug |
| The EGR valve is
located just to the right of the oil filler cap and above two large coolant
hoses. Gently push in the release button on the grey plastic electrical connector before sliding it straight off. |
||
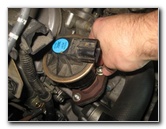
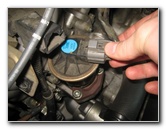
 Electrical Connector Removed |
 Spray With Penetrating Oil |
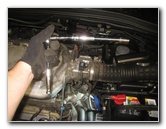 12mm Socket & Extensions |
| If the original EGR
valve hasn't been removed in many years, I highly recommend loosening the
two nuts by spraying a small amount of
penetrating oil on to the threads before you attempt to loosen them.
There have been reports of the EGR valve mounting studs breaking off due to the nuts being corroded (rusted) in place. Wait at least a few minutes for the penetrating oil to work. Attach the 12mm socket to a long extension bar. You could also just use a standard 12mm wrench. |
||
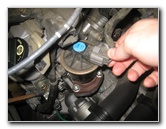
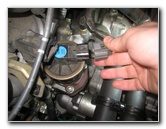
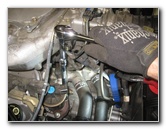 Loosen Counterclockwise |
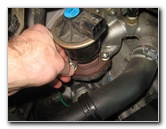 Spin Off 12mm Nuts |
 12mm Nuts Removed |
| Loosen the two nuts
by turning them in the counterclockwise direction. Spin off the nuts by hand to prevent from having them fall down into the engine bay. Set the two 12mm nuts aside in a safe place. |
||
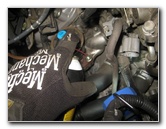
|
|
||
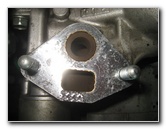
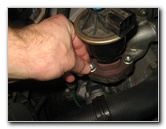
 Pull Off Old EGR Valve |
 Inspect EGR Valve |
 EGR Ports |
| Carefully pull the
old EGR valve straight up and off the engine. Inspect the EGR valve and also the ports on the engine. |
||
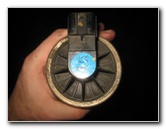 Siemens AC01 3005E 389780 |
 Clean EGR Ports |
 Install New EGR Valve |
| The OEM EGR valve
on this 2006 MDX was labeled as Siemens part number AC01 - 3005E - 389780. I recommend buying the Standard Motor Products EGV658 EGR valve since it has excellent reviews on Amazon. If you would like to try cleaning the old EGR valve to see if that clears your CEL (SES) light and P1491 or P0401 error codes, use some Throttle Body Cleaner spray or carburetor ("carb") cleaner. Be sure to cover the diaphragm and electronics on the top part of the old EGR valve with a plastic bag to protect them from the cleaning spray. Allow the cleaner spray to dissolve the carbon deposits and flush them away. You could also gently use a wire brush to clean the carbon from the EGR valve and the ports (holes / openings) on the engine. Another method is to use a wet/dry shop vacuum and a small flathead screwdriver to carefully scrape away the built up carbon deposits on the valve and ports while removing them with the suction from the vacuum. |
||
 Spin On 12mm Nuts |
 |
 Tighten Clockwise |
| My EGR valve was
still working perfectly and looked fairly clean for having run 160,000
miles. So I just re-installed it while I wait for the throttle body cleaner
and wire brushes to arrive from Amazon. I plan on cleaning them in the
future and also replacing the damaged gasket. Two compatible replacement gaskets for the EGR are part number Standard Motor Products VG6 or Fel-Pro 70978. If you are re-installing the cleaned old valve, make sure that the metal gasket is properly positioned on the engine. If you purchased a new valve, it should have included a new gasket. Lower the new (or cleaned) EGR valve down into place. Spin on the two 12mm nuts a few turns by hand in the clockwise direction to prevent them from becoming cross threaded. |
||
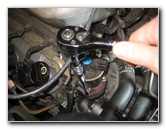
 Torque To 16 lb-ft |
 Electrical Connector |
 Push On Power Plug |
| Tighten the two
bolts by turning them in the clockwise direction with the 12mm socket,
extension bar and a 3/8" drive ratchet until they are snug.
If you have a torque wrench, the service manual specification for the 12mm nuts is 16 lb-ft. Push the electrical connector straight on to the valve until it clicks securely into place. |
||
 Replace Front Lower Cover |
 1/4 Turn Clockwise - Lock |
 Secure 2nd Fastener |
| Lower the ignition
coils cover back into place at the front of the engine. Push the two fasteners back into their holes on the mounting bar. Rotate the two fasteners 1/4 turn clockwise to secure them in place. |
||
 Re-Attach Rubber Hose |
 Replace Engine Cover |
 Spin In 10mm Bolts |
| Re-attach the small
rubber hose to the top right part of the ignition coils cover. Lower the plastic engine cover back into place. Line up the bolt holes in the plastic cover with their corresponding holes in the manifold cover. Spin in the four 10mm bolts a few turns in the clockwise direction by hand to prevent them from becoming cross threaded. |
||
 Tighten Clockwise |
 Snap On Bolt Caps |
 EGR Valve Replaced |
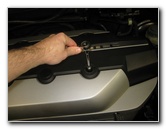
| Tighten the four
bolts with the 10mm socket and a 1/4" drive ratchet until they are snug.
Try to avoid over tightening the bolts to prevent from cracking the plastic cover. Start the engine and listen closely for any strange sounds. If you need to clear the DTC (diagnostic trouble codes), use an OBD2 scanner or you can try disconnecting the 12V automotive battery for at least 15 minutes. Be sure to record the EGR valve cleaning or replacement in your SUV's service records. For more,
please check out all of my
2001-2006 Acura MDX DIY Repair & Maintenance Guides. |
||
| If you found this guide to be helpful,
please consider making a small donation by clicking on the PayPal.com
"Donate" button located to the right of this paragraph. Thank you!
(Note: I am not a registered charity. Donations are not tax deductible.) |