
Acura MDX
Blitzsafe AUX Audio Input Installation Guide
How to install the Blitz Safe HON/AUX DMX
V.2X auxiliary audio input adapter in a 2001 to 2006 Acura MDX SUV.

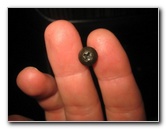
 Blitz Safe AUX Adapter |
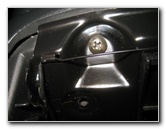
 2006 MDX - Bose Radio |
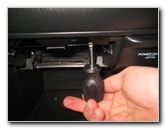
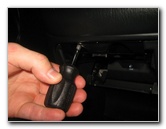
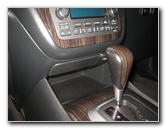
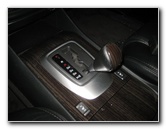 Shifter Back To 1 - 2 |
| This
automotive maintenance tutorial was specifically created to assist
owners of the first generation (2001, 2002, 2003, 2004, 2005 & 2006)
Acura MDX in installing a BlitzSafe HON/AUX DMX V.2X audio input
adapter with a 3.5mm mini headphone jack to the Bose stereo system
in order to use an aftermarket Bluetooth adapter for playing music or
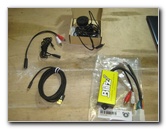
podcasts from you smartphone. Owners of other Acura or Honda vehicles such as the RDX, ILX, TLX, RLX, TL, CL, RSX, RL, TSX, ZDX, NSX, Integra, Pilot, Accord, Civic, Fit, Clarity, CR-V, CR-Z, HR-V, Odyssey, Element and Ridgeline may also find these DIY instructions to be helpful. The items needed include the Blitzsafe HON/AUX DMX V.2X auxiliary adapter and a male stereo RCA plugs to 3.5mm headphone jack cable. I also recommend an aftermarket Bluetooth adapter such as the Besign BK01 Bluetooth Car Kit with a ground loop noise isolator for the 3.5mm AUX port. To access the back of the radio, you'll need a long Phillips head screwdriver and a stubby Phillips head screwdriver. |
||
|
|
||
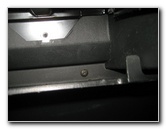
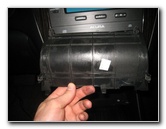
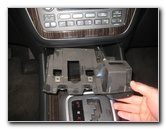
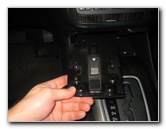
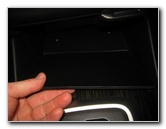
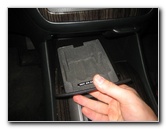
 Pull Out "Not An Ashtray" |
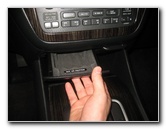 Pull Slightly Down |
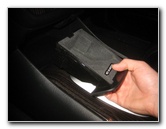 Storage Tray Removed |
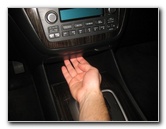
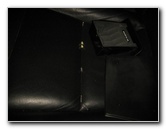
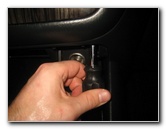
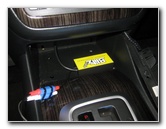
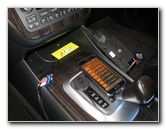
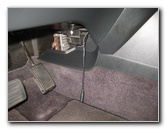
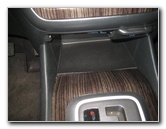
| The first few steps
are to park the vehicle on a level surface and engage the emergency /
parking brake to prevent it from moving. Move the shifter knob all the way back to the 1st and 2nd gear position to give yourself extra working room in front of the radio. Turn the ignition switch to the "OFF" position. Gently slide out the "not an ashtray" storage drawer from the left side of the center console under the radio. Pull the "not an ashtray" drawer slightly down before sliding it completely out. Set the storage drawer aside in a safe place. |
||
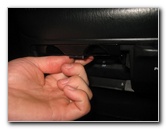
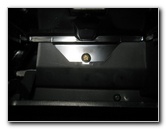
 Bottom Rubber Mat |
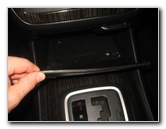 Remove Rubber Cover |
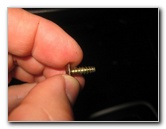
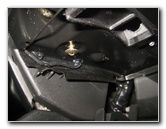
 Brass Screw - Rear Wall |
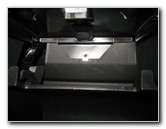
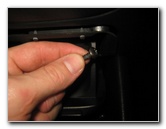
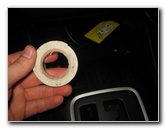
| Remove the rubber
mat from the bottom of the storage compartment below the "not an ashtray"
and 12V power outlet. Set the rubber mat aside in a safe place. There is a brass (gold colored) metal screw located at the middle of the rear wall of the storage compartment. |
||
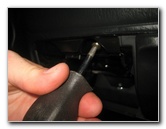
 Loosen Counterclockwise |
 Brass Metal Screw Removed |
 Rear Wall Screw Removed |
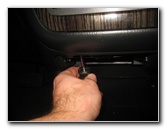
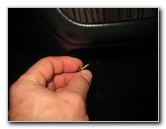
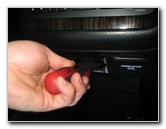
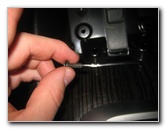
| Use a long Phillips
head screwdriver to loosen the brass metal screw in the counterclockwise
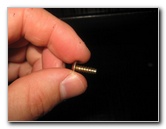
direction a few turns. Reach in and carefully spin out the screw the rest of the way by hand to prevent it from falling and becoming lost. Set the screw aside in a safe place. I'd recommend setting your screws on a paper notepad with labels such as "back wall middle". |
||
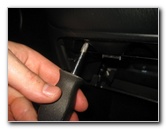
 Loosen Top Screws |
 |
 2nd Brass Top Screw |
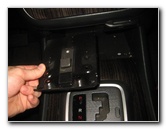
| There are four
screws on the top wall or "ceiling" of the mounting plate for the "not an
ashtray" drawer. Use a short stubby Phillips head screwdriver to loosen the two vertically mounted (straight up) brass colored screws by turning them in the counterclockwise direction. The two vertically mounted brass colored screws are about an inch away from the front edge. Set the two screws on your notepad with the appropriate label. |
||
 |
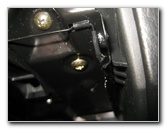
 Lower Right Black Screw |
 Loosen Counterclockwise |
| Then loosen the
black metal screw on the rear wall at the lower right (passenger) side
corner of the plastic panel. Use the long Phillips head screwdriver to loosen it in the counterclockwise direction. |
||
 Spin Out By Hand |
 |
 Lower Right Screw Removed |
| Spin out the black
metal lower right rear screw the rest of the way by hand to prevent from
losing it. Set the screw aside in a safe place. |
||
 Front Edge Screws |
 Angled Front Edge Screws |
 Loosen Counterclockwise |
| Then remove the two
black metal screws that are mounted at an angle near the front edge of the
"not an ashtray" tray. Use the stubby Phillips head screwdriver to remove them by turning them in the counterclockwise direction. |
||
 Remove Left Front Screw |
 Black Metal Screw Removed |
 Set Screws Aside |
| Set the two black
metal screws aside in a safe place. At this point, you should have removed 6 screws. |
||
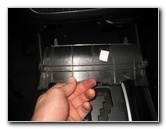
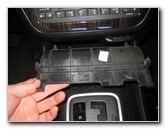
 Pull Out Ashtray Mount |
 Top Side of Tray |
 Bottom of Ashtray Mount |
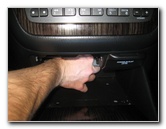
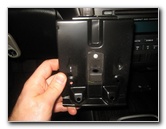
| Gently pull out the
black metal mounting bracket for the "not an ashtray" storage drawer. Set the mounting bracket aside in a safe place. |
||
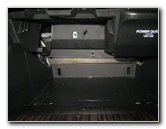
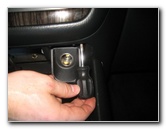
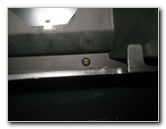
 Final Screw - 12V Outlet |
 Loosen Counterclockwise |
 12V Outlet Screw Removed |
| The seventh and
final screw that needs to be removed is located near the 12 volt electrical
power outlet. The screw is vertically mounted just to the right (passenger side) of the 12V power socket. Remove the screw with the stubby Phillips head screwdriver by turning it in the counterclockwise direction. |
||
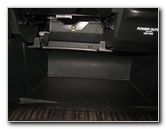
 7 Screws Removed |
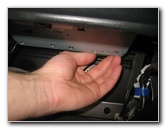
 Pull Out Rear Plastic Trim |
 Metal Retaining Clips |
| The black plastic
rear trim panel is held in place by a few metal retaining clips that act as
friction fasteners. Gently pull out the rear trim cover from the lower storage compartment. |
||
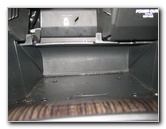
 Set Aside Trim Panel |
 Rear Cover Removed |
 Pull Out 12V Tray |
| Set the trim cover
aside in a safe place. Then gently pull out the plastic tray that contains the 12V power outlet from under the radio. |
||
|
|
||
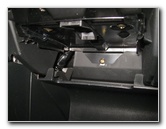
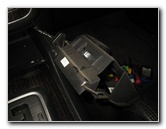 Rest 12V Outlet On Right |
 Rear of Radio Accessible |
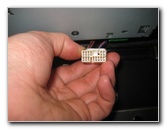
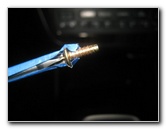
 Blitz Safe Electrical Connector |
| Try to avoid
pulling on or stressing the electrical wires that connect to the 12V power
outlet. Carefully rest the plastic tray on the right side of the center console. On some Acura MDX models, there will be an empty electrical connector socket on the back of the radio. |
||
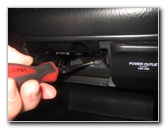
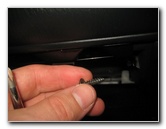
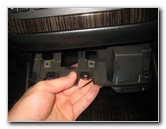
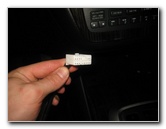
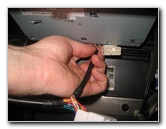
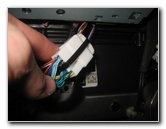
 Disconnecting Plug |
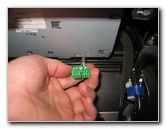 Green Connector - WRONG |
 White Connector - CORRECT |
| I mistakenly
disconnected the connector on the far right side of the radio. This green
plastic connector did not match the connector on the Blitz Safe adapter, so
I pushed it back into place. The correct connector to remove on the Bose stereo system is the second one from the right which is a white plastic plug. Push in the release tab on the top of the white plastic electrical connector before pulling it straight out. (This 2006 MDX has the Bose stereo but does not include the navigation system, rear backup camera or rear entertainment system.) |
||
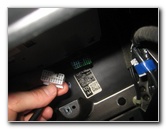
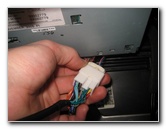
 2nd Connector From Right |
 Compare To BlitzSafe Plug |
 Push In BlitzSafe Plug |
| Compare the white
plastic connector that you removed from the back of the radio to the one
attached to the Blitz Safe. If they look exactly the same, you can continue. Push the Blitz Safe connector straight into the socket on the rear of the radio. Try to push the connector straight in to prevent from bending the metal pins. I didn't hear the re-assuring "click" to signal that the connector was locked in place. It still seemed to be securely locked in the socket. |
||
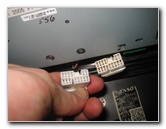
 Attach Radio Plug To Socket |
 Blitz Safe Attached To Bose |
 Test Blitz Safe AUX Input |
| Push the electrical
connector that you removed from the back of the radio into the female socket
attached to the Blitz Safe unit. Attach the male RCA plugs to 3.5mm headphone jack adapter cable to the female RCA plugs on the Blitz Safe unit. Before you being re-assembling the center console, I recommend testing the AUX input function. Turn the ignition key to the "On" position but do not start the engine. Plug the 3.5mm mini headphone jack into your iPod, iPhone, MP3 player or Android smartphone. Start playing some music or streaming audio from Pandora, Spotify, iTunes, etc. Press the "CD / AUX" button until you see the letters "CDC" on the display. If you don't hear your music playing, make sure that the volume knob is turned above the "0" muted setting. |
||
 Zip Tie - Secure Connectors |
 Temporarily Route 3.5mm Cable |
 Double Sided Tape |
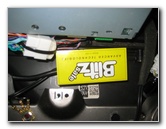
| I recommend using a
plastic cable or "zip" tie to secure the white radio connector to the female
socket on the Blitz Safe unit. Route the 3.5mm headphone jack cable through the opening in the center console behind the radio. You may choose to route the AUX input wire to either the driver or passenger side of the vehicle. I recommend using a Bluetooth Car Adapter for easy wireless streaming of your music and/or telephone calls to your Bose stereo system. |
||
 Tape on Blitz Safe |
 Secure Behind Radio |
 Replace 12V Outlet Tray |
| Apply some double
sided tape to the back side of the Blitz Safe unit. Firmly push the Blitz Safe unit to the rear wall of the area just below the radio. You may also choose to use cable ties to secure the wires to the other harnesses to prevent any rattles or noises from the loose cables. Carefully slide the plastic 12V power outlet tray back under the radio. |
||
 Tighten Screw Clockwise |
 Re-Insert Rear Panel |
 Snap In Friction Fasteners |
| Re-insert the black
metal screw near the 12V power outlet and tighten it in the clockwise
direction. Re-insert the rear wall plastic trim cover back into the storage compartment. Firmly push on the trim cover to secure the retaining clips. |
||
 Slide In Ashtray Mount Plate |
 Push Mount In Place |
 Replace Angled Screws |
| Slide the mounting
plate for the "not an ashtray" storage drawer back into place. Spin in the two black metal screws near the front edge of the ashtray mounting tray. They are situated at a slight angle. |
||
 2 Black Front Edge Screws |
 Two Vertical Brass Screws |
 Tighten Clockwise |
| Tighten the two
screws in the clockwise direction with the stubby Phillips head screwdriver. Then replace the two brass colored screws located slightly further back from the front of the tray. They are mounted vertically (straight up). Spin them in a few turns by hand to prevent from having them fall and become lost. |
||
 Attach Screw With Tape |
 Lower Right Black Screw |
 Attach Brass Screw With Tape |
| For the two screws
that are located at the rear of the storage compartment, I recommend loosely
attaching them to the long Phillips head screwdriver with some painter's
tape. Replace the black metal screw at the bottom right corner of the storage drawer by turning it clockwise with the Phillips head screwdriver. |
||
 Rear Middle Screw Replaced |
 Replace Rubber Mat |
 Rubber Mat Secured |
| Then attach the
brass metal screw to the screwdriver with some painter's tape. Replace the brass screw into the middle of the rear wall by turning it in the clockwise direction with the long Phillips head screwdriver. Double check that all of the screws are snug. Replace the rubber mat to the bottom of the storage compartment. |
||
 Slide In "Not An Ashtray" |
 Ashtray Re-Installed |
 BlitzSafe Install Complete |
| Slide the "not an
ashtray" storage drawer back into the metal mounting tray. If you have trouble re-inserting the ashtray, be sure to angle the front edge down a bit while sliding it in. Test the AUX input again to make sure that everything is working properly. If you hear a whining, hissing or whistling noise from the speakers while driving and listening to music through the BlitzSafe unit, I recommend attaching a ground loop noise isolator to the AUX input wire. For more,
please check out all of my
2001-2006 Acura MDX DIY Repair & Maintenance Guides. |
||
| If you found this guide to be helpful,
please consider making a small donation by clicking on the PayPal.com
"Donate" button located to the right of this paragraph. Thank you!
(Note: I am not a registered charity. Donations are not tax deductible.) |