
Toyota Camry
Serpentine Belt Replacement Guide
How to change the serpentine accessory
belt on the A25A-FKS 2.5l I4 engine in a 2018 to 2022 Toyota Camry.

 2018 Camry 2.5L I4 |
 Left Side of Engine |
 Alternator - Belt |
| This automotive
maintenance tutorial was specifically written to assist owners of the XV70
eighth generation (2018, 2019 and probably also the 2020, 2021 & 2022 model
years) Toyota Camry sedan in checking or changing the serpentine accessory
belt (also known as the V-belt, multi-rib or drive belt) on the A25A-FKS 2.5
liter inline four cylinder engine. Owners of other Toyota, Scion and Lexus vehicles such as the Avalon, Corolla, Prius, Yaris, Mirai, 86, Sienna, RAV4, Highlander, 4Runner, C-HR, Land Cruiser, Sequoia, Tacoma, Tundra, Venza, Hilux, RX 350, IS 250, IS 350, CT 200H, GS 450h, GX 470, LX 470, UX 200, NX 300 and UX 250h may also find these DIY instructions to be helpful. The original OEM serpentine belt on this 2018 Camry was part number Bando 6PK1150 also known as genuine Toyota part # Toyota 90916-A2027. The only tool needed to remove and replace the belt is a 14mm wrench or a 14mm socket with a ratchet. |
||
|
|
||
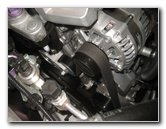
 Tensioner Assembly |
 A/C Compressor Pulley |
 Crankshaft Pulley |
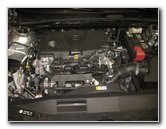
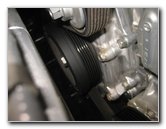
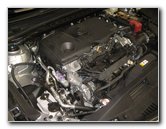
| The first two steps
are to open the hood and then move to the left (passenger) side of the
engine bay. If you recently drove the car, allow it to cool off for at least an hour to avoid burning yourself when you replace the belt. Take a moment to study how the OEM belt is routed around the pulleys including the crankshaft, air conditioning system compressor, the alternator and the tensioner. |
||
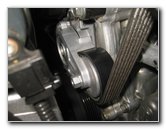
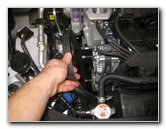
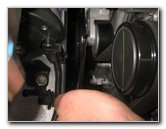 Place 14mm On Tensioner |
 Wrench On Tensioner Arm |
 Lift Up To Release Tension |
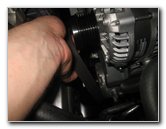
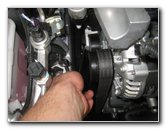
| Place the 14mm
wrench or a 14mm socket and ratchet over the hex head on the tensioner arm
assembly. Lift the wrench up and towards the back of the engine bay to rotate the tensioner arm and release the tension on the old belt. |
||
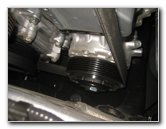
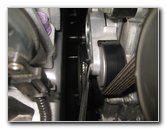
 Slip Belt Off Pulleys |
 Lift Out Old Belt |
 Inspect Old Belt |
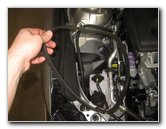
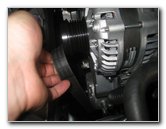
| Hold the tensioner
arm in the released position with one hand and carefully slip the old belt
off the alternator pulley with the other hand. Avoid placing your fingers in between the belt and any of the pulleys. Slip the belt off the other pulleys and lift it out of the engine bay. |
||
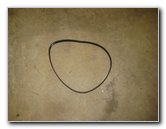
 Old Belt Removed |
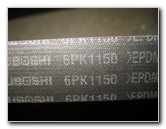 6PK1150 |
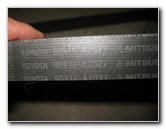 Toyota 90916-A2027 |
| Inspect the old
belt for any fraying, wear or chunks of missing rubber. If the old belt is in relatively good condition, consider saving it as an emergency backup just in case the new belt fails prematurely. The original "OEM" belt in this 2018 Camry was marked as part number 6PK1150 and also Toyota 90916-A2027. |
||
|
|
||
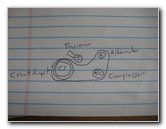 Belt Routing Diagram |
 Lower In New Belt |
 Last Loop By Alternator |
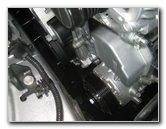
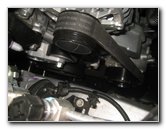
| Carefully lower the
new belt down into the left side of the engine bay. Wrap the ribbed side of the new belt around the large crankshaft pulley at the bottom rear corner of the engine. A good rule to remember is that the ribbed side of the belt goes around the ribbed pulleys and the smooth side of the belt goes against the smooth tensioner pulley. |
||
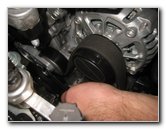
 Slip Over Alternator |
 Check Belt Routing |
 New Belt Installed |
| Next, wrap the new
belt around the underside of the A/C compressor pulley and hold the final
loop near the alternator. The new belt should be under the smooth tensioner pulley. Place the 14mm wrench over the bolt head on the outside of the tensioner assembly. Release the tension by rotating the wrench up and towards the rear of the engine bay. Carefully slip the final loop of the new belt over the alternator pulley. Avoid placing your fingers in between the new belt and any of the pulleys. Gently allow the tensioner arm to move back into place. Double check that the new belt is properly routed on the new pulleys and fully seated on each of the ribbed pulleys. Start the engine and listen closely for any strange sounds that might indicate a problem such as a improperly belt or a failing pulley bearing. Be sure to record the belt change in your vehicle's service records. For more,
check out all of my
2018-2022 Toyota Camry DIY Repair & Maintenance Guides. |
||
| If you found this guide to be helpful,
please consider making a small donation by clicking on the PayPal.com
"Donate" button located to the right of this paragraph. Thank you!
(Note: I am not a registered charity. Donations are not tax deductible.) |