
Chevrolet
Equinox Reverse Light Bulb Replacement Guide
How to change a burnt out reverse bulb in
the tail light housings of a 2018 to 2022 GM Chevy Equinox SUV.

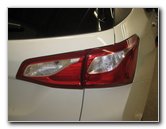
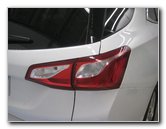 2018 Equinox Tail Lights |
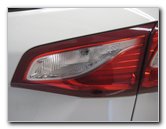 Reverse Bulb Housing |
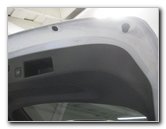 Tailgate Interior Panel |
| This automotive
maintenance tutorial was specifically written to assist owners of the third
generation (2018, 2019 and probably also the face-lifted or updated 2020,
2021 and 2022 model years) GM Chevrolet Equinox SUV in changing a burnt out
reverse bulb in the tail light housings (also known as the back-up or backup
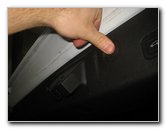
light bulb). Owners of other General Motors vehicles from Chevy, Buick, GMC, Cadillac and Holden such as the Trax, Blazer, Traverse, Tahoe, Suburban, Cruze, Malibu, Impala, Camaro, Cascada, LaCrosse, Encore, Envision, Enclave, Regal, Canyon, Sierra, Terrain, Acadia, Yukon, Savana, XT4, XT5, XT6, Escalade, CTS, XTS, CT6, Astra, Commodore and Trailblazer may also find these DIY instructions to be helpful. The compatible replacement miniature wedge base reverse light bulb part number is 921 (alsow known as W16W). If you would like to have brighter reverse lights, install some 921 LED bulbs. The tools needed to access the sockets and replace the bulbs include a Torx T15 star bit screwdriver, a pry bar tool or a large flat head screwdriver and a pop rivet removal tool. The reverse light is contained within a separate housing attached to the tailgate door for the cargo area. (Note - The brake, rear turn signal and parking lights are all LED bulbs that should last the life time of the vehicle.) Open the tailgate and locate the small screw inside the door pull handle located to the right of the "Close" button. |
||
|
|
||
 Small Screw Pull Handle |
 Loosen Counterclockwise |
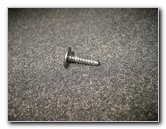 Torx Screw Removed |
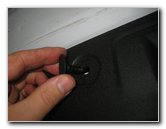
| Locate the small
black metal screw inside the door pull handle situated just to the right of
the "Close" button. Remove the screw by turning it in the counterclockwise direction with the Torx T-15 screwdriver. Set the Torx screw aside in a safe place. |
||
 Remove Right Pop Rivet |
 Remove Left Pop Rivet |
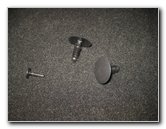 1 Screw - 2 Pop Rivets |
| Then remove the two
round black plastic pop rivets with a pop rivet removal tool. If necessary, you may also be able to use a flat head screwdriver along with a pair of needle nose pliers to pull out the pop rivets. There is one pop rivet on the left side of the door pull handle and the second pop rivet is on the right side of the handle. Set the two pop rivets aside with the screw. |
||
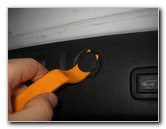
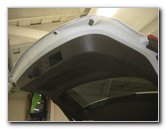
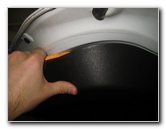 Pry Off Black Panel |
 Release Retaining Clips |
 Loosening Interior Panel |
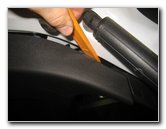
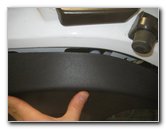
| Then insert the
plastic pry bar tool in between the black plastic interior panel and the
metal tailgate door. Firmly pry the interior panel away from the tailgate. |
||
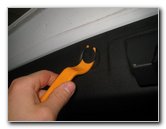
 Metal Retaining Clips |
 Grey Plastic Bulb Socket |
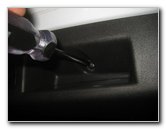
 1/4 Turn Counterclockwise |
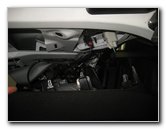
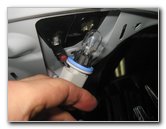
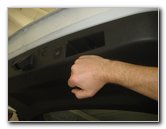
| You may need to
re-insert the pry bar tool into several locations to fully release the metal
retaining clips. If you are only replacing one reverse light bulb, you don't need to fully remove the tailgate's interior panel. Just release enough retaining clips so that you can reach in and access the reverse light bulb socket. Rotate the grey plastic bulb socket 1/4 turn in the counterclockwise direction before pulling it straight out of the housing. |
||
|
|
||
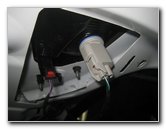
 Bulb Socket Removed |
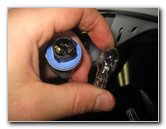 Pull Out Old Light Bulb |
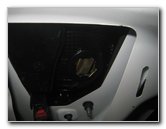 Empty Bulb Housing |
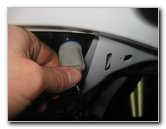
| Gently pull the old
light bulb straight out of the socket. If you have trouble removing a stubborn or stuck old bulb that might be rusted in place, try gently wiggling it back and forth while pulling it straight out. Try to avoid using excessive pressure on the old light bulb to prevent from having it break and cut your fingers. |
||
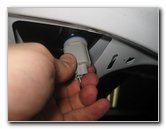
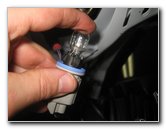 Push In New Light Bulb |
 1/4 Turn Clockwise - Lock |
 Line Up Friction Fasteners |
| Push a new number 921
miniature wedge base light bulb straight into the socket. If you would like to have brighter reverse lights, install some compatible replacement 921 LED bulbs. Re-insert the bulb socket into the housing and rotate it 1/4 turn in the clockwise direction to secure it into place. Line up the metal retaining clips on the back side of the interior panel with their corresponding slots in the metal tailgate door. |
||
 Firmly Tap In Clips |
 Re-Insert Pop Rivets |
 Push In Two Pop Rivets |
| Firmly tap in the
retaining clips all along the sides and bottom edge of the interior trim
panel. Push the two plastic pop rivets back into place. Make sure they are fully seated. |
||
 Tighten Screw Clockwise |
 Interior Panel Secured |
 Reverse Bulb Replaced |
| Replace the screw
into the door pull handle by turning it in the clockwise direction with the
Torx T15 star bit screwdriver until it is snug. To test the new reverse light, have an assistant step on the brake pedal and shift the transmission into reverse. If you installed an LED bulb and it doesn't work, try removing it from the socket, rotating it 180 degrees and pushing it back into the socket. Some LED bulbs are polarized and will only work when the "+" positive and "-" negative electrical contacts are in the correct orientation. Be sure to record the bulb change in your vehicle's service records. For more, please check out all of my
2018-2022 GM Chevrolet Equinox DIY Repair & Maintenance Guides. |
||
| If you found this guide to be helpful,
please consider making a small donation by clicking on the PayPal.com
"Donate" button located to the right of this paragraph. Thank you!
(Note: I am not a registered charity. Donations are not tax deductible.) |