
Toyota RAV4
Cargo Area Light Bulb Replacement Guide
How to change a burnt out cargo area or
"trunk" light bulb in a 4th generation 2013 to 2016 Toyota RAV4 with photos.

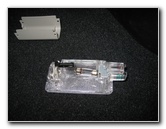
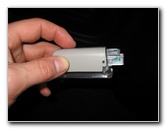
 2013 RAV4 Cargo Light |
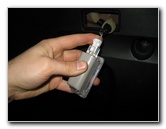
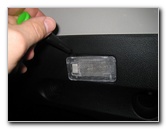 Insert Flathead Screwdriver |
 Pull Out Light Housing |
| This
automotive maintenance tutorial was specifically written to assist
owners of the fourth generation (2013, 2014, 2015, 2016 and maybe
also the refreshed 2017 model year) Toyota RAV4 SUV in changing a
burnt out cargo area light bulb. Owners of other Toyota, Lexus or Scion vehicles such as the Yaris, Matrix, Prius, Camry, Corolla, Sienna, Tacoma, Tundra, FJ Cruiser, Venza, Highlander, Avalon, Sequoia, Land Cruiser, IS 250, ES 350, GS 350, tC, xB, xD, iQ and FR-S may also find these DIY instructions to be helpful. A replacement festoon or "fuse" type bulb is part number DE3022 which is available from various manufacturers such as Sylvania, GE, PIAA and Eiko. (You may also be able to use the similar DE3175 bulb.) The only tool needed to access and replace the bulb is a small flathead screwdriver used to pry out the light housing. |
||
|
|
||
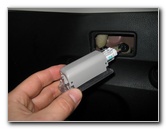
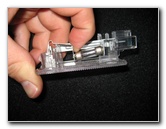
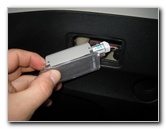
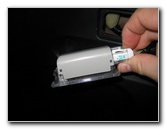 Press Release Tab |
 Pull Out Power Plug |
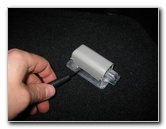 Pry Off Rear Cover |
| To prevent from
scratching the plastic surfaces, you may choose to cover the tip of your
screwdriver with a thin micro fiber cloth. Gently pry out the light housing from the plastic interior body panel in the cargo area with the small flathead screwdriver. Press the release tab on the white plastic electrical connector and slide the plug straight out of it socket. Use the screwdriver to pry off the grey rear plastic cover on the light housing. |
||
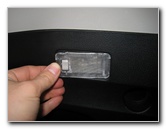
 Old Bulb Exposed |
 Pull Back Metal Tab |
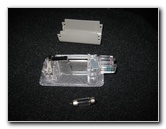 Remove Old DE3022 Bulb |
| Pull back the metal electrical contact to release the old bulb from the socket. | ||
|
|
||
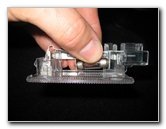 Insert New Light Bulb |
 Push On Back Cover |
 Push In Electrical Connector |
| Insert a new #
DE3022 bulb in to the socket. (Tip - If you are installing an LED bulb and it doesn't work at first, try flipping it around in the socket.) Push the grey plastic cover on to the back side of the housing. Slide the white plastic power plug back in to its socket. |
||
 Re-Insert Wires First |
 Pop In Light Housing |
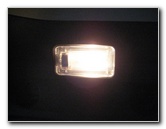 Test New Cargo Light Bulb |
| Re-insert the wires
and the front side of the housing in to the body panel. Then gently snap in the retaining clip on the rear edge of the housing. Test the new cargo area light bulb by moving the rocker switch to the "On" position. For more,
check out my other
2013-2016 Toyota RAV4 DIY Repair & Maintenance Guides. |
||
| If you found this guide to be helpful,
please consider making a small donation by clicking on the PayPal.com
"Donate" button located to the right of this paragraph. Thank you!
(Note: I am not a registered charity. Donations are not tax deductible.) |