
Hyundai Santa
Fe Headlight Bulbs Replacement Guide
How to change a low beam, high beam, turn
signal or side marker light bulb in a 2013 to 2018 Hyundai Santa Fe.

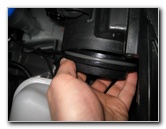
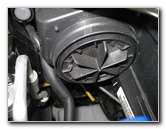
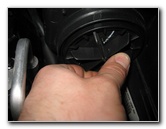
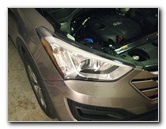 2014 Santa Fe Headlight |
 Black Plastic Dust Cap |
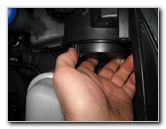 1/4 Turn Counterclockwise |
| This
automotive maintenance tutorial was specifically written to assist
owners of the third generation (2013, 2014, 2015, 2016, 2017 and
2018) Hyundai Santa Fe SUV in changing a
burnt out low beam, high beam, front turn signal or side marker
light bulb in the headlight housings. Owners of other Hyundai or Kia vehicles such as the Optima, Cadenza, K900, Sorento, Sportage, Sedona, Soul, Elantra, Veloster, Sonata, Azera, Tucson, Forte, Genesis, Cerato, Spectra, Accent, Sephia, i20, i30, ix35, i40 and Equus may also find these DIY instructions to be helpful. The replacement light bulb part numbers are as follows: Low Beam # H11 (or possibly an H11B), High Beam # H7, Front Turn Signal # 2357A and Front Side Marker # 2825. (Please check your old light bulbs before purchasing new ones. The low beam might be an H11 or an H11B depending on the model year, trim level or the country where it was manufactured.) No tools are needed to access any of the bulbs in either the driver or passenger side headlight assemblies. |
||
|
|
||
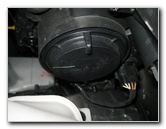
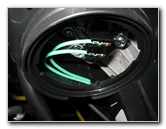
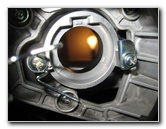
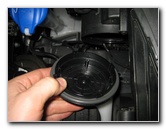 Dust Cover Removed |
 Old Low Beam Exposed |
 1/4 Turn Counterclockwise |
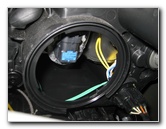
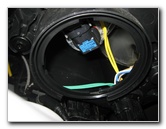
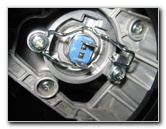
| The first two steps
are to open the hood and then move to the side of the SUV with the burnt out
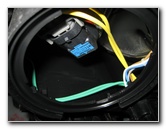
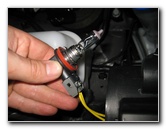
headlight bulb. The Low Beam light bulb is located at the middle of the headlight assembly. Reach in behind the headlight and rotate the round black plastic dust cap 1/4 turn counterclockwise before removing it. Set the dust cover aside in a safe place. Rotate the base of the old low beam bulb 1/4 turn counterclockwise before pulling it straight out of the housing. |
||
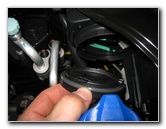
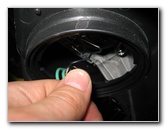
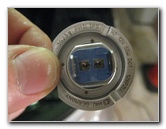
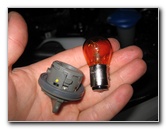
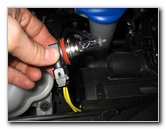 Remove Old Light Bulb |
 Squeeze Two Plastic Tabs |
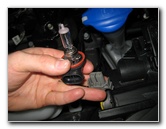 Pull Off Power Plug |
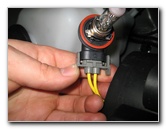
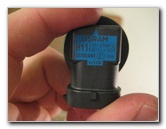
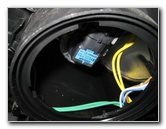
| Squeeze together the two grey plastic tabs on the bottom of the electrical connector before pulling the power plug straight off the base of the old low beam bulb. | ||
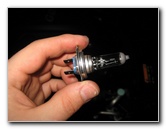
 Osram H11 Low Beam |
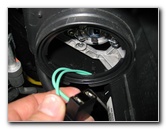
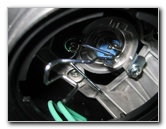
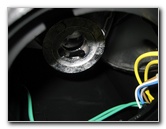 Empty Bulb Socket |
 Push On New H11 Bulb |
| Try to avoid
touching the glass part of the new halogen bulb with your fingers or
anything greasy in the engine bay. If you do get the new bulb dirty, wipe it clean with a paper towel moistened with rubbing alcohol. Push the power plug on to the base of the new H11 bulb until it clicks securely in to place. Note - The owner of a 2013 Santa Fe informed me that their SUV was equipped with H11B low beam headlight bulbs. Please check the part number on your old low beam headlight bulbs before you buy new ones. |
||
 Insert New Low Beam |
 1/4 Turn Clockwise - Lock |
 Replace Dust Cover |
| Insert the new low
beam bulb in to the housing and rotate it 1/4 turn clockwise to secure it in
place. Line up the dust cover and rotate it 1/4 turn clockwise to lock it in place. |
||
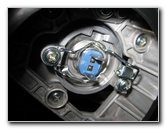
 1/4 Turn Clockwise - Lock |
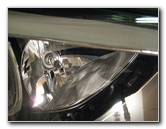 High Beam - Inner Corner |
 Round Plastic Cover |
| The High Beam light bulb is located near the inner corner of the headlight assembly. | ||
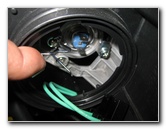
 1/4 Turn Counterclockwise |
 Old High Beam Exposed |
 Pull Off Power Plug |
| Rotate the round
black plastic dust cap 1/4 turn counterclockwise before pulling it straight
off. Set the dust cover aside in a safe place. Pull the black plastic electrical connector straight off the base of the old high beam bulb. |
||
|
|
||
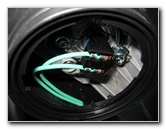
 Two Metal Retaining Arms |
 Push In - Release From Hook |
 Swing Open Metal Arms |
| The high beam bulb
is held in place by two metal retaining arms. Push in the top arm and then lift it up to release it from the hook. Swing open the retaining arms. |
||
 Remove Old Light Bulb |
 Philips H7 High Beam Bulb |
 Empty Bulb Housing |
| Pull the old high
beam bulb straight out of the housing. Don't touch the glass part of the new halogen bulb. If you do get it dirty, wipe it clean with some rubbing alcohol and a paper towel. |
||
 Install New H7 Bulb |
 Secure Retaining Clip |
 Push On Electrical Connector |
| Install the new
H7 high beam bulb in to the
housing. Swing closed the metal retaining arms and re-attach the top arm to the hook. Push on the black plastic power plug on to the electrical contacts on the base of the new high beam bulb. |
||
 Replace Plastic Cover |
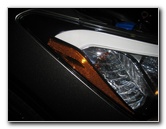 Side Marker & Turn Signal |
 Turn Signal Bulb Socket |
| Replace the black
plastic dust cap by rotating it 1/4 turn clockwise to secure it in place. The Front Turn Signal and Side Marker light bulbs are located near the outer edge of the housing. |
||
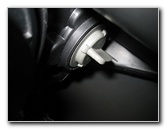
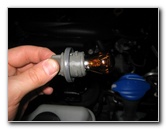 1/4 Turn Counterclockwise |
 Push Down & 1/4 Turn CC |
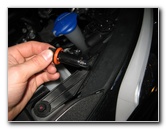 Side Marker Bulb Socket |
| Rotate the grey
plastic turn signal bulb socket 1/4 turn counterclockwise before removing it
from the housing. Push the old bulb down in to the socket and rotate it 1/4 turn clockwise before pulling it straight out. Push a new amber colored number 2357A light bulb down in to the socket and rotate it 1/4 turn clockwise to secure it in place. |
||
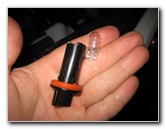 Replace 2825 Bulb |
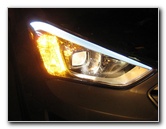 Testing New Headlight Bulbs |
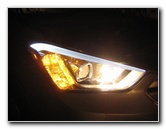 Test High Beam Light Bulb |
| Re-insert the turn
signal bulb socket in to the housing and rotate it 1/4 turn clockwise to
secure it in place. Then rotate the small black plastic side marker bulb socket 1/4 turn counterclockwise before pulling it straight out. Pull the old light bulb straight out of the socket and push in a new number 2825 bulb or you can use a brighter LED. Re-insert the side marker bulb socket in to the housing and rotate it 1/4 turn clockwise to secure it in place. Test the new light bulbs by turning on the headlights, activating the hazard signals and flashing the high beams. For more,
check out all of my
2013-2016 Hyundai Santa Fe DIY
Repair & Maintenance Guides. |
||
| If you found this guide to be helpful,
please consider making a small donation by clicking on the PayPal.com
"Donate" button located to the right of this paragraph. Thank you!
(Note: I am not a registered charity. Donations are not tax deductible.) |