
Toyota Camry License Plate Light Bulbs Replacement Guide
How to change a burnt out license plate
light bulb on an XV50 seventh generation 2012 to 2016 Toyota Camry with
pictures.

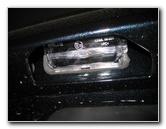 2013 Camry License Light |
 Open Trunk Lid |
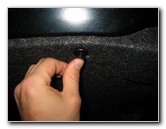
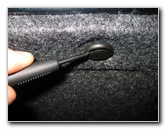 Pry Out Center of Fastener |
| This
automotive "how-to" guide was specifically written to assist owners
of the XV50 7th generation (2012, 2013, 2014, 2015 & 2016)
Toyota Camry in changing a burnt out license plate light bulb. Owners of other Toyota, Scion or Lexus vehicles such as the Yaris, Corolla, Matrix, RAV4, Prius, Tacoma, Tundra, Sienna, FJ Cruiser, Venza, Highlander, Avalon, 4Runner, Land Runner, Sequoia, IS 250, ES 350, GS 350, tC, xB, xD, iQ and FR-S may also find these DIY instructions to be helpful. Replacement license plate light bulbs are part number 2825 from manufacturers such as Sylvania, GE, PIAA and Eiko. You may also use other 5 watt miniature wedge base bulbs such as the # 168, W5W or a compatible LED bulb. The only tool needed to replace the bulbs is a small flat head screwdriver or a pop rivet removal tool. |
||
|
|
||
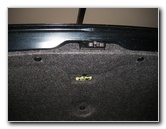
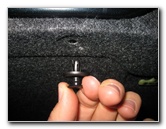 Remove Pop Rivet Fasteners |
 Pull Back Trunk Lid Carpet |
 Rear of Bulb Housing |
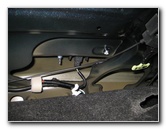
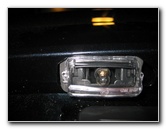
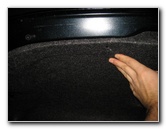
| The first two steps
are to open the trunk lid and locate the round black plastic fasteners on
the carpet liner. Remove the three pop rivet fasteners closest to the license plate lights by first prying out the center piece. Set the three fasteners aside in a safe place. Pull the carpet liner away from the trunk lid and locate the black plastic license plate light bulb housing. |
||
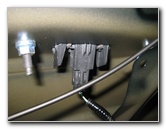
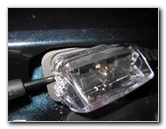
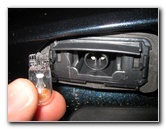
 Gently Squeeze Prongs |
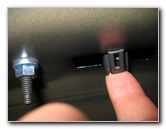 Push Out Bulb Housing |
 Bulb Housing Accessible |
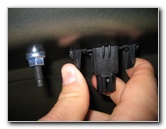
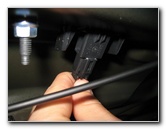
| To access the bulb,
you'll first need to partially eject the housing from the trunk lid. Very gently squeeze together the two plastic prongs on the sides of the bulb housing and push it out of the trunk lid. It may be easier to first disconnect the power plug by pressing the release button and sliding it straight off.
You don't have to entirely remove the housing to access the bulb, but it might come out. It seemed to be partially stuck on this 2013 Camry and I didn't want to force it out when it wasn't necessary. |
||
|
|
||
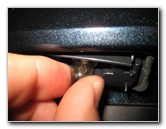
 Pry Off Lens Cover |
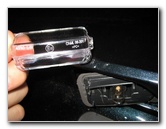 Lens Cover Removed |
 Pull Out Old Light Bulb |
| Use the small
flathead screwdriver to gently pry off the clear lens cover on the front of
the bulb housing. Set aside the lens cover in a safe place. Grasp the old bulb with your thumb and forefinger before pulling it straight out. |
||
 Old # 2825 Bulb |
 Push In New 2825, 168, W5W |
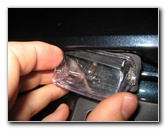 Replace Lens Cover |
| Push a new 5 watt
miniature base bulb such as the # 2825,
168 or W5W straight in to the
socket. Line up the clear lens cover over the housing and snap it back in to place. |
||
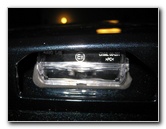 Push In Light Housing |
 Replace Power Plug |
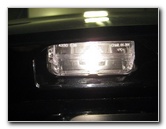 Test New License Bulb |
| Gently push the
bulb housing back in to the trunk lid.
Make sure that the bulb housing is securely in place before replacing the power plug. Test the new license plate light bulb by turning on the vehicle's headlights. |
||
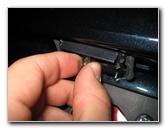
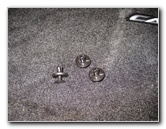 3 Black Plastic Fasteners |
 Replace Trunk Lid Liner |
 Pop In 3 Fasteners |
| Replace the trunk
lid carpet and push in the 3 black plastic pop rivet fasteners. Don't forget to record the bulb change in your vehicle's service records. For more,
check out my other
2012-2016 Toyota Camry DIY Repair & Maintenance Guides. |
||
| If you found this guide to be helpful,
please consider making a small donation by clicking on the PayPal.com
"Donate" button located to the right of this paragraph. Thank you!
(Note: I am not a registered charity. Donations are not tax deductible.) |