
2009-2013 Toyota Corolla Tail Light Bulbs Replacement Guide
How to change a burnt out brake, turn signal
or reverse bulb in the tail lights of a 10th generation 2009 to 2013 Toyota Corolla.

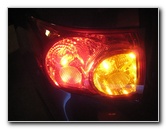
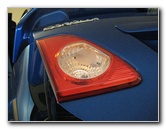
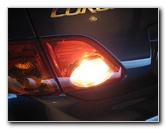
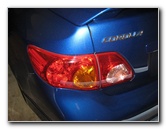 2010 Corolla Tail Lights |
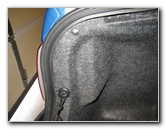 Open Trunk Lid |
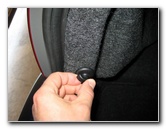
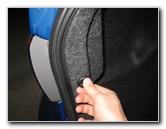 Remove Cargo Net Hook |
| This
automotive "how-to" guide was specifically written to assist owners
of the 10th generation (2009, 2010, 2011, 2012, 2013) Toyota Corolla
in changing a burnt out brake, turn signal or reverse bulb in the
tail light housings. Owners of other Toyota, Lexus or Scion vehicles such as the Yaris, Matrix, Prius, Camry, RAV4, Sienna, Tacoma, Tundra, FJ Cruiser, Venza, Highlander, Avalon, Sequoia, Land Cruiser, IS 250, ES 350, GS 350, tC, xB, xD, iQ and FR-S may also find these DIY instructions to be helpful. Replacement tail light bulbs with their part numbers are as follows: Brake # 7443, Reverse # 921, Rear Turn Signal # 3156 (2009-2010 model years) or # 992 / 7440A (2011-2013). The only tool required to access the tail light bulbs is a flathead screwdriver. You may also need a pair of needle nose pliers or a pop rivet removal tool. |
||
|
|
||
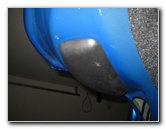
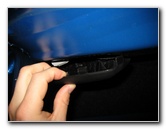
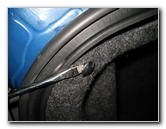 Pry Out Pop Rivet |
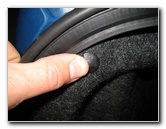
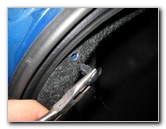 Pull Out Friction Fastener |
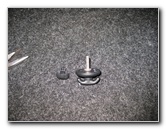 Two Fasteners Removed |
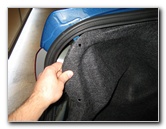
| The first two steps
are to pop open the trunk and move to the side of the vehicle with the burnt
out tail light bulb. Locate the two fasteners on the carpeting at the rear corner of the trunk and remove them. If your Corolla is equipped with a cargo net, unhook the net and spin out the plastic hook screw. To remove the black plastic friction fastener, gently pry it out with a flathead screwdriver. A pair of needle nose pliers can make it easier to remove a stubborn pop rivet. Set aside the two trunk carpet fasteners in a safe place. |
||
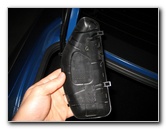
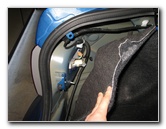 Pull Back Trunk Carpeting |
 Turn Signal & Brake Sockets |
 1/4 Turn Counter Clockwise |
| Pull back the trunk
carpeting to reveal the sockets for the brake light and rear turn signal
lights. The Brake Light bulb is located in the brown socket at the outer edge of the tail light housing. Grasp the socket with your thumb and forefinger before rotating it 1/4 turn counter clockwise to unlock it. Pull the socket and bulb straight out of the housing. |
||
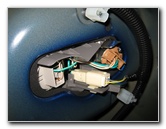
 Remove Brake Bulb Socket |
 Pull Out Old Brake Bulb |
 1/4 Turn Clockwise |
| Pull the old brake
light bulb straight out of the socket and push in a new #
7443 bulb. Re-insert the socket back in to the housing and rotate it 1/4 turn clockwise to lock it in place. |
||
|
|
||
 1/4 Turn Counter Clockwise |
 Rear Turn Signal Socket |
 Pull Out Old Bulb |
| The Rear Turn
Signal socket is light grey and located closer to the center line of the
vehicle. Rotate the socket 1/4 turn counter clockwise and pull it straight out of the housing. Pull the old turn signal bulb straight out of the socket and push in a new # 3156 bulb (for 2009-2010 models) or # 992 / 7440A bulb (for 2011-2013 model years). |
||
 1/4 Turn Clockwise |
 Testing New Tail Light Bulbs |
 Replace Trunk Carpet |
| Re-insert the
socket back in to the tail light assembly and rotate it 1/4 turn clockwise
to lock it in place. Test the new brake or turn signal bulb by having someone step on the brake pedal and activate the hazard signals. Replace the trunk carpet, push in the black plastic pop rivet fastener, and screw in the cargo net hook. |
||
 Replace Cargo Net Hook |
 Push In Plastic Pop Rivet |
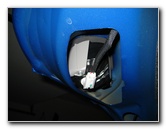
 Reverse Light Housing |
| The Reverse light bulb is located in a separate housing on the trunk lid of the vehicle. | ||
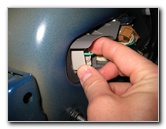
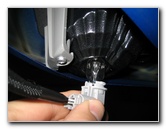
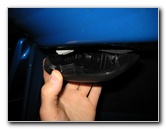
 Reverse Bulb Access Panel |
 Pull Off Access Cover |
 Plastic Cover Removed |
| Locate the black
plastic reverse bulb access cover on the underside of the trunk lid. Gently pry off the cover with your fingertips or a small flathead screwdriver. Set the cover aside in a safe place. |
||
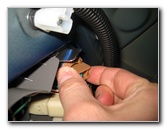
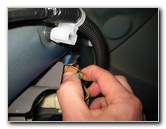
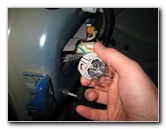
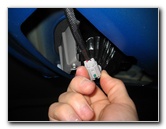
 Reverse Bulb Socket |
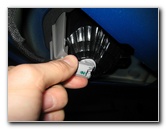 1/4 Turn Counter Clockwise |
 Pull Out Reverse Socket |
| Rotate the light grey reverse bulb socket 1/4 turn counter clockwise and pull it straight out of the housing. | ||
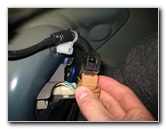
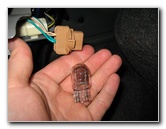
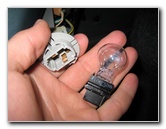
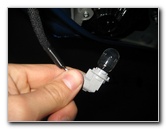
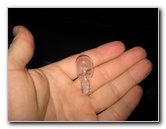 Pull Out Old # 921 Bulb |
 Insert New Bulb & Socket |
 1/4 Turn Clockwise |
| Pull the old
reverse bulb straight out of the socket and push in a new #
921 bulb. If you would like to have brighter reverse lights for extra safety, install some compatible replacement 921 LED bulbs. Re-insert the socket back in to the housing and rotate it 1/4 turn clockwise to secure it in place. |
||
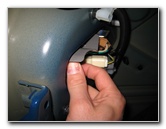
 Line Up Cover |
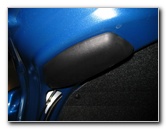 Access Panel Replaced |
 Test New Reverse Bulb |
| Line up the black
plastic reverse bulb access panel and gently snap it back in to place. Test the new reverse bulb by having someone step on the brake pedal and place the transmission in reverse. Be sure to record the bulb change in your vehicle's service records. For more, check out my other Corolla DIY tutorials at the links below - |
||
| If you found this guide to be helpful,
please consider making a small donation by clicking on the PayPal.com
"Donate" button located to the right of this paragraph. Thank you!
(Note: I am not a registered charity. Donations are not tax deductible.) |