
Toyota
Corolla Curt Trailer Hitch Installation Guide
How to install a Curt trailer hitch on a
10th generation 2009-2013 Toyota Corolla in order to attach an Inno bike rack.

 Curt Trailer Hitch # 112653 |
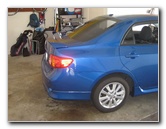 2010 Toyota Corolla S |
 Hitch & Tow Bar Included |
| This
automotive upgrade tutorial was specifically written to assist
owners of the 10th generation (2009, 2010, 2011, 2012 & 2013) Toyota
Corolla in installing the Curt
112653 (1 1/4") trailer hitch to attach an
Inno INH305 bike rack. Owners of trailer hitches compatible with the tenth generation Corolla such as the Curt # 11265, 11266, 11295, 112651, 112652, 112653, 112661, 112662, 112663, 112951, 112952 and 112953, Reese Towpower # 51171 or 77186, Hidden Hitch 60200, and Draw-Tite 24814 may also find these instructions to be helpful. The procedure is also the same for the 9th generation (2003, 2004, 2005, 2006, 2007, 2008) Corolla and the new 11th generation 2014 and 2015 Corolla sedans. I purchased this Curt trailer hitch and the Inno INH305 bike rack from Amazon. By doing the labor myself, I saved just over $200 compared to a quote from a local shop. |
||
|
|
||
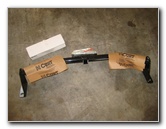
 Tow Bar Included |
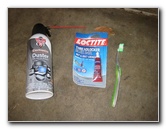 Compressed Air, Loctite & Brush |
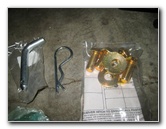 Mounting Bolts & Washers |
|
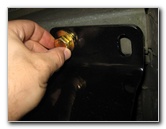
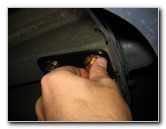
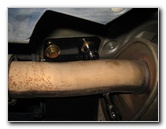
First check to see if the tow loop from the factory is still attached to the passenger side frame rail on the underside of your Corolla. If the tow loop is there, remove it by turning the two 19mm bolts counterclockwise. The tools needed to install the hitch include a can of compressed air, a small brush, Loctite blue bolt locker liquid, a 19mm socket, a 3/8" drive ratcheting wrench, a 9" extension bar, a few cable ties, safety glasses and a torque wrench. The chances are good that you'll just see the two weld nut holes on both the driver and passenger side frame rails. For a trouble free installation of the trailer hitch, it's best to clean out the bolt holes with compressed air and or a brush. |
||
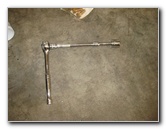 19mm Socket & Extension Bars |
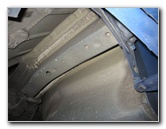 Driver Side Frame Rail |
 Clean Out Bolt Holes |
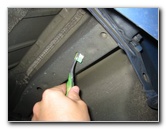
| Please wear safety
glasses to protect your eyes during the installation. I first sprayed compressed air in to each bolt hole to clean out any loose debris. |
||
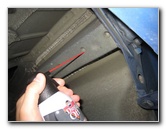
 Toothbrush - Remove Debris |
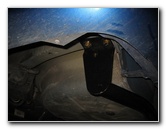
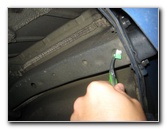 Two Weldnut Holes |
 Clean Out Passenger Side |
| Then remove any dirt or mud from the threads in the weldnuts by using a metal brush or even an old toothbrush will work for vehicles that haven't been driven in any corrosive environments such as salted winter roads. | ||
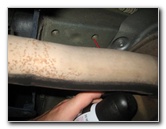
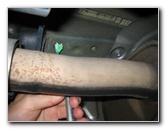 Using Toothbrush In Threads |
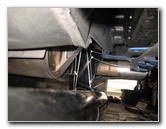
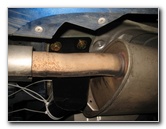
 Cable Ties Around Exhaust |
 Zip Ties Supporting Hitch |
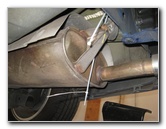
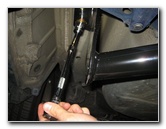
| If you are
installing the trailer hitch by yourself, I'd recommend using some plastic
cable ties or "zip ties" to support the passenger side. Loop the cable ties over the cold exhaust support and around the trailer hitch. Tighten the cable ties until the passenger side of the trailer hitch is close to the frame rail. I had thin "light duty" cable ties, so I used two sets of ties for extra support. |
||
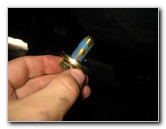
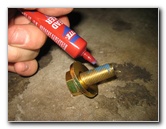
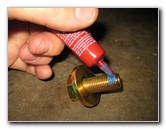
 Loctite Blue Threadlocker |
 Bolt & Lock Washer |
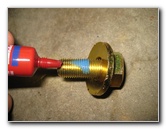 Apply Loctite To Threads |
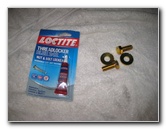
| An optional step is
to apply a small amount of Loctite
blue (removable with hand tools)
threadlocker nut & bolt locking liquid to the threads of each bolt. As long as you tighten the bolts to the appropriate torque, you don't need to use Loctite. I just wanted a bit of extra peace of mind that the bolts wouldn't vibrate loose. |
||
 Insert First Bolt - Clockwise |
 Cable Ties Holding Passenger Side |
 Loctite On Threads |
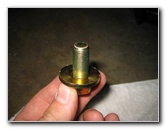
| Place the metal
conical washers on the bolts with the "toothed" end facing up towards the
trailer hitch. Lift the driver side of the trailer hitch up towards the frame rail and line up the bolt holes with the weldnuts. |
||
|
|
||
 Spin In 19mm Bolt By Hand |
 Two Driver Side Bolts Attached |
 |
| Spin in the two bolts by hand a few turns in the clockwise direction to prevent them from becoming cross threaded. | ||
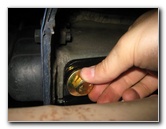 Spin In Passenger Side Bolts |
 |
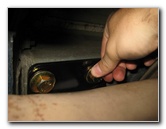 |
| Move to the
passenger side of the trailer hitch.
Apply a small amount of Loctite to the two bolts with their conical washers attached. Spin in the two bolts on the passenger side by hand a few turns in the clockwise direction to prevent them from becoming cross threaded. |
||
 All 4 Bolts Inserted |
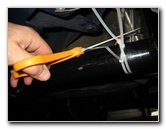 Cut Cable Ties |
 Tighten Clockwise |
| Once all four bolts
are securely in place and supporting the trailer hitch, you can cut the
cable ties on the passenger side with a pair of scissors.
Tighten the four bolts with the 19mm socket attached to an extension bar and the 3/8" drive ratcheting wrench by turning them clockwise until they are hand tight. |
||
 |
 Torque Wrench Set To 86 ft-lbs |
 Torque 4 Bolts To 86 ft-lbs |
| Then use your
torque wrench to tighten the four bolts to
86 ft-lbs. Double check that the four bolts are tight before moving on to the bike rack installation. |
||
 |
 Tightening Passenger Side |
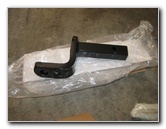
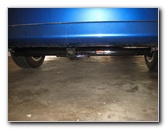
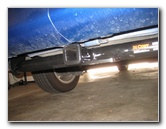
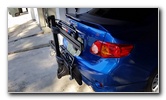
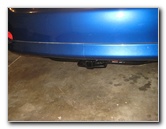 Trailer Hitch Installed |
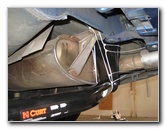
| The Curt part number 112653 trailer hitch is relatively hidden below the Corolla and the black paint helps it blend in to the ground. | ||
 View of Hitch Under Bumper |
 Curt 1 1/4" Hitch Receiver |
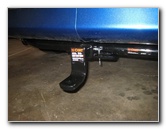 Checking Tow Bar Fit |
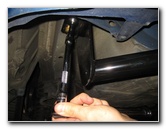
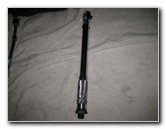
| Even though we
won't be needing the tow bar for our Inno INH305 bike rack, I ordered this
model (# 112653) that included it since it was the only one in stock and
available with 2 day free shipping from Amazon Prime.
If you also only plan on using your trailer hitch for a bike rack, you can save a few dollars by ordering Curt trailer hitch # 11265 which only includes the hitch bar and mounting hardware but not the tow bar, pin and retaining clip. I attached the included tow bar (with out mounting ball) just to check the fit of the trailer hitch receiver. |
||
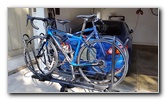 Inno INH305 Attached |
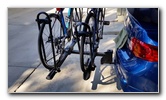 INH305 Side View |
 Bike Rack Storage Position |
| To assemble the
Inno INH305 bike rack, all I had to do was slide on the bike carriers and
secure them with four nuts. This Class 1 trailer hitch has a towing capacity of 2,000 lbs and a tongue weight of 200 lbs. Our two bikes (carbon fiber Trek road bike and an aluminum Diamondback hybrid) plus the Inno INH305 bike rack should be around 100 lbs total. Curt Manufacturing recommends that all "non-trailer" loads should also be supported by their load stabilizing straps (part # 18050). From what I've read online in various forums, most people don't bother with the straps since the whole purpose of a trailer hitch is to avoid having straps marring or scuffing your car's paint job. We've used the hitch and bike rack a few times already and they work great. We love how easy it is to get a bike in and out of the Inno INH305 bike carriers. When the all black bike rack is folded up for storage, it blends in nicely with the rear of my car and isn't an eye sore like some of the other racks I have seen. I really like how the Inno INH305 comes with a locking trailer hitch pin to keep someone from disconnecting the entire rack and stealing it. There are locks on each each bike carrier. Inno also included a braided metal cable that can be run through the frames of each bike to lock them to the rack. For more, check out my other Corolla DIY tutorials at the links below - |
||
| If you found this guide to be helpful,
please consider making a small donation by clicking on the PayPal.com
"Donate" button located to the right of this paragraph. Thank you!
(Note: I am not a registered charity. Donations are not tax deductible.) |