
Honda Accord
Premature Rear Brake Pad Wear Repair Guide
How to replace the rear brake pads on a
Honda Accord or Acura TSX and swap caliper pin positions to prevent premature
wear.

By Paul B. Michaels Author & Photographer Auto Mechanic Since 1989 |
||
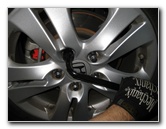
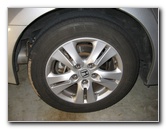 Honda Accord Rear Wheel |
 Loosen Five Lug Nuts |
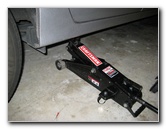
 Raise With Floor Jack |
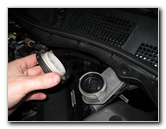
| The rear
brake pads on this 2009 Honda Accord LX Premium sedan began making a
scraping or screeching noise with less than just 20,000 miles on the
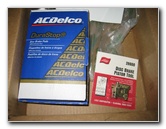
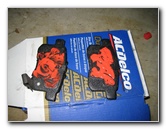
odometer. I researched online and discovered that Honda had agreed to settle a class action lawsuit for a "defect" with the rear brakes of about 750,000 Honda Accord and Acura TSX vehicles. All 2008, 2009 and a few early 2010 model year Accord vehicles are possibly affected by the problem along with 2009 and some 2010 Acura TSX cars. Rather than spend $199 at the dealership and wait to be reimbursed for only $150, I decided to quickly correct the problem myself for much less money and hassle. I purchased new ACDelco 17D1336CH ceramic rear brake pads and printed out a PDF of the directions that accompany the "improved" Honda rear brake pads for swapping the two rear caliper pins which were installed incorrectly at the factory. |
||
|
|
||
From what I've read on the various Honda Accord forums, just replacing the original OEM pads which are made of very soft organic material with high quality ceramic pads and correcting the positions of the two caliper slider pins should be enough to make the rear brakes pads last much longer than the measly 12,000-20,000 miles many owners are experiencing. The "improved" Honda Accord rear brake pads that are probably now made of ceramic material, come with two metal pieces to act as springs that keep the pads off the rotor when the vehicle is not braking. The new Honda rear brake pads are part # 43022-TA0-A40. I recommend buying the ACDelco 17D1336CH or the Wagner ThermoQuiet QC1451 rear brake pads. Owners such as myself that replace the rear pads with a different brand other than Honda pads are only eligible for a reimbursement of 50% of the cost. I doubt I'll take the time to jump through the hoops to file a claim. Another issue that leads to the rear brake pads wearing out prematurely is the EBD or Electronic Braking Distribution system (A.K.A. Electronic Brake Proportioning) which is biased to apply more pressure to the rear brakes. This prevents the nose of the vehicle from diving under braking and also minimizes braking noise. I'm almost 100% certain that reversing the caliper pins to the correct positions will allow the new more durable ACDelco ceramic brake pads to last at least 50,000-60,000 miles or more. If they don't, I may still take our Accord to the dealership for the Electronic Braking Distribution (EBD) system to be adjusted and also purchase the "new" Honda pads with springs. |
||
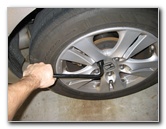
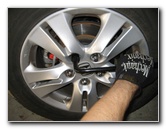
 Spin Off Lug Nuts |
 5 Lug Nuts Removed |
 Rear Brake Rotor & Caliper |
|
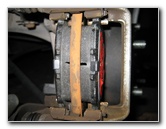
The first steps are to verify that the
transmission is in "Park", place
wheel chocks on both sides of the
front tires, and slightly loosen the
five lug nuts on the rear wheel with a tire iron. Then raise the rear of the vehicle with a floor jack and securely support it with at least two jack stands. Spin off the lug nuts the rest of the way, carefully remove the rear wheel and set it aside in a safe place. Behind the wheel you'll see the rear brake rotor, caliper, caliper bracket, and the old brake pads. |
||
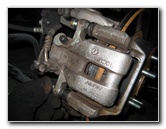
 Loosen 12mm Lower Bolt |
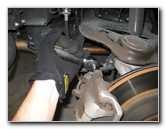 Remove Upper Caliper Bolt |
 Pull Caliper Off Pads/Rotor |
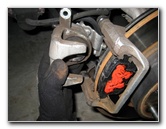
| Use a 12mm socket
with a ratcheting wrench to remove the upper and lower caliper bolts.
Then carefully pull the brake caliper off the old pads and rest it securely on the suspension. Avoid putting any stress on the rubber brake fluid lines. |
||
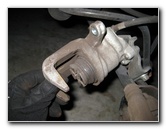
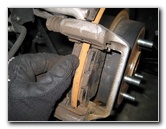
 Safely Rest Caliper |
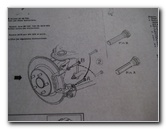
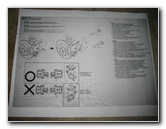 "Improved" Pads Directions |
 Worn Out Old Pads |
| If you have recently
replaced your rear brake pads and they still have plenty of life left, you
can just
reverse the caliper pins to help correct the premature wear problem. The completely round and smooth pin goes into the top of the caliper bracket. The caliper pin that has flat edges needs to be placed in the bottom of the caliper bracket. Refer to Picture # 22 for a close up shot of the caliper pin reversal directions. |
||
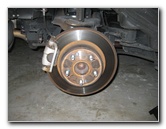
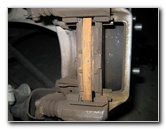
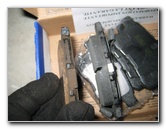
 Remove Old Pads |
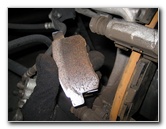 Only 20,000 Miles |
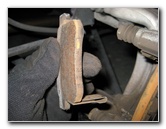 Squeal Bar At Bottom |
| Pull the old rear
brake pads off the rotor and out of the caliper bracket. Make a mental note
of how the wear or "squeal" bars are orientated on the old pads.
On this and most 2008-2010 Honda Accords, the wear bar is situated at the bottom of the inner pad. |
||
 |
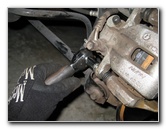
 Disc Brake Piston Tool |
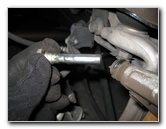
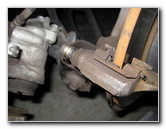
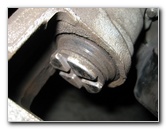
 Brake Caliper Slider Pin |
 Remove Upper Caliper Pin |
 |
 Remove Lower Caliper Pin |
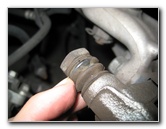
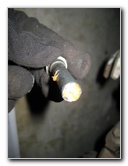
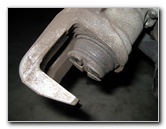
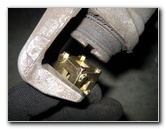
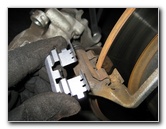
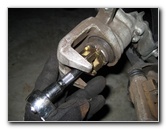
| Then gently pull
the two caliper slider pins out of their rubber dust boots. Try to avoid
damaging the rubber dust boot. If your 2008-2010 Honda Accord or 2009-2010 Acura TSX was among the vehicles affected by this issue, you'll see that the pin in the top of the caliper bracket is "Pin A" with flat edges, and the pin in the bottom of the bracket is "Pin B" which is completely round. |
||
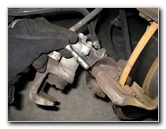
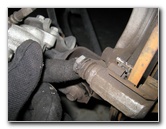
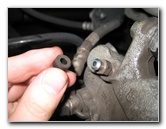
 Reverse Caliper Pins |
 |
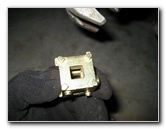
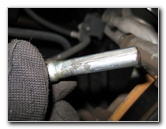 Pin A - Flat Edges |
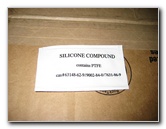
| Lubricate the upper and lower caliper pins with "caliper pin grease" such as the packet of silicone compound that was included with the new ACDelco 17D1336CH brake pads. | ||
 |
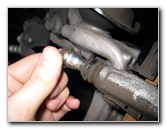
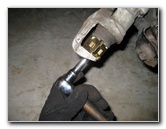
 Pin B - Round & Smooth |
 Round Pin B - Insert In Top |
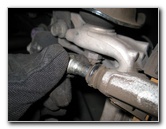
| Once the caliper
pins are well lubricated with brake
parts lubricant grease, re-insert the round Pin B into the top of the
caliper bracket. Then re-insert Pin A which has flat sides into the bottom of the caliper bracket. |
||
 |
 |
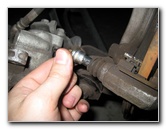
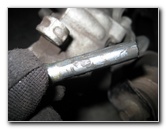 Pin A - Flat Sides |
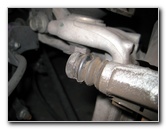
| After inserting the
caliper pins back into the bracket you may notice that the upper pin feels
more spring loaded than it did before.
Having this pin in the correct position as originally intended by the Honda engineers must help to keep the pads from dragging on the rotor and shortening their useful lives. |
||
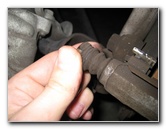
 Insert Pin A In Bottom |
 Slide Into Rubber Dust Boot |
 Silicone Disc Brake Grease |
 Silicone Lube On Caliper Pin |
 Lubricate Both Pins |
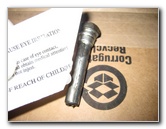
 Lisle Disc Brake Piston Tool |
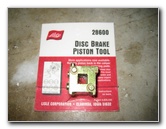
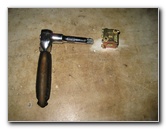
| In order for the
brake caliper piston to fit over the thicker new pads, it will need to be
moved backwards. On most cars with regular brake pistons, you would
accomplish this by compressing the piston with a "C" clamp.
The 2008-2010 Honda Accord cars and many other modern vehicles have "screw type" rear brake pistons that allow the parking or "emergency" brake to be self adjusting over the life of the pads. The screw in type rear brake pistons need to be turned or rotated clockwise (to the right) in order to reset them back into the caliper assembly. You can either use a very large flathead screwdriver to accomplish this or I'd highly recommend spending just over $10 for a "Disc Brake Piston Tool" such as the Lisle Disc Brake Piston Tool # 28600 pictured above. The disc brake piston tool looks like a metal six sided die with different nubs or pegs on each side that correspond to the screw in type rear brake pistons of various automobile manufacturers. |
||
 3/8" Drive Ratchet Wrench |
 Rear Disc Brake Piston |
 Brake Fluid Reservoir |
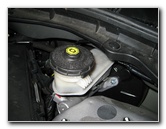
| It's a good idea to remove the cap on the brake fluid reservoir before turning back the rear brake caliper pistons to allow the brake fluid to easily move backwards through the system. | ||
 Remove Brake Fluid Cap |
 Find Correct Side Of Tool |
 Correct Side - 4 Small Nubs |
| Next take the disc
brake piston tool and test fit each side to the rear brake caliper piston
until you find the side that allows the best grip on the piston face.
I found that the side with a small nub at each of the four corners worked best (Picture # 42). |
||
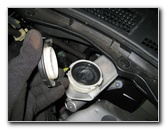
 Turn Ratchet Clockwise |
 Caliper Piston Compressed |
 Old Vs. New Rear Pads |
| Push a 3/8 drive
extension bar into the hole on the tool opposite the "best fit" side and
attach your 3/8 drive ratcheting wrench to the extension bar. Then use the disc brake piston tool to slowly turn the piston backwards by rotating it clockwise (right) until it is almost flush with the metal part of the brake caliper. Regularly check the brake fluid level in the reservoir to ensure that it does not overflow. If you find that the rubber boot around the piston starts to bunch up or bind, turn the piston counter-clockwise (left) a tiny bit and then try to turn it clockwise again. Try to avoid turning the caliper piston too quickly which may cause damage to the rubber dust boot. Align the face of the piston so that it looks like a plus "+" sign when the caliper is held straight up in front of you as shown below in Picture # 47. The new inner brake pad has corresponding pegs or nubs that fit into the recessed "+" sign grooves on the piston face as shown in Picture # 46 below. |
||
 Brake Pad Nubs / Pegs |
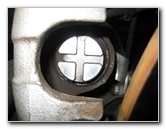 Align Piston Like "+" |
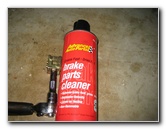 Brake Parts Cleaner Spary |
Thoroughly clean off the brake rotor, caliper, caliper pistons, and caliper bracket with some brake parts cleaner spray and an automotive rag or shop towel.
|
||
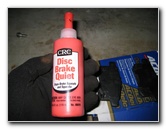 CRC Disc Brake Quiet |
 Apply CRC Disc Brake Gel |
 Brake Pad Anti-Rattle Clips |
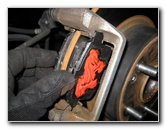
| To help prevent braking noise, apply some
CRC
Disc Brake Quiet gel or a similar product to the rear of the brake pads
where they come in contact with the caliper. If your set of new rear brake pads came with new anti rattle clips, remove the old metal clips and install the new ones in their place on the caliper bracket. |
||
 Install New Brake Pads |
 Push Flat Against Rotor |
 Test Fit Caliper Over Pads |
| Slide the new brake
pads into the caliper bracket and press them flush against the brake rotor.
Be sure to orientate the wear or "squeal" bar at the bottom of the inner pad. |
||
 Compress Piston More |
 Lower Caliper On Rotor |
 Insert Caliper Bolts |
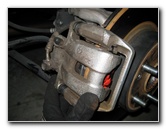
| Then place the
brake caliper over the new pads and down against the rotor. If the caliper
won't fit over the thicker new pads, turn the piston backwards one more full
turn.
Be sure that the piston still lines up in the plus "+" sign position. Line up the bolt holes at the top and bottom of the caliper before inserting the caliper bolts. Tighten them with the 12mm socket and ratcheting wrench to just past hand tight or about 25-30 ft lbs of torque if you have a torque wrench. |
||
 Torque To ~27 Ft. Lb |
 Brake Fluid Bleeding Valve |
 Replace Brake Fluid Cap |
| Double check that
both the upper and lower caliper bolts are tight before continuing. If your brake pedal previously felt mushy or spongy, the brake fluid may be contaminated with water or the brake lines may contain air bubbles. It would be best to bleed the brake lines at this time to flush out the old fluid and replace it with some new DOT 3 brake fluid. For more on this topic, check out my Brake Line Fluid Bleeding Guide. |
||
 Replace Wheel & Nuts |
 Lower Floor Jack |
 Tighten 5 Lug Nuts |
| Replace the rear
wheel and spin on the five lug nuts by hand to prevent cross threading them.
Progressively tighten the lug nuts with the tire iron in a "criss cross" or "star"
pattern. Next lower the vehicle until the tire holds enough weight to keep it from rotating and complete tightening the lug nuts. It would be best to use a torque wrench or an air gun with a torque stick to tighten the lug nuts to about 100 ft lbs. Get into the driver's seat and pump the brake pedal a few times to restore brake line pressure. Then check the brake fluid level in the reservoir and verify that it is above the "MIN" (minimum) line. Once the brake fluid level is correct, replace the brake fluid reservoir cap. To break in your new rear brake pads, just drive normally for the first few hundred miles while trying to avoid any hard or "panic" stops which may "glaze" the new brake pads and cause them to squeak. It's also a good idea to regularly inspect your driveway for drops of brake fluid which may indicate a leak, verify the brake fluid level in the reservoir, and also check that the lug nuts are still properly tightened. For more,
check out my
Honda
Accord Repair & Maintenance Guides page. |
||
| If you found this guide to be helpful,
please consider making a small donation by clicking on the PayPal.com
"Donate" button located to the right of this paragraph. Thank you!
(Note: I am not a registered charity. Donations are not tax deductible.) |